
Disclosure: Discount School Supply provided us with Colorations Confetti Paint and several painting supplies mentioned in this post at no cost.

We love painting around here and fingerpainting is just always a hit. Once your toddler is old enough to not "taste" paint, I love using store-bought paints (if they are still "tasting" - I'd recommend using either of our recipes for edible fingerpaint - we have one here and one here). I have yet to find/create a homemade recipe that rivals the lasting power and vibrancy of store-bought paint.
Here are ten ways to use fingerpaints with a few links to friends at the end for even more ideas to enjoy this wonderful type of paint.
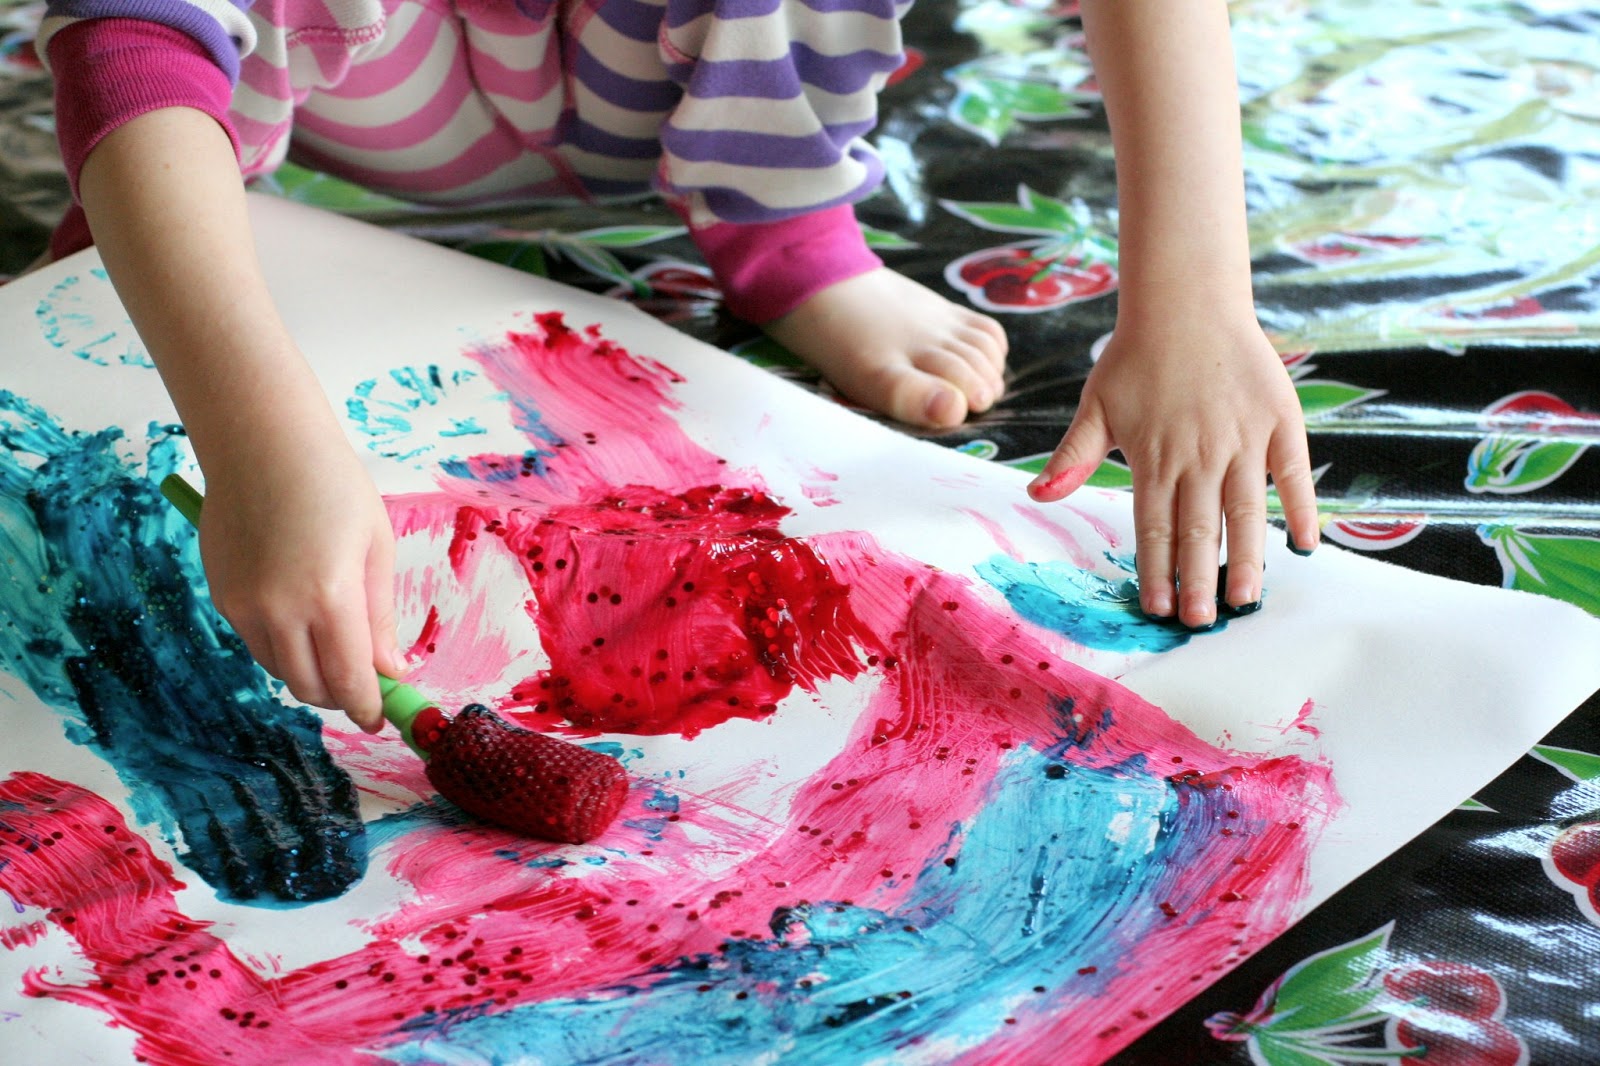
1. Scraper Painting
Discount School Supply sent us one of their BioColor Paint Scrapers and S and I were excited to give it a try with our fingerpaints. I'd seen scrape painting done before with amazing results, so I had high expectations. It did not disappoint! S chose three colors of paint and selected where she wanted big globs of each to go and then set to work painting the page with big sweeping motions. For this piece of artwork we used the extra large size Colorations Colored Paper we received (in white). It held up really well to all that heavy paint and it was nice to have a "canvas" that was a bit bigger than average sized paper.

Check out S's expression here - she was impressed, too! Hahaha.

Using the scraper was a fun way to mix the colors together and it was just such a different way to paint - we really had a great time with it!
2. Blotto Art
I actually had to Google what this type of painting is officially called! I've got so many fond memories of doing it myself, and it's still fun to this day. To make Blotto art, you take a sheet of paper and fold it in half. We used some high quality watercolor paper that we adore. You then add big dollops of paint in various places. S put them all in a straight up and down line this time. Then you fold and squish and squeeze the paint as much as you can. When you are ready, slowly open the folded paper and a beautiful mirror image will reveal itself. We thought this one looked like a butterfly and I thought the patterning in the fingerpaints was so cool - like tree roots!

3. Foam Roller Painting
We received a set of foam rollers from Discount School Supply and it was S's first time painting with rollers. It seemed like the sort of thing that necessitated a large piece of paper and some room to walk, so I set S up with a large stretch of butcher paper and pulled the chairs back from our dining room table to allow her to move freely. She set to work creating a map! The tracks the rollers left were "roads" and she had a running narrative for the map of the town she was creating.

The finished piece of artwork had a few pieces of construction paper added to it (various buildings in the town) and some glitter. Because you can never have too much glitter (as evidenced by our Golden Glitter Slime, amiright?).

4. Tape Resist
To do tape resist, you need a good sheet of paper (we use high quality watercolor paper
) and low quality masking tape (we use Dollar Tree masking tape). The stronger your paper and the weaker your tape, the better! I had S lay out strips of tape and once she was done I continued them to the edges of the paper by adding more tape (you could leave it as is, of course, but I love the stained glass effect that is created with complete lines). Paint to your heart's desire, and then remove the tape to reveal your masterpiece!

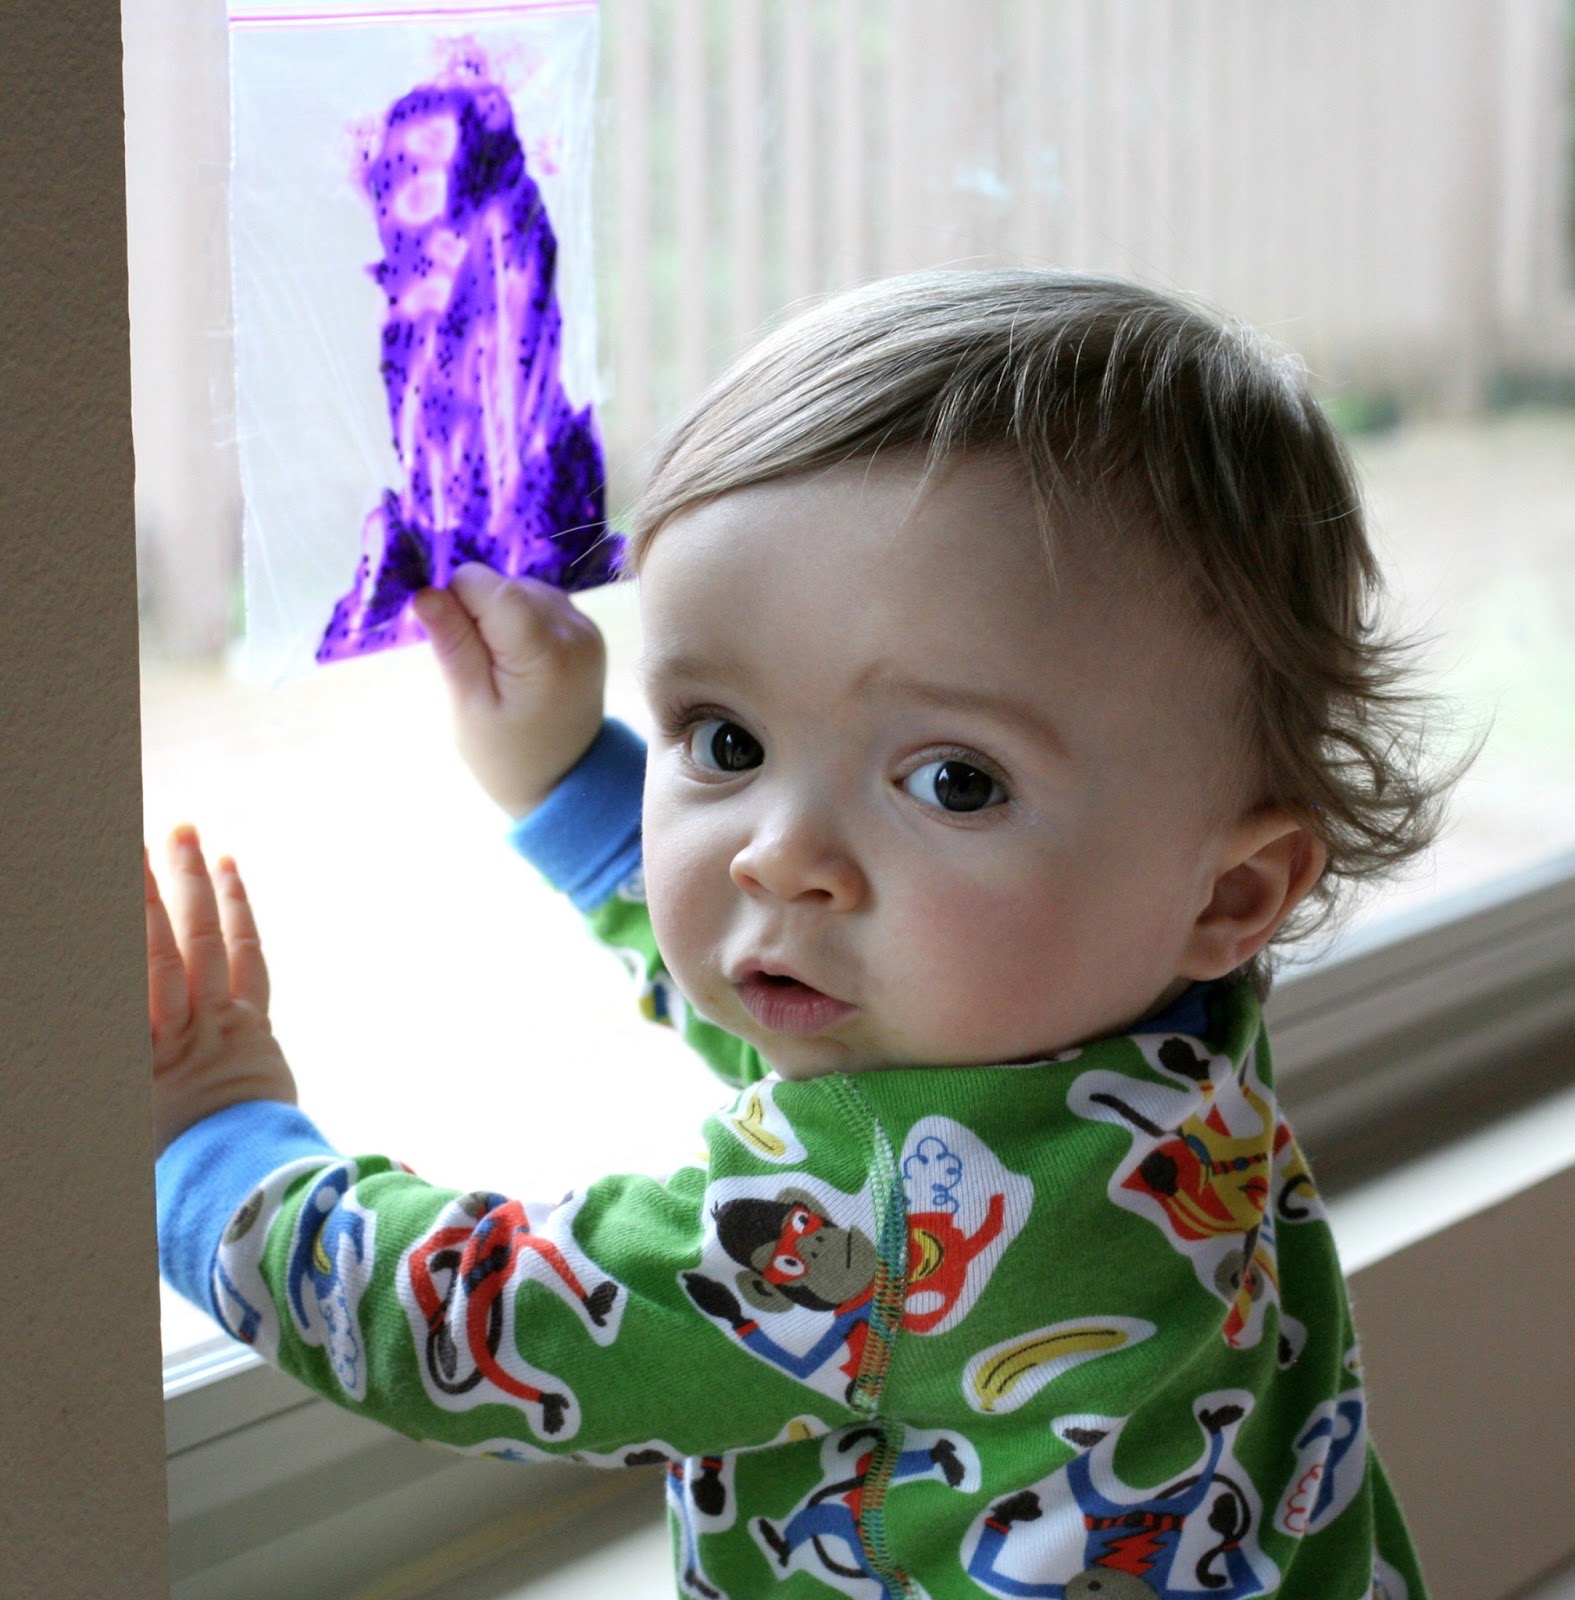
5. Squish Bags
If you have a little one around (or even if you don't these are still cool - but they do have a special appeal to babies and toddlers), you can add some fingerpaint to a Ziploc bag and tape it in the window to have a really interesting way to make some art. X was fascinated by the purple sparkly paint and enjoyed making tracks in it with his little chubby fingers over and over again.

We loved the way the window lit up the paint and really accented the glitter in the paint.
6. Fingerpaint Matching Activity
You could do color coded shapes (i.e. red-outlined triangle, green-outlined circle, etc) if you have a toddler and regular fingerpaints. S is a bit older, so I thought I'd give her a bit of a challenge by drawing the shapes of the glitter that's within each Colorations Confetti Paint (each color contains a different shape of glitter) and see if she could figure out how to match the paints with the shapes. It took her a minute, but once she discovered the connection she was super excited.

An activity like this is a great way to reinforce shapes with younger children, and great fine motor practice to paint within the lines.

7. Body Painting
This is an old picture of little S when she was around 18 months old - but body painting with fingerpaints is SO much fun. :)

8. Erupting Fingerpaints
If you have some leftover fingerpaints, add some baking soda (about a tablespoon will usually suffice), stir, and then add vinegar for a beautiful glittery fizzy reaction. S erupted several colors of leftover paints and then "painted"and played with the bubbly foam with some of her plastic miniature animals.

9. Paint with Textured Brushes
S and I really enjoyed this set of Colorations Wacky Painting Tools that Discount School Supply sent us. S enjoyed feeling each brush on her arm and cheek before starting to paint. We did a free paint on a large bit of butcher paper where she just explored the patterns that each brush made when you moved it in different ways (swirling, straight line, hard, soft, etc).
Then I had her turn away and used a sheet of construction paper to make patterns with each of the brushes. Then S had to match the brush to the imprint like a puzzle! A few of the patterns really tricked her, but she loved it!!!

10. Mess Free Fingerpainting
This is a great way to mix it up, or if you have a baby/mouthing toddler OR a child who does not enjoy messy hands - you can put a piece of paper with paint inside a Ziploc and they can paint through the bag while keeping their hands clean. This was how X got to "paint" with us.

OK, so his painting mostly looked a lot like drumming because he still doesn't really "get" painting...but it was nonetheless adorable and he enjoyed participating with sis. :)

Still looking for more ways to use that fingerpaint?
One of my all time favorite fingerpainting methods - a la Linoleum floor. Click here to see Dilly Dali Art's beautiful kitchen floor masterpiece!
Or you could always use the windows to paint Kandinsky Circles!
You could try out any or all of the fun and clever ways Twodaloo and her twin toddlers have used fingerpaints.
Or you could incorporate sponges in an interesting way like Blog me Mom did here.
Follow along with Fun at Home with Kids on Facebook, Google+, Pinterest or Subscribe by Email or Bloglovin'!
All activities here are activities I feel are safe for my own children. As your child's parents/guardians, you will need to decide what you feel is safe for your family. I always encourage contacting your child's pediatrician for guidance if you are not sure about the safety/age appropriateness of an activity. All activities on this blog are intended to be performed with adult supervision. Appropriate and reasonable caution should be used when activities call for the use of materials that could potentially be harmful, such as scissors, or items that could present a choking risk (small items), or a drowning risk (water activities), and with introducing a new food/ingredient to a child (allergies). Observe caution and safety at all times. The author and blog disclaim liability for any damage, mishap, or injury that may occur from engaging in any of these activities on this blog.


Love these ideas! I'll definitely be doing the scraping art with my 1 year-old this afternoon. He'll love it. Pinned!
ReplyDeleteYour the coolest mum I've ever seen, bravo!, for the care and all the attention you bring to you children, and good help for cleaning, lol
ReplyDeleteHahahaha, thank you!
DeleteFirst, I LOVE your blog! So many great ideas, I've already used a few in my own classroom. Second, I'm in need of some help... My class goes up to 18 months old, and until I started there the children didn't get to do many art activities, so I'm trying to incorporate it into their daily schedule. Nearly all of my kids are still in the mouthing phase and while the materials I use are all non-toxic/edible, I still am running out of ways to use paint (without having them eat everything). I tried doing this mess-free approach but then they tried eating the bags... Yikes!
ReplyDeleteThat's tough when it's a big group since it's hard to teach no mouthing consistently when you have too many littles to watch! How about markers and coffee filters with spray bottles or painting with their feet? If they are trying to eat the paint too much, I'd maybe wait a bit and try some less edible art projects? Maybe once they "get" what art is a bit more with other experiences with markers and such, they'll be more likely to use the paint to explore... Keep up the great work!!! They are lucky to have such a dedicated teacher!
Delete