Fun at Home with Kids

The Ultimate Guide to Slimes

Monday, June 30, 2014

The ULTIMATE guide to slimes.  Recipes for slimes, flubber, flarp, and even edible (taste-safe) slimes!  Fun for all ages.  In addition to recipes, there are several fun ideas for how to play with slimes.  From Fun at Home with Kids

We love slimes here at Fun at Home with Kids, and to follow up the fun Slime Week we had on our Facebook page, I've compiled the ULTIMATE guide to slimes.  Be sure to click on the links below to get the full recipe or details for each of the slimes/activities mentioned!  And don't forget - if your slime fails, check out our slime troubleshooting post for answers on what went wrong and how to fix it!  Oh and last but not least, if you're from the UK and looking to make slime, be sure to read our post on how to make slime with UK ingredients here!

Recipes for Slime


Glitter Goo from a Girl and a Glue Gun
Sparkly Slime Recipe from Learn Play Imagine
Jelly Silly Putty from Paging Fun Mums
Molten Lava Slime from Fun-A-Day


Edible Slime Recipe from Blog Me Mom
Pumpkin Slime Recipe from Learn Play Imagine
How to Make 2-Ingredient Slime from Learn Play Imagine


Glow in the Dark Slime from A Pumpkin and a Princess
Edible No-Cook Slime from Fun at Home with Kids
Fluffy Slime from Sow Sprout Play
Bubbling Slime from Epic Fun for Kids
Infant and Toddler Safe Slime from Child Central Station


How to Make Glitter Slime from 36th Avenue
Rainbow Slime in Preschool from Teach Preschool
Ocean Slime from Buggy and Buddy


Galaxy Slime from Twodaloo
Homemade Flarp from Mandy's Recipe Box
Princess Slime from Craftulate

Ocean Swirl Slime from Twodaloo
Polka Dot Slime from Fun at Home with Kids
Rainbow Slime from Learn Play Imagine


Activities with Slime

Reusable Bubbles from Twodaloo
Art and Flubber from Teaching 2 and 3 Year Olds
Flubber Slime Baskets from Juggling with Kids
10 Slime Fine Motor Activities from Lalymom
Playing with Slime from Chocolate Muffin Tree
Color Mixing with Homemade Slime from Learn Play Imagine
8 Awesome GAK Activities from Carrots are Orange


$10 DIY Care Package for the Homeless (with free printable shopping list)

Sunday, June 29, 2014

We are really big on teaching our kids about giving (I wrote a post about it last December that you can find here), but it was still a sweet surprise when S asked if we could please do something for the homeless people we sometimes pass on the street.  I wanted to maximize the effect of what we could do, so I settled on $10 as our price point.  I considered shelf life, lack of access to refrigeration/heat sources, nutrition, and ease of preparation when putting this together.  I also wanted it to be easy for others to put together in case any of you would like to do this project with your children.

How to make a $10 Care Package for the Homeless that includes several days of food.  Includes a free printable shopping list.  From Fun at Home with Kids

I settled on Target, because I know their brand, Market Pantry, has exceptionally low prices.  Walmart or a local grocery store with their own brand would also work well.  I also thought about packaging - I wanted to make use of every part of the care package.  I settled on putting everything in a reusable grocery bag as that would continue to be useful as a strong storage bag even after the food was consumed.

We bought the following per $10 Care Package:  
one 2.5 pound jar of Market Pantry Peanut Butter ($4.39)
one box of Market Pantry Wheat Crackers ($1.50)
two pouches (rather than cans, since most homeless people won't have access to can openers) of Tuna Fish ($1.24 each)
one 6-pack of Market Pantry raisins ($1.29)
one reusable grocery bag ($0.99)


If you'd like to add some additional food, cereals, granola bars, nuts, and other dried fruits or meats would all be great choices.

S helped me assemble each kit and load them into our car.  She also helps me hand the kits out.

A Review of Green Kid Crafts (+ a giveaway!)

Tuesday, June 24, 2014

Disclosure:  I was paid for this post, but I only agreed to write it after sampling two kits for free with no obligation.  I only agree to write paid posts for products/companies we believe in.

When Green Kid Crafts contacted me about a review, I wasn't sure we'd be interested.  I get contacted by lots of activity box companies, and we've never tried any of them.  But I showed S these boxes and she was super excited to give them a try.  When I am approached by a company I don't know, I won't agree to write a post until we've tried their product and love it.  Well we tried two no-strings-attached kits and loved them!  So much so, that we subscribed ourselves for a year of boxes!


We (obviously) do a lot of activities around here, so I didn't think that I would find an activity box very useful.  But it really was SO nice to have several activities all planned out and prepped and ready to go!  In addition to the prepped materials in the box, you'll find several extension activities listed on the backs of the activity cards and you'll also find a link to download a free activity guide with even more fun ideas!  The kits are hands-on, award winning, and eco-friendly.  They are best for kids who are 3-10 years old.

The two boxes S chose to sample for this post were the Planet Protector Discovery Box and the Backyard Science Discovery Box.  In addition to offering subscriptions of various lengths, you can also buy individual Discovery boxes (you can even buy the two we post about here!).

The Planet Protector Discovery Box had the following three projects in it:

1.  Design and Create a Watercolor Earth Artwork Display

S had so much fun painting, and we strung her art up using the enclosed materials (everything we needed, down to the two pushpins!).  I loved that the display is reusable indefinitely and I also loved that the watercolors had a ton of paint left when she was done.  We've used them several times since for other art projects!


2.  Create Your Own Paper Mache Globe

I haven't done paper mache since I was in elementary school and it was SO FUN.  S needed help with this craft since she's 4, but older children may be able to complete it solo.  I loved that there was enough material to make a second globe.  We've got the extras stored in a craft drawer so S can revisit this project again soon.  She's so proud of the Earth she created with a little help from mama!


3.  Make Your Own Plantable Seed Paper

This was SO MUCH FUN.  We actually kept going and made several extra sheets of recycled paper because we were having so much fun.  I thought S would need a lot of help, but after the first three sheets, she took over and made the rest totally by herself.  She's used the sheets for artwork and is looking forward to planting some of the seeded paper in her garden this week.


The Backyard Science Discovery Box had four projects in it:

1.  Create a Leaf Pendant

S LOVES this necklace.  She actually made the print herself (I did need to help her flatten the clay, but that's it) and she is SO proud of it.  She wears it all the time and loves to tell people all about it.


2.  Decorate Your Own Collecting Bag

S loves to collect treasures whenever we go out, so this was a perfect project for her.  I held the material taut while she used the leaf rubbing cards and fabric crayons to make the pretty leaf pictures you see here.  I love that we can use the leaf rubbing cards again for other fun art projects.


3.  Make a Sun Print

S was able to make a few of these before the Seattle sun hid on us again.  When I went to photograph her prints, I realized she'd already sent them off in letters to friends.  If you're not familiar with it, the paper is dark blue to start.  Your child adds a bunch of nature finds and places the paper in direct sun for 5 minutes, or until the paper changes color.  Then you bring it inside and rinse it with water and it makes a beautiful white print of whatever item you'd laid on there originally.  You can see a picture of what it looks like in the slideshow here.

4.  Design a Shadow Nature Box

S hasn't gotten to this project yet, but I know she will love using her Collecting Bag to gather items to create an art display!


In summary, here are several things I loved about our Green Kid Crafts boxes:

They had all the materials (that could possibly be included - you may need to provide items like a bowl or a blender or a spoon) included.
They encourage kids to get outside in nature.
They are eco-friendly and encourage creativity.
They are FUN!

And now for the fun part!  Green Kid Crafts is generously giving away one 6 month subscription to a lucky reader with a US mailing address!  This is valued at $119!  The giveaway will run through Monday, July 7th at 12:00am.  The selected winner (US mailing address only, please) will have 48 hours to respond; if I can't get ahold of you within that window of time I will choose another winner.

No-Cook Edible Chia, Flax, and Seedless Slime Recipes

Sunday, June 15, 2014

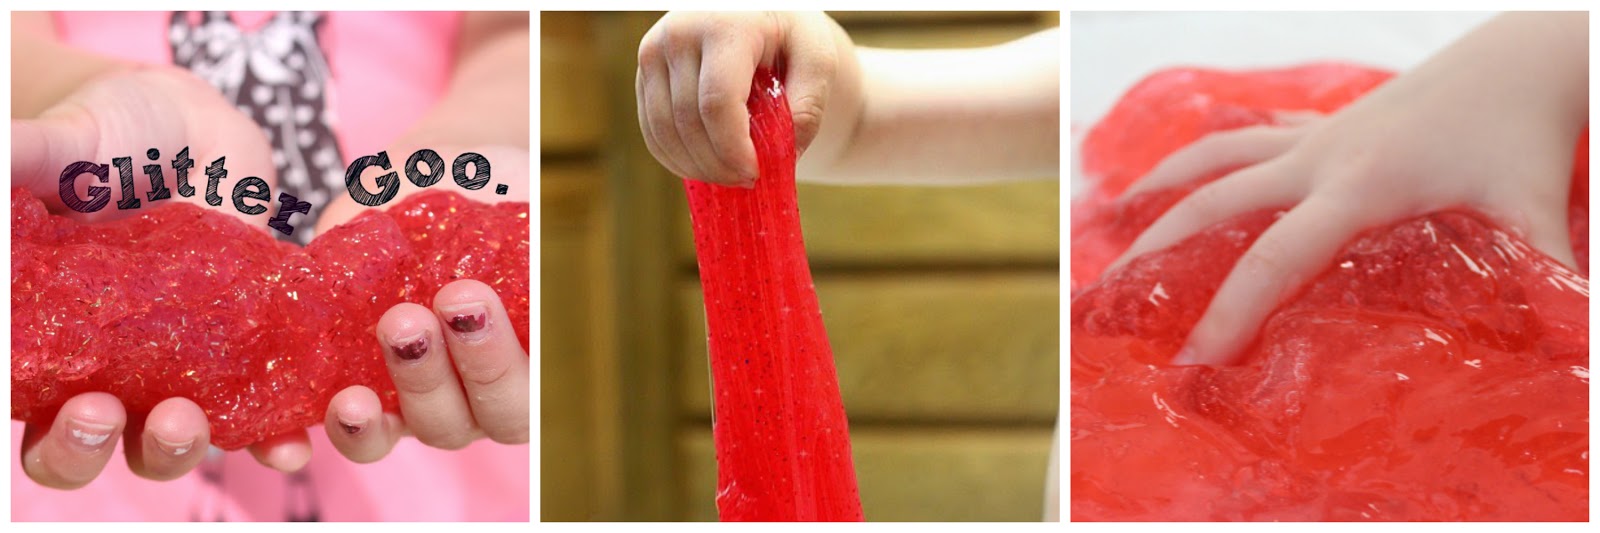
As many of you know, one of my favorite recipes ever is our No Cook Edible Slime.  It still is, but in several places worldwide it's challenging to find one of the main ingredients in that recipe - basil seeds.  I'm so excited to finally have a solution for you all!  My awesome blogging friend Dyan of And Next Comes L was working on trying to make our chia seed recipe work out (initially I'd tried the same approach as I did with the basil seeds, but the chia seeds lose water as you play, so the slime would fall apart over time) and we were chatting when I had a realization!  I'd been studying a lot of specialty ingredients for the series of gluten-free play recipes I created for our book - and I thought of something that just might fix the problems I was having with the chia seeds.  We tried it out and it works PERFECTLY:

A NEW recipe for No-Cook Edible (Taste-Safe) Slime using Chia Seeds!  A super fun slime for ALL ages!  From Fun at Home with Kids

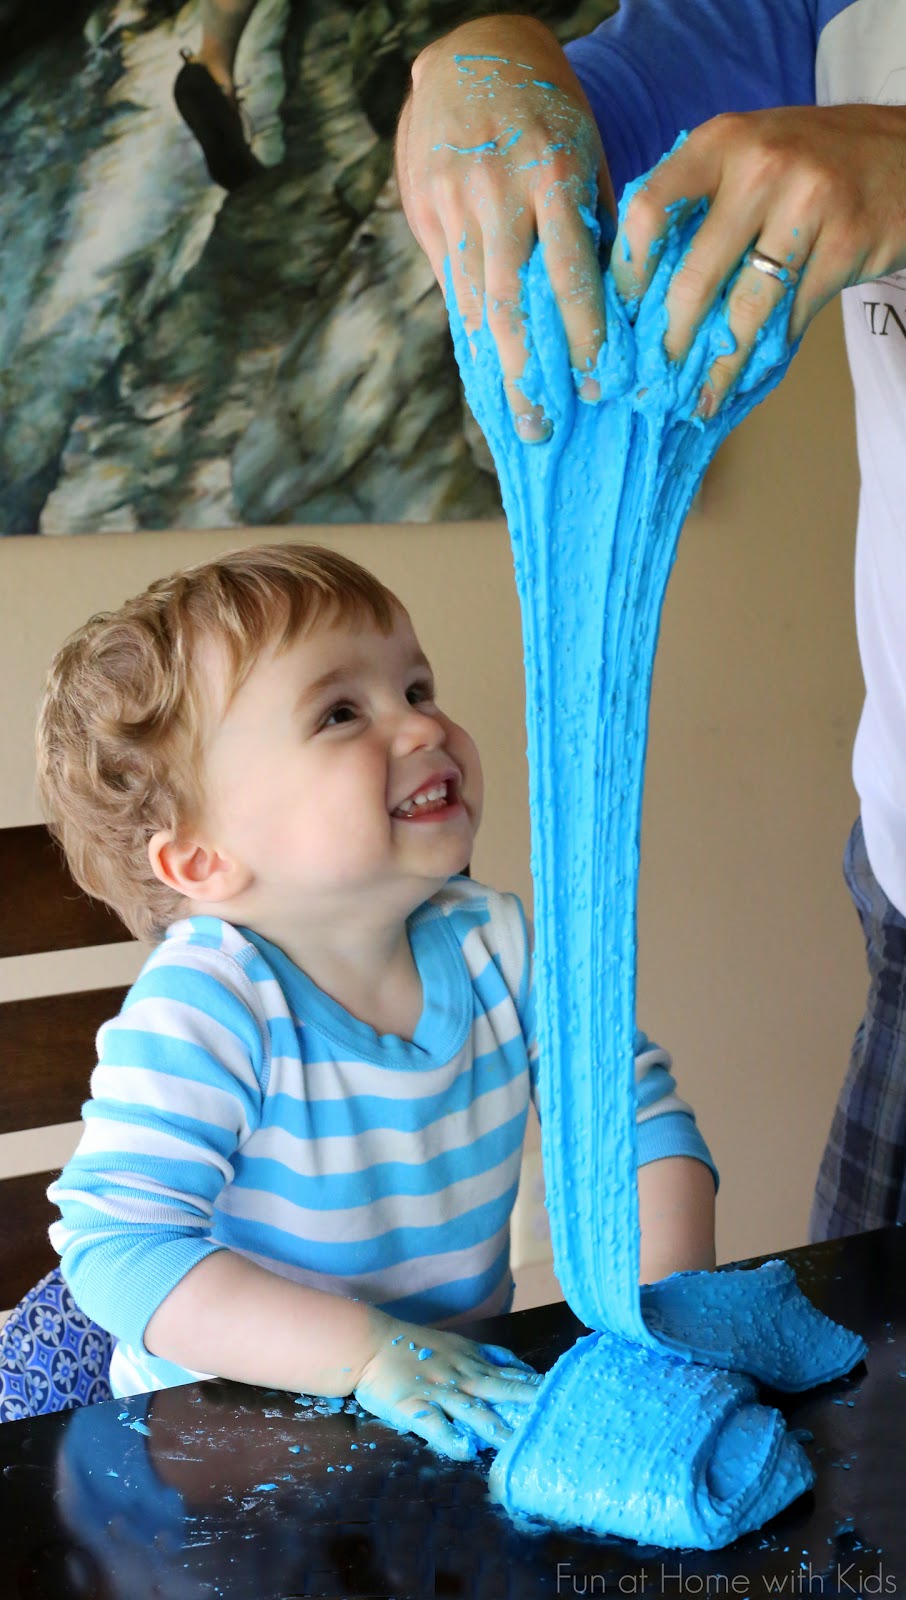
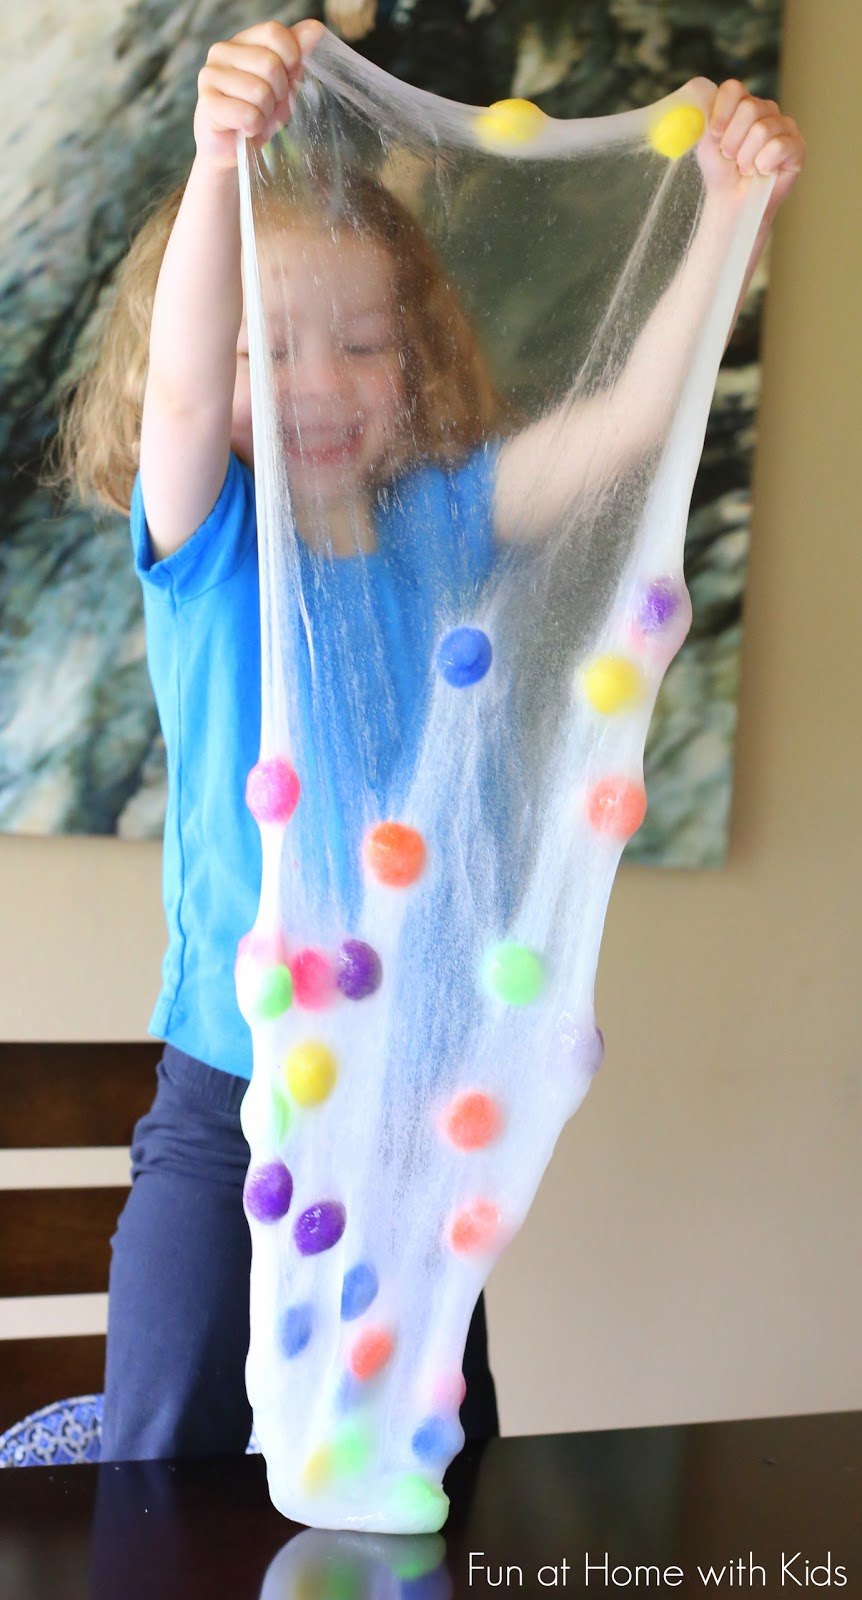
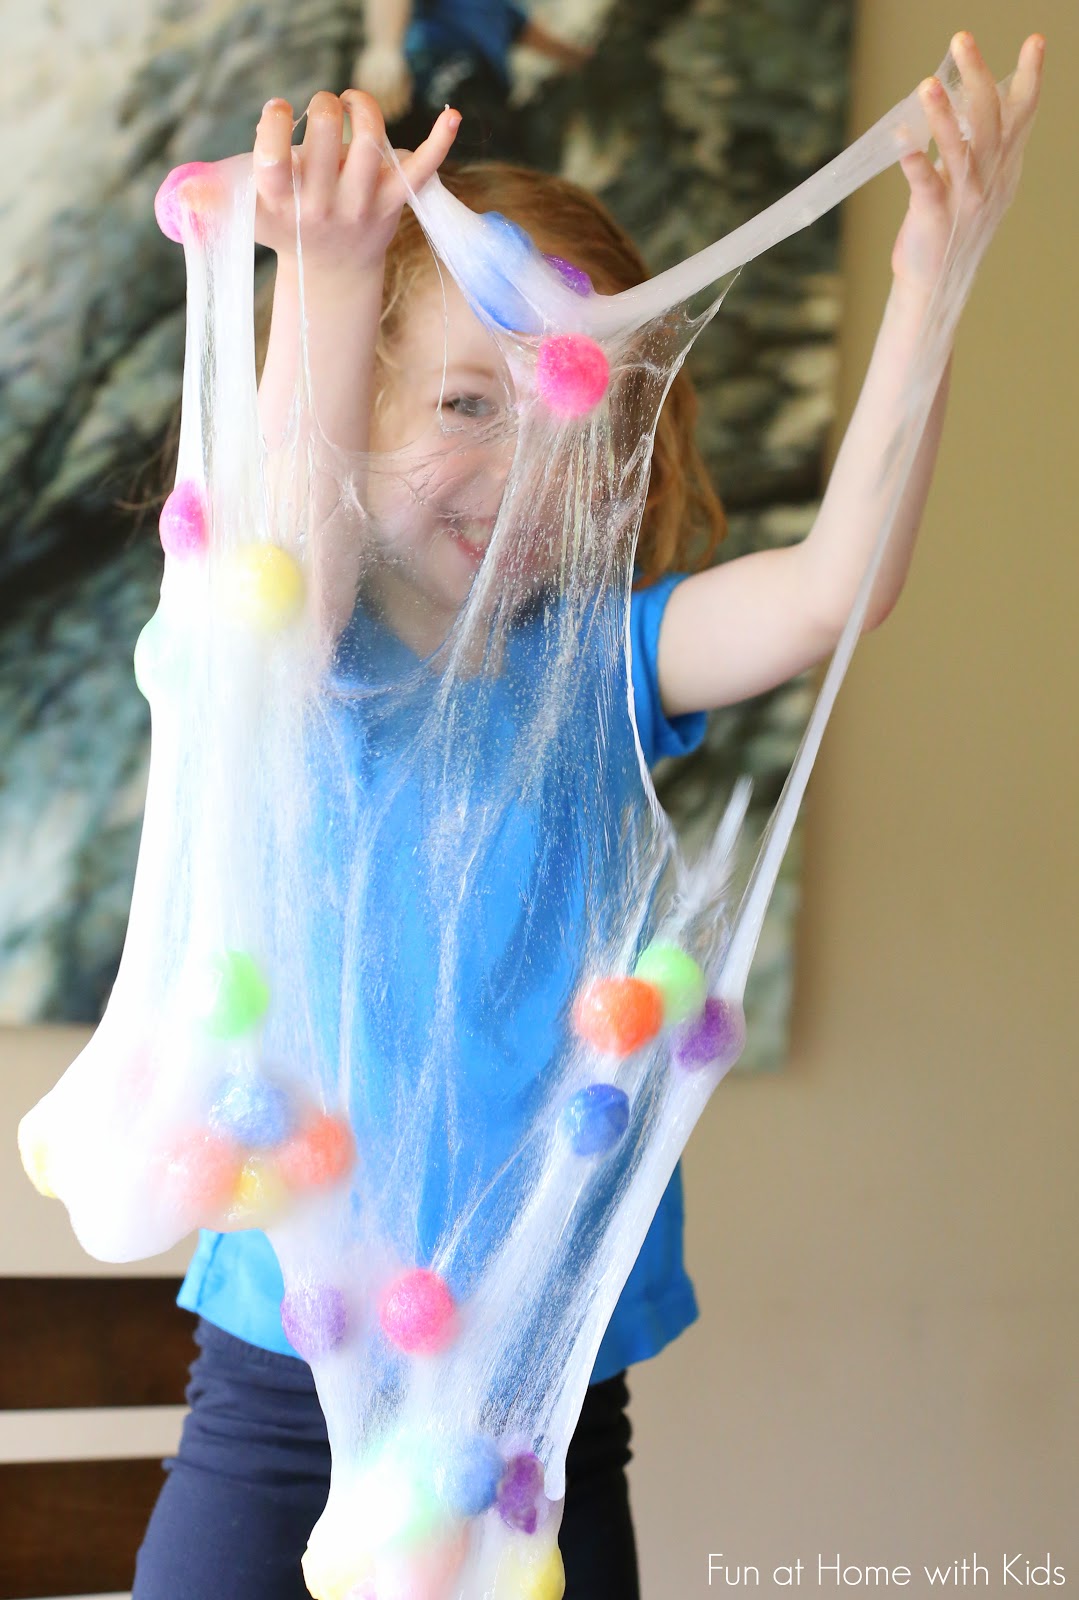
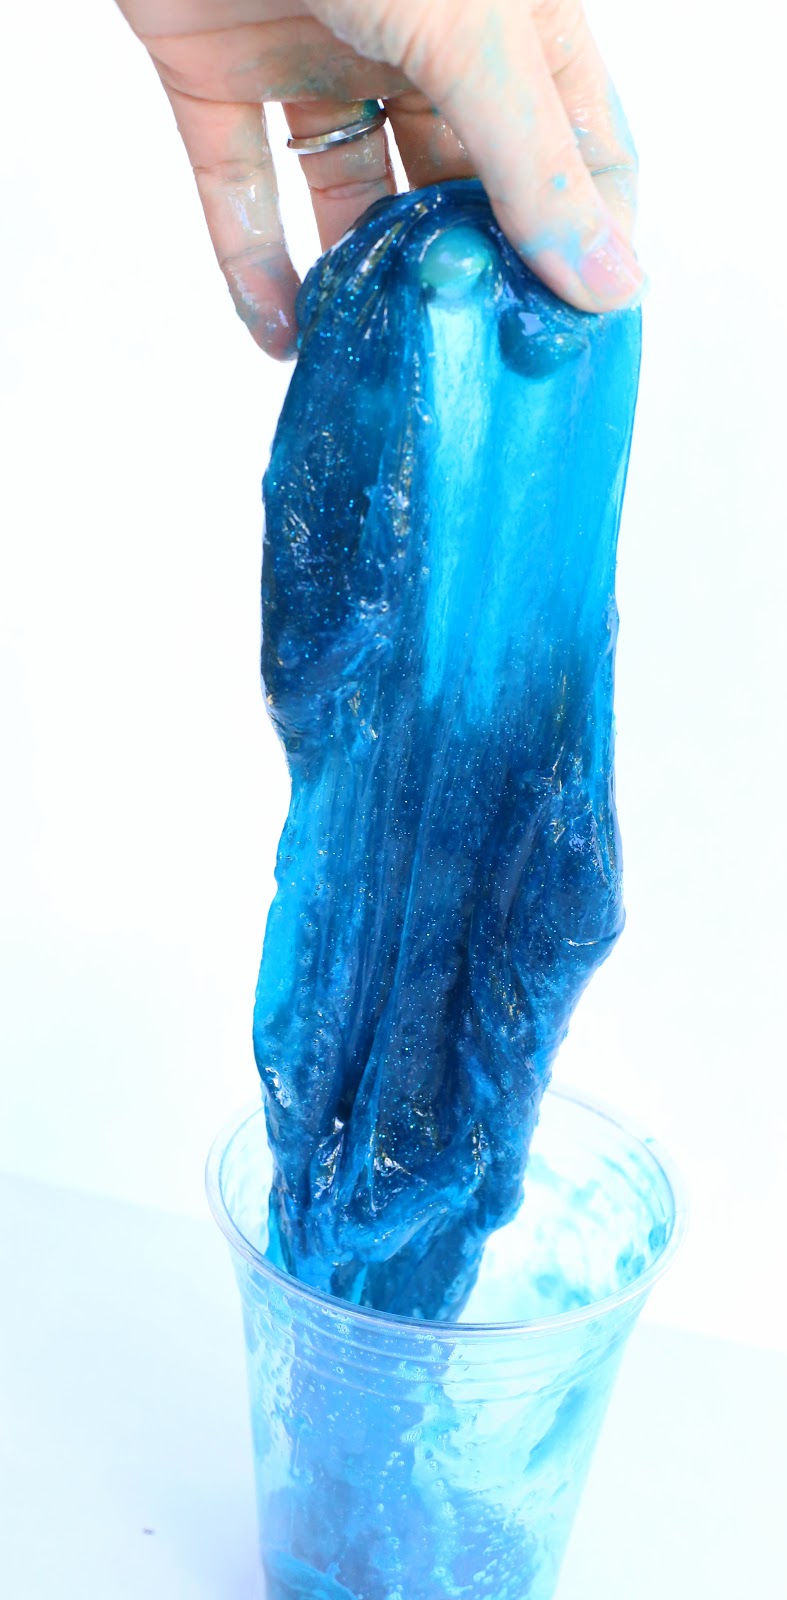
The chia seed slime doesn't fall apart as you play and it's really fun and super stretchy!

A NEW recipe for No-Cook Edible (Taste-Safe) Slime using Chia Seeds!  A super fun slime for ALL ages!  From Fun at Home with Kids

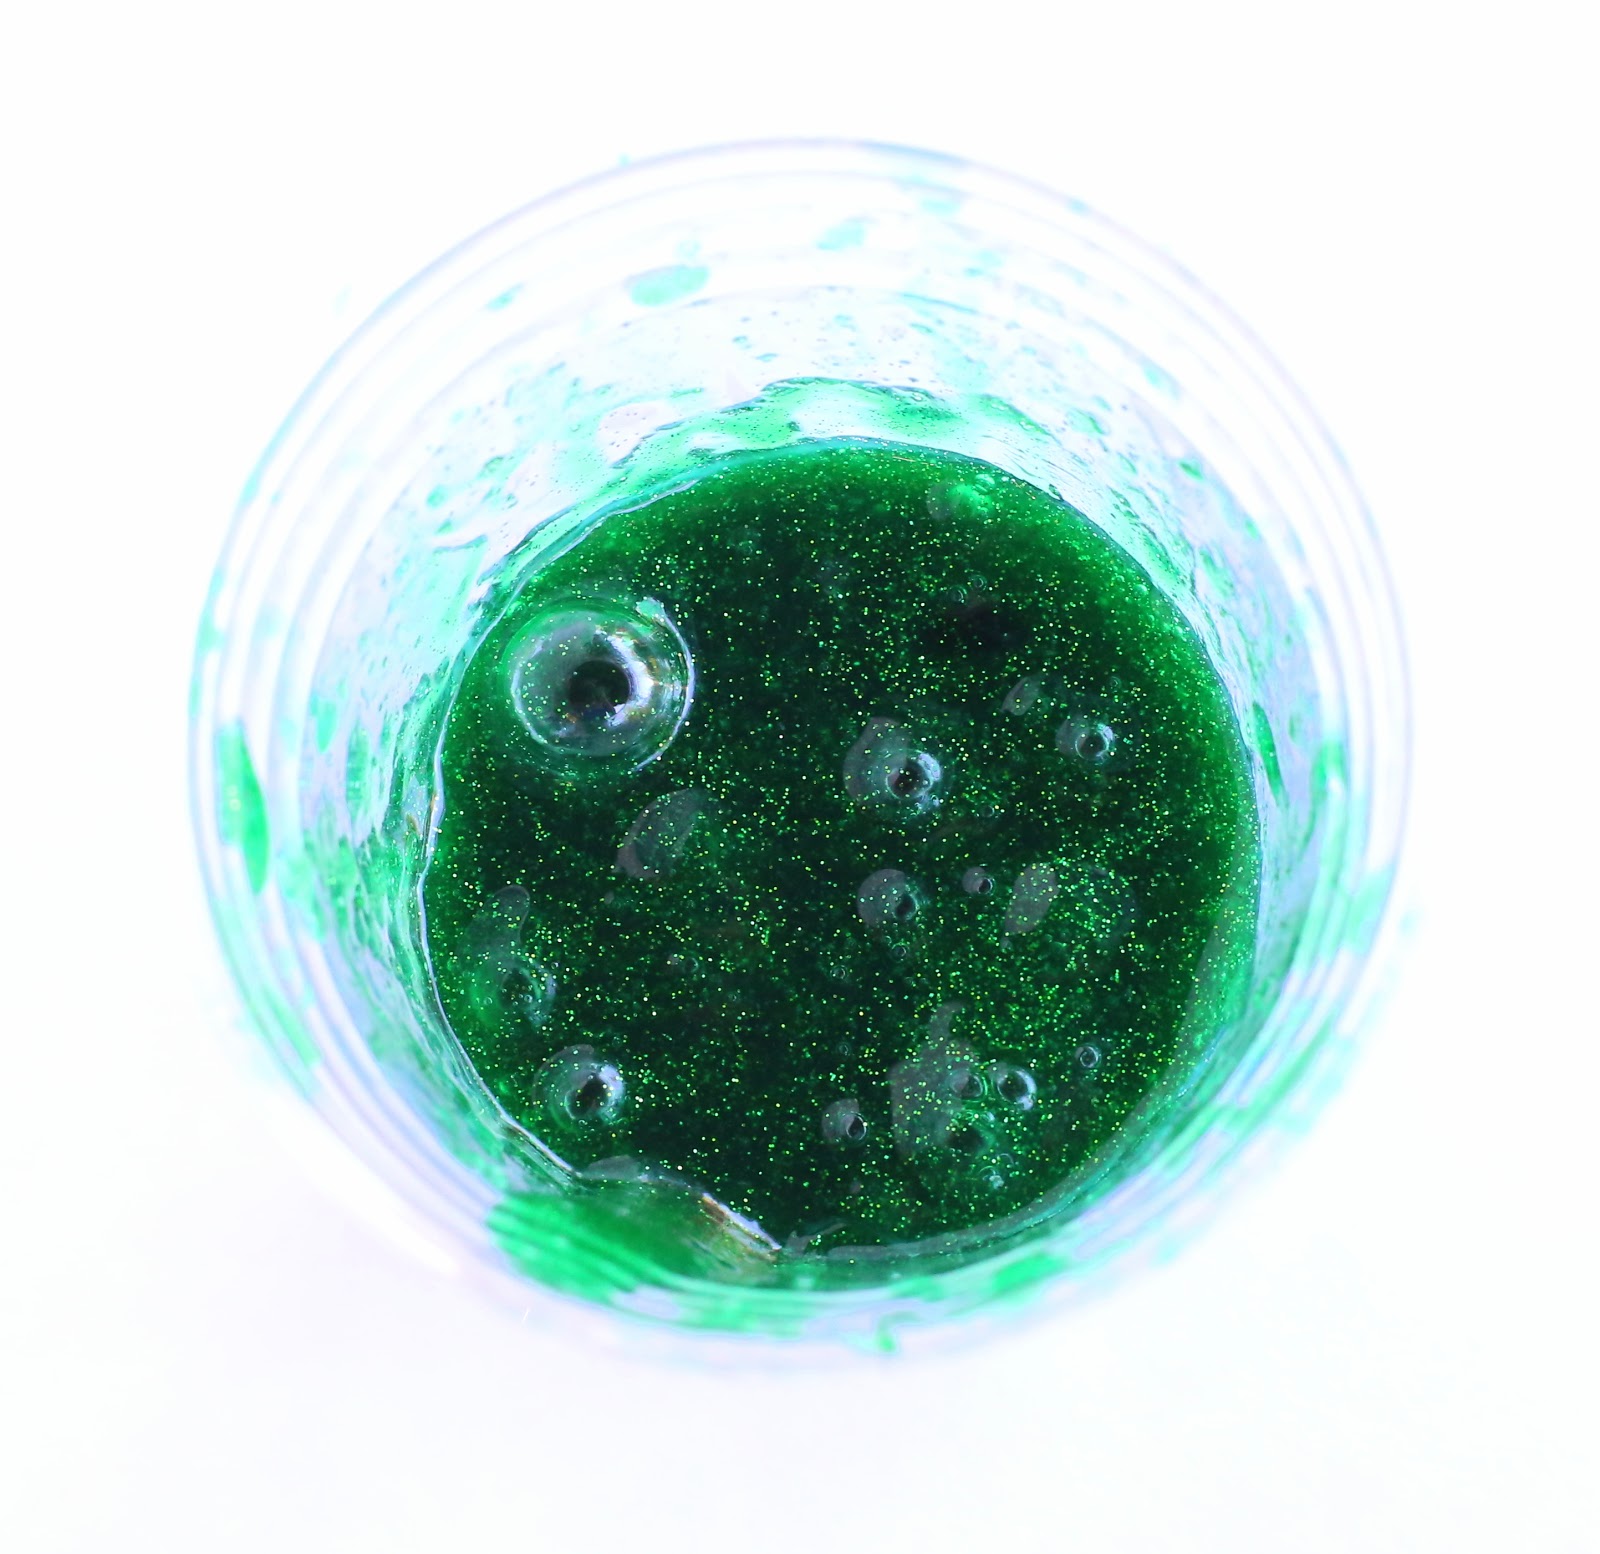
 You can move it as one big glob.

A NEW recipe for No-Cook Edible (Taste-Safe) Slime using Chia Seeds!  A super fun slime for ALL ages!  From Fun at Home with Kids

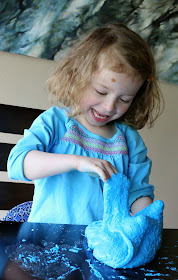
You can make hand or footprints in it.

A NEW recipe for No-Cook Edible (Taste-Safe) Slime using Chia Seeds!  A super fun slime for ALL ages!  From Fun at Home with Kids

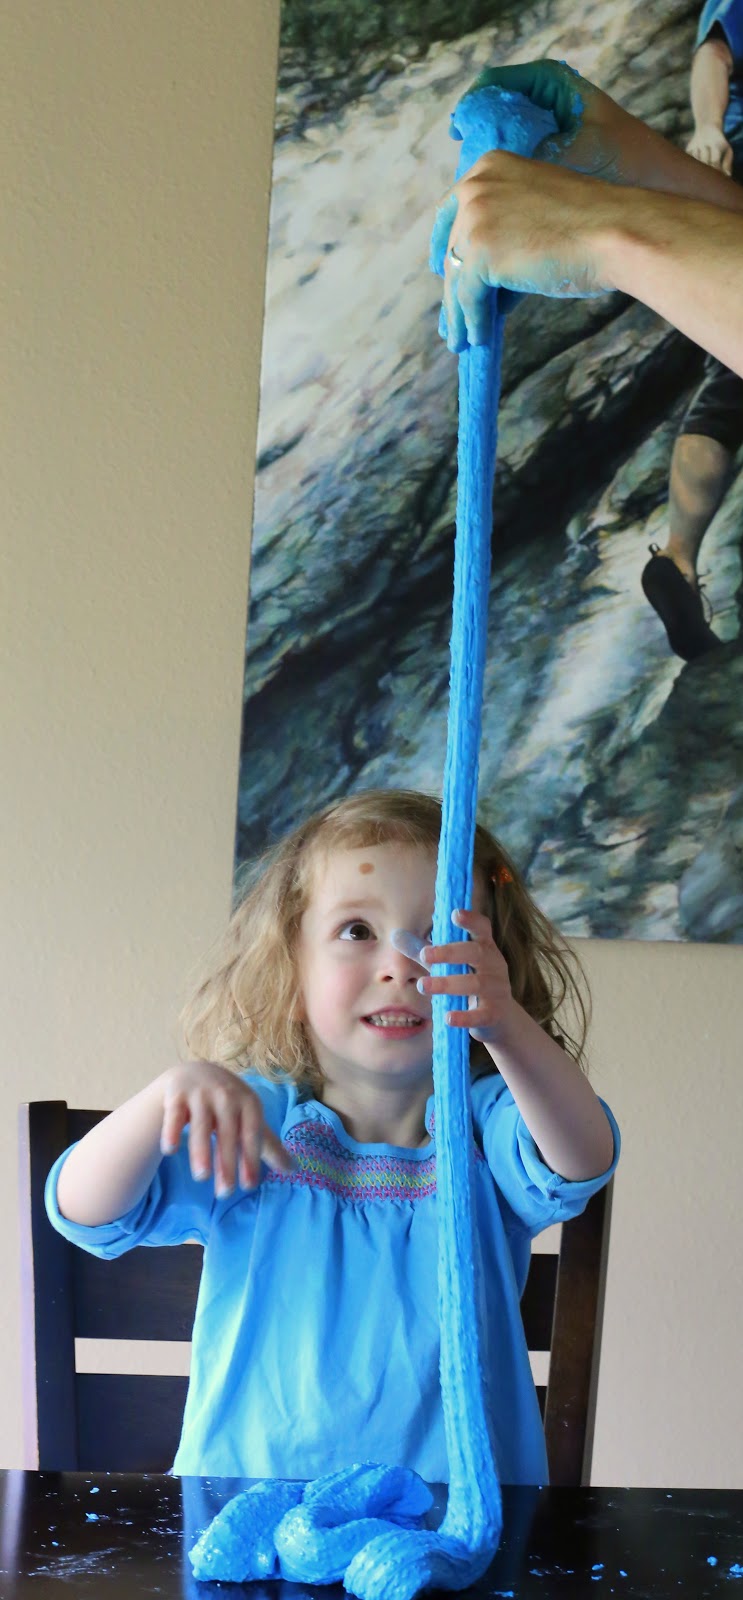
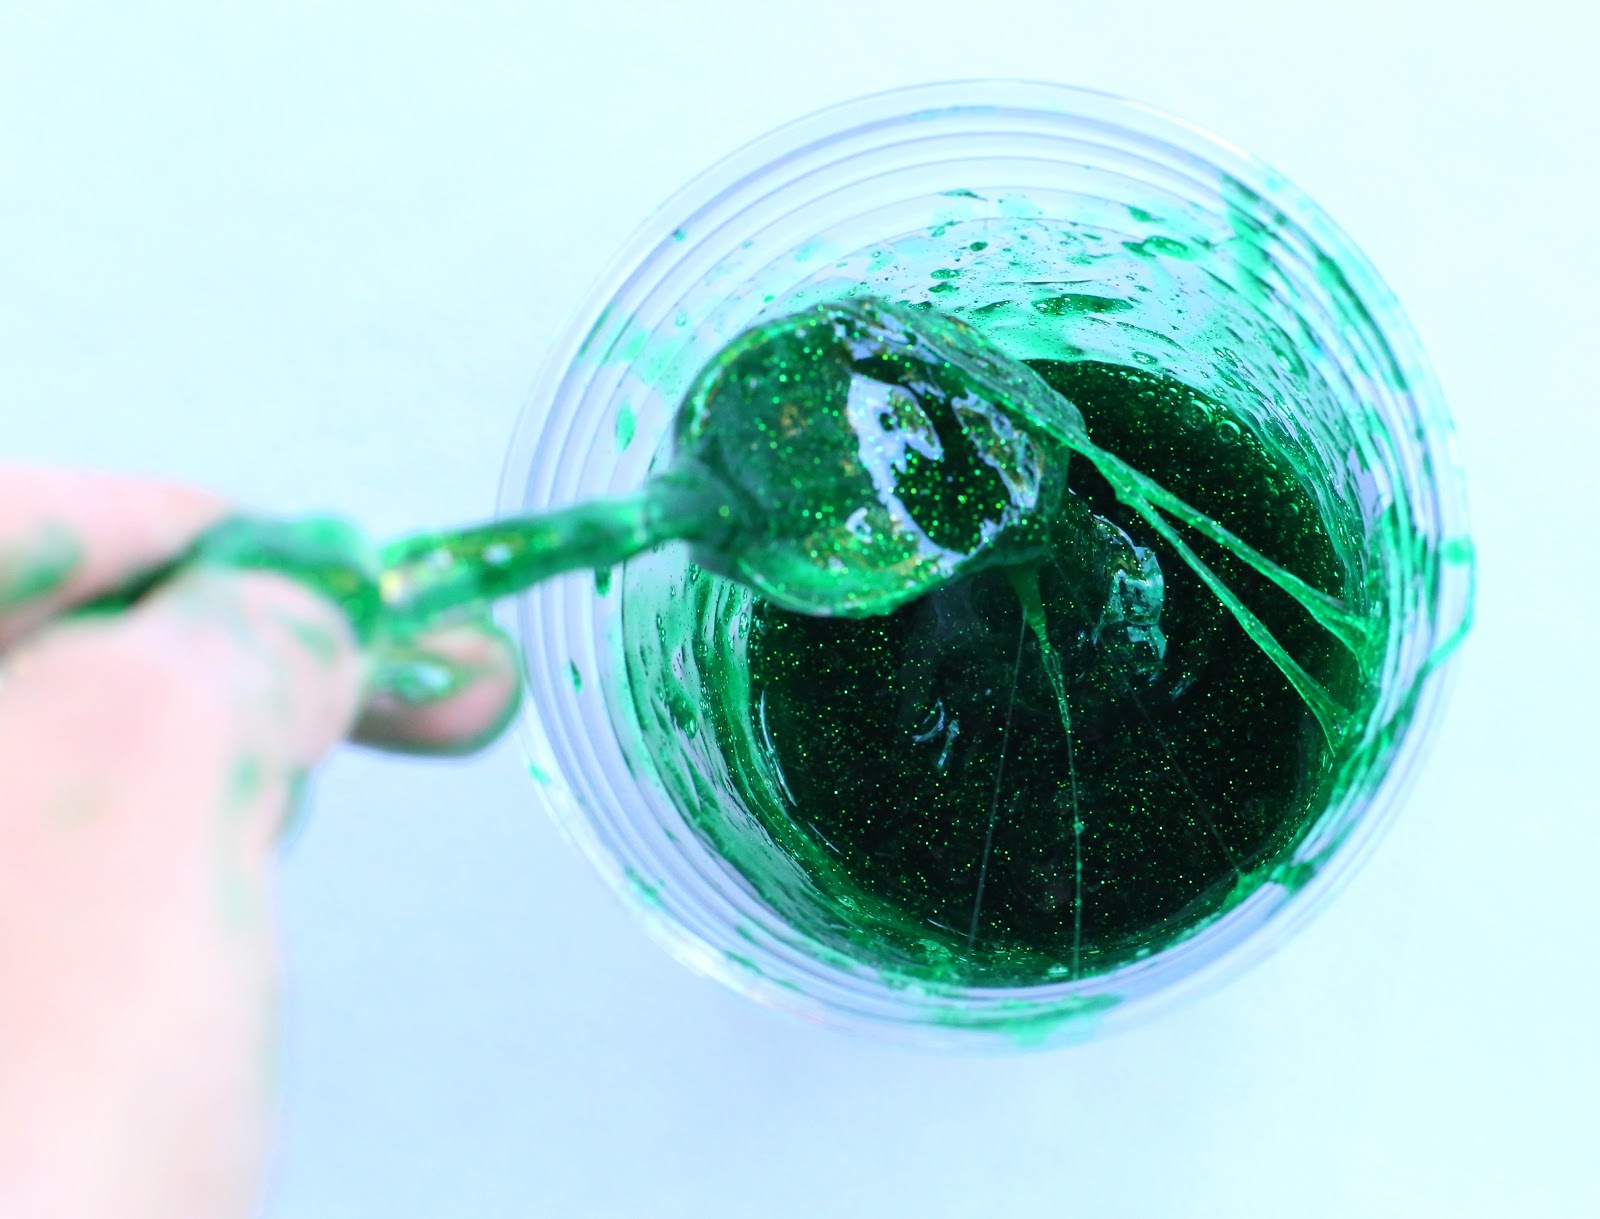
It's so fun to watch it ribbon down from up high!

A NEW recipe for No-Cook Edible (Taste-Safe) Slime using Chia Seeds!  A super fun slime for ALL ages!  From Fun at Home with Kids

And since it's edible (though please don't serve this to your child as a meal, haha), it's safe for very little ones to explore as well!

A NEW recipe for No-Cook Edible (Taste-Safe) Slime using Chia Seeds!  A super fun slime for ALL ages!  From Fun at Home with Kids

We got ours to stretch around 5 feet, which is amazing for an edible, chemical-free slime!

A NEW recipe for No-Cook Edible (Taste-Safe) Slime using Chia Seeds!  A super fun slime for ALL ages!  From Fun at Home with Kids
This post contains affiliate links for your convenience.

From there, I wondered if I could modify the same basic recipe to make flax seeds work (I could) and then I wanted to see if I could make it work with no seeds at all (I could!).  Though the other two recipes worked, we all felt the best version of the slime was the chia seeds.  It was the most flexible and stretchy, so if you can get ahold of chia seeds, that's our recommendation.  And to save money, we buy our seeds and our xanthan gum in the bulk section of our grocery store.  Here are all three recipes.

To make Edible Chia Seed Slime:

A NEW recipe for No-Cook Edible (Taste-Safe) Slime using Chia Seeds!  A super fun slime for ALL ages!  From Fun at Home with Kids

Measure 1/4 cup chia seeds and 2 cups of water into a sealable container (we use tupperware containers) and store overnight in the fridge (12-24 hours).  If you can, stir at least once because the seeds tend to clump.  The next day your seeds should be nice and gelatinous.  Stir to break up any clumps, then add 1 teaspoon of xanthan gum and whisk.  It won't completely mix in, but that's OK.   Add food coloring if you'd like, though as you can see from the photos above, you don't want to add a whole bottle of blue to make a really cool blue color.  It will just give your family smurf hands.  Add 3-5 drops and call it good and your hands will thank you. Next add one full 16 oz box of cornstarch (for UK folks this is cornflour) and mix.  At some point, it gets easier to knead by hand.  After that continue adding cornstarch by the Tablespoon until the slime isn't sticky.  We found that we needed to add 5 additional Tablespoons of cornstarch.  You will know your slime is ready when you can move it as a big heap.  If it's crumbly and not stretchy, add a teaspoon of water to correct and knead well.

We played with it for over an hour each time and it didn't dry out, but if it does, just wet your hands under the sink and knead them into the slime - this should be enough water to rehydrate it.

It is edible, which means it is perishable.  It will need to be stored in the refrigerator in a sealed container when not in use.  It can keep for up to a week, but please inspect it for signs of mold or foul odor before presenting it to your child for play each time.  An interesting difference between this recipe and our Basil Seed Slime is that this recipe will harden in the refrigerator each time you store it.  To rehydrate it and get it ready for play, using your hands or a spoon, break it into small chunks and pour 1 Tablespoon of water over it at a time.  Knead the water in until your slime reaches its normal consistency.  It typically takes around 3 Tablespoons of water, but it will vary based on how many hours it has been in the fridge, etc.

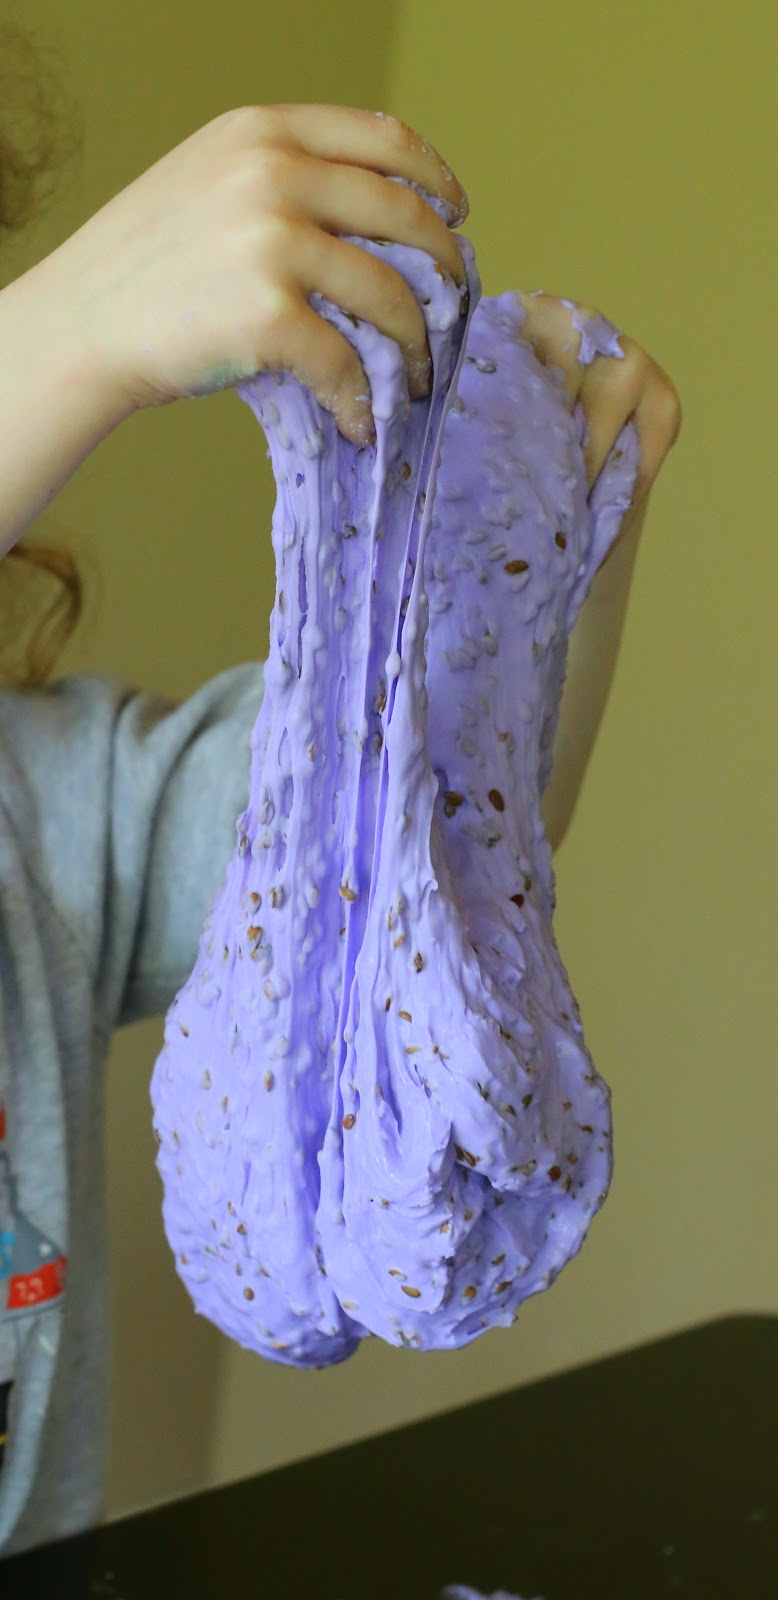
  To make Edible Flax Seed Slime:

A NEW recipe for No-Cook Edible (Taste-Safe) Slime using Flax Seeds!  A super fun slime for ALL ages!  From Fun at Home with Kids

Measure 1/2 cup flax seeds and 2 cups of water into a sealable container (we use tupperware containers) and store overnight in the fridge (12-24 hours).  The next day your seeds should be nice and gelatinous.  Stir to break up any clumps, then add 2 teaspoons of xanthan gum and whisk.  It won't completely mix in, but that's OK.   Add food coloring if you'd like (3-5 drops is enough in our experience).  Next add one full 16 oz box of cornstarch + 1/4 cup (for UK folks this is cornflour) and mix.  At some point, it gets easier to knead by hand.  If the slime is still very sticky, add more cornstarch 1 Tablespoon at a time and knead between each addition.  If the slime is crumbly and not stretchy, add a teaspoon of water to correct and knead well.

We played with it for over an hour each time and it didn't dry out, but if it does, just wet your hands under the sink and knead them into the slime - this should be enough water to rehydrate it.

It is edible, which means it is perishable.  It will need to be stored in the refrigerator in a sealed container when not in use.  It can keep for up to a week, but please inspect it for signs of mold or foul odor before presenting it to your child for play each time.  An interesting difference between this recipe and our Basil Seed Slime is that this recipe will harden in the refrigerator each time you store it.  To rehydrate it and get it ready for play, using your hands or a spoon, break it into small chunks and pour 1 Tablespoon of water over it at a time.  Knead the water in until your slime reaches its normal consistency.  It typically takes around 3 Tablespoons of water, but it will vary based on how many hours it has been in the fridge, etc.

To make Edible Seedless Slime:

Without the additional stabilization from the seeds and their gelatin, this slime is less stretchy and more prone to snapping than the above two.  However, if you don't have access to basil, chia, or flax seeds, it's still a very fun slime to play with!

A NEW recipe for No-Cook Edible (Taste-Safe) Slime!  A super fun slime for ALL ages!  From Fun at Home with Kids

Add 1 and 3/4 cups of water to 1 Tablespoon of xanthan gum and whisk.  The xanthan gum won't completely mix in, but that's OK.   Add food coloring if you'd like (3-5 drops is enough in our experience).  Next add one full 16 oz box of cornstarch + 1/2 cup (for UK folks this is cornflour) and mix.  At some point, it gets easier to knead by hand.  If the slime is still very sticky, add more cornstarch 1 Tablespoon at a time and knead between each addition.  If the slime is crumbly and not stretchy, add a teaspoon of water to correct and knead well.

We played with it for over an hour each time and it didn't dry out, but if it does, just wet your hands under the sink and knead them into the slime - this should be enough water to rehydrate it.

It is edible, which means it is perishable.  It will need to be stored in the refrigerator in a sealed container when not in use.  It can keep for up to a week, but please inspect it for signs of mold or foul odor before presenting it to your child for play each time.  An interesting difference between this recipe and our Basil Seed Slime is that this recipe will harden in the refrigerator each time you store it.  To rehydrate it and get it ready for play, using your hands or a spoon, break it into small chunks and pour 1 Tablespoon of water over it at a time.  Knead the water in until your slime reaches its normal consistency.  It typically takes around 3 Tablespoons of water, but it will vary based on how many hours it has been in the fridge, etc.


Follow along with Fun at Home with Kids on FacebookGoogle+Pinterest or Subscribe by Email or Bloglovin'!

All activities here are activities I feel are safe for my own children.  As your child's parents/guardians, you will need to decide what you feel is safe for your family.  I always encourage contacting your child's pediatrician for guidance if you are not sure about the safety/age appropriateness of an activity. All activities on this blog are intended to be performed with adult supervision.  Appropriate and reasonable caution should be used when activities call for the use of materials that could potentially be harmful, such as scissors, or items that could present a choking risk (small items), or a drowning risk (water activities), and with introducing a new food/ingredient to a child (allergies).  Observe caution and safety at all times.  The author and blog disclaim liability for any damage, mishap, or injury that may occur from engaging in any of these activities on this blog.

Polka Dot Slime

Tuesday, June 10, 2014

I've been wanting to make a Polka Dot Slime for awhile, but every "polka dot" I tried fell out of the slime.  Argh!  I kept brainstorming, and finally I nailed it!  Oh goodness is this a fun slime!!!!  Slimes never get old around here, but it's so fun for me to see how the variations we make to the ingredients change the behavior of the slime (for example our Chocolate Slime stretched for 9 feet!).  We discovered that Polka Dot Slime was perfect for BIG WIDE stretches.

Recipe for an ultra fun and stretchy Polka Dot Slime!  Fun at Home with Kids

SO.  MUCH.  FUN.

Recipe for an ultra fun and stretchy Polka Dot Slime!  Fun at Home with Kids

S also liked making little mini-slime polka dots.


Fried slime egg, anyone?


Eeeek!  It was just so fun to play with.

Recipe for an ultra fun and stretchy Polka Dot Slime!  Fun at Home with Kids

X also enjoyed playing with it, but I didn't want to share photos because this slime is meant only for children who are no longer mouthing and understand not to put their hands in their mouth.  Glue and Liquid Starch are not meant for little tummies!  If you do have a little one who's still mouthing - never fear - we've developed a super rad Edible Slime here.

Now for those of you with older children, here's how to make your very own batch of ULTRA fun Polka Dot Slime:

2 five ounce bottles of clear school glue
Pom poms

Pour two full five ounce bottles of clear glue into a cup or bowl.  As per my discoveries in our How To Fix Slime Fails post, I recommend adding a little bit (on the order of Tablespoons) of liquid starch at a time and stirring well in between each addition of liquid starch.  You want to keep adding until the slime is no longer sticky/stringy/sticking to the sides of the bowls.  For detailed photos of what this looks like, check out our How To Fix Slime Fails post.  :)  Once the slime is formed and you've kneaded to make it uniform, add your pom poms and knead them in.  We added 30 medium pom poms to ours.

If you are in the UK or need a liquid starch alternative, be sure to read this post on how to make slime using laundry detergent!

Keep your slime in a sealed container or bag.  It will keep for several weeks of play!

If you liked this, you're sure to love our Polka Dot Soup!


Click the photo below to buy it on Amazon or click here to read more about our book!

Follow along with Fun at Home with Kids on FacebookGoogle+Pinterest or Subscribe by Email or Bloglovin'!

All activities here are activities I feel are safe for my own children.  As your child's parents/guardians, you will need to decide what you feel is safe for your family.  I always encourage contacting your child's pediatrician for guidance if you are not sure about the safety/age appropriateness of an activity. All activities on this blog are intended to be performed with adult supervision.  Appropriate and reasonable caution should be used when activities call for the use of materials that could potentially be harmful, such as scissors, or items that could present a choking risk (small items), or a drowning risk (water activities), and with introducing a new food/ingredient to a child (allergies).  Observe caution and safety at all times.  The author and blog disclaim liability for any damage, mishap, or injury that may occur from engaging in any of these activities on this blog.

How to Fix Slime that Didn't Work Out

Sunday, June 8, 2014

I looooove play recipes.  So it always bums me out if people can't get them to work (by the way, I'm always happy to help you troubleshoot any of our recipes if you send me a photo!).  Slimes in particular seem to cause a lot of trouble for folks, so when I was writing our book, I decided to do a bit of investigating.  I learned a ton about what probably goes wrong for those of you who have slimes that don't work - and I also figured out how to fix a slime fail!  I hope this will help those of you who have not had success with slime recipes!

Photographs of all the ways slime recipes can fail and how to fix each of them.  Also includes great tips for how to make perfect slime the first time!  From Fun at Home with Kids
This post contains affiliate links for your convenience.

So first thing's first - the slime recipe that I decided to troubleshoot is the one that uses clear glue (aka PVA) and liquid starch (Sta Flo) since it seems to be the one that causes the most trouble for folks.  (If you are using our laundry detergent recipe, you can follow this same set of directions.  Keep in mind that the laundry detergent is a direct substitute for liquid starch.)  The first interesting thing I learned is that over time the liquid starch will settle.  This was leading to a lot of inconsistency in and of itself.  So the first thing I learned about this slime recipe is:

Always shake your liquid starch container a bit to make sure that it is well-mixed.

Now that you've shaken your liquid starch, let's look at the two ways this slime can go wrong.

First way:  Not enough liquid starch

Photographs of all the ways slime recipes can fail and how to fix each of them.  Also includes great tips for how to make perfect slime the first time!  From Fun at Home with Kids

How do you know if this is your issue?  Your slime will be stringy - it will stick to your fingers (see how much is sticking to mine above?) a ton.  As you stir, you'll see little strings of glue grabbing your spoon.  If you grab a section of your slime, it won't lift out in a glob - just a small stringy portion will stretch up.

Photographs of all the ways slime recipes can fail and how to fix each of them.  Also includes great tips for how to make perfect slime the first time!  From Fun at Home with Kids

Remedy?  Add more liquid starch, approximately one Tablespoon at a time.  Stir well to mix in between each addition of liquid starch.  You'll know you've added enough when you no longer see those strings of glue grabbing your spoon as you stir, and you'll be able to lift all or most of the slime out if you grab a section of it.  After a few minutes of kneading it will be beeeautiful and not sticky.

Photographs of all the ways slime recipes can fail and how to fix each of them.  Also includes great tips for how to make perfect slime the first time!  From Fun at Home with Kids

Second way:  Too much liquid starch

A slime that's had too much liquid starch added will be stringy, but NOT sticky.  It won't stick to your fingers - it will slide right off.  It won't stick to a spoon or even to itself.  It's just gross looking clumps of goo (seriously SUPER gross).

Photographs of all the ways slime recipes can fail and how to fix each of them.  Also includes great tips for how to make perfect slime the first time!  From Fun at Home with Kids

 You can see strands of floating slime, and there will be standing liquid starch.

Photographs of all the ways slime recipes can fail and how to fix each of them.  Also includes great tips for how to make perfect slime the first time!  From Fun at Home with Kids

How do you fix it?  First, pour off any standing liquid starch.  Then add clear glue approximately 1/4 cup at a time and stir.  Once the slime starts holding together, you will need to knead it by hand.  After adding glue and kneading for 2-3 minutes, it will be just like new!  It will gel even more if left overnight in a sealed bag.

Photographs of all the ways slime recipes can fail and how to fix each of them.  Also includes great tips for how to make perfect slime the first time!  From Fun at Home with Kids

So what does perfect slime look like?  It holds together and doesn't have any strings of glue or standing liquid starch.

Photographs of all the ways slime recipes can fail and how to fix each of them.  Also includes great tips for how to make perfect slime the first time!  From Fun at Home with Kids

If you grab it, it moves as one cohesive unit.

Photographs of all the ways slime recipes can fail and how to fix each of them.  Also includes great tips for how to make perfect slime the first time!  From Fun at Home with Kids

Kneading it for a minute or two will make it gel into a smoother and more uniform slime.

Photographs of all the ways slime recipes can fail and how to fix each of them.  Also includes great tips for how to make perfect slime the first time!  From Fun at Home with Kids

Because we've noticed that the amount of liquid starch needed varies wildly from slime to slime (depending a ton on what you add to it - food coloring, liquid watercolors, glitter, etc), I really recommend adding whatever amount of glue you'd like (we usually make a slime batch with two bottles of clear glue , but even one bottle makes a pretty solid amount of slime) to a container and then slowly adding liquid starch - about 1 Tablespoon at a time - and stirring between each addition until you have slime that looks like the blue slime pictured in the cup above.  

Once you've made your slime, be sure to knead it for a few minutes to make it uniform (honestly, you can just hand it to your kid to play and that will mix it for you!).  Store it in an airtight container or Ziploc bag when you aren't using it.  It will keep for several weeks.

And don't worry if it bubbles.  That's normal.

Photographs of all the ways slime recipes can fail and how to fix each of them.  Also includes great tips for how to make perfect slime the first time!  From Fun at Home with Kids

My final awesome discovery was that vinegar will dissolve this slime - just in case you get any on your carpet or clothing!

I hope this helps those of you who have had slimes backfire on you in the past!


Follow along with Fun at Home with Kids on FacebookGoogle+Pinterest or Subscribe by Email or Bloglovin'!

All activities here are activities I feel are safe for my own children.  As your child's parents/guardians, you will need to decide what you feel is safe for your family.  I always encourage contacting your child's pediatrician for guidance if you are not sure about the safety/age appropriateness of an activity. All activities on this blog are intended to be performed with adult supervision.  Appropriate and reasonable caution should be used when activities call for the use of materials that could potentially be harmful, such as scissors, or items that could present a choking risk (small items), or a drowning risk (water activities), and with introducing a new food/ingredient to a child (allergies).  Observe caution and safety at all times.  The author and blog disclaim liability for any damage, mishap, or injury that may occur from engaging in any of these activities on this blog.