
I am SUPER excited to report that I have finished writing the first draft of the Fun at Home with Kids book (due out this November!), so I am back to regularly posting! Thanks for bearing with us through the past few quiet weeks. :)
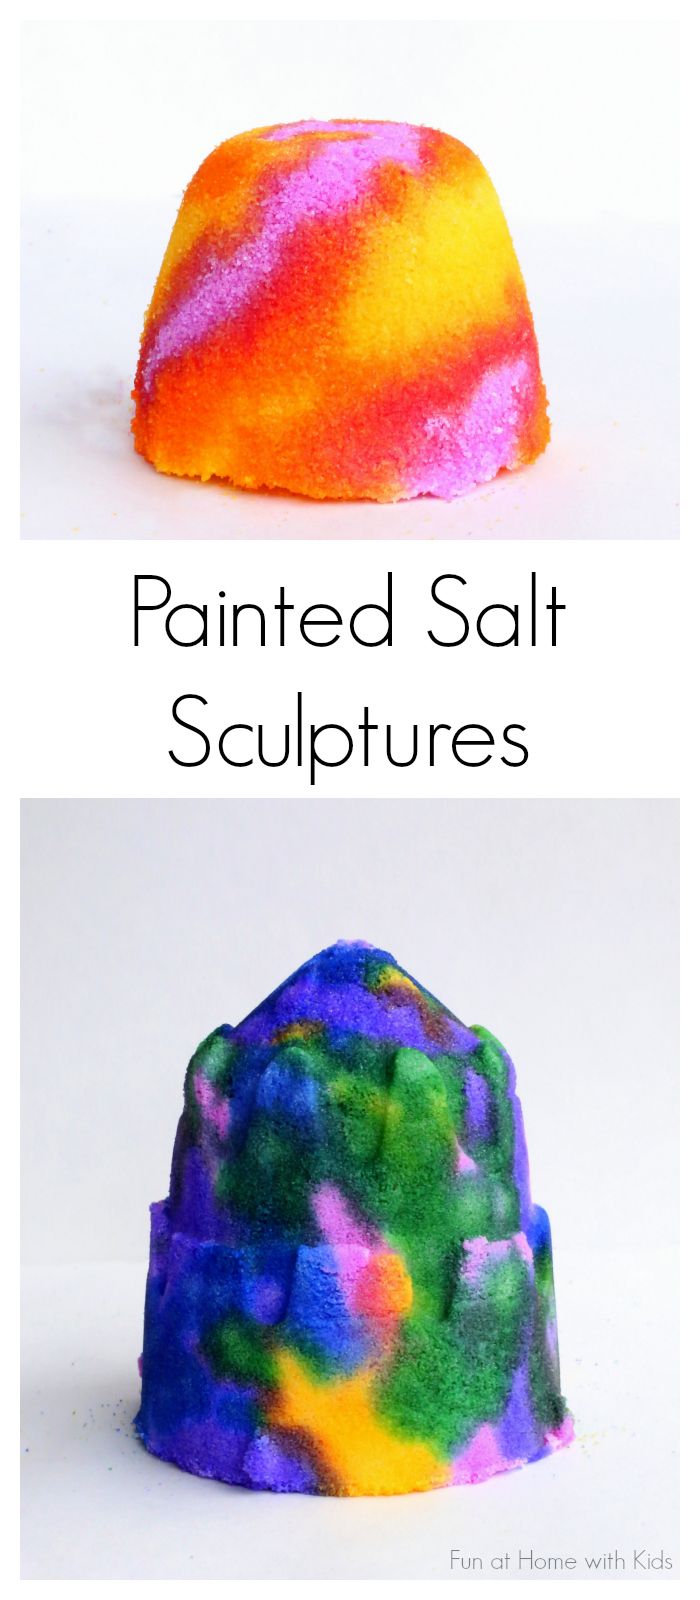
I've been waiting to share this new activity we invented with you all - we love it so much!!!!! And when I say we, I literally mean all of us - even Grandma and Grandpa! Our salt sculptures are just TOO much fun to paint. Though one or two were painted by S, most were collaborative pieces by 4 or even 5 of us at once. They're kind of addictive, so it's good that they only cost around a dollar to make!!!
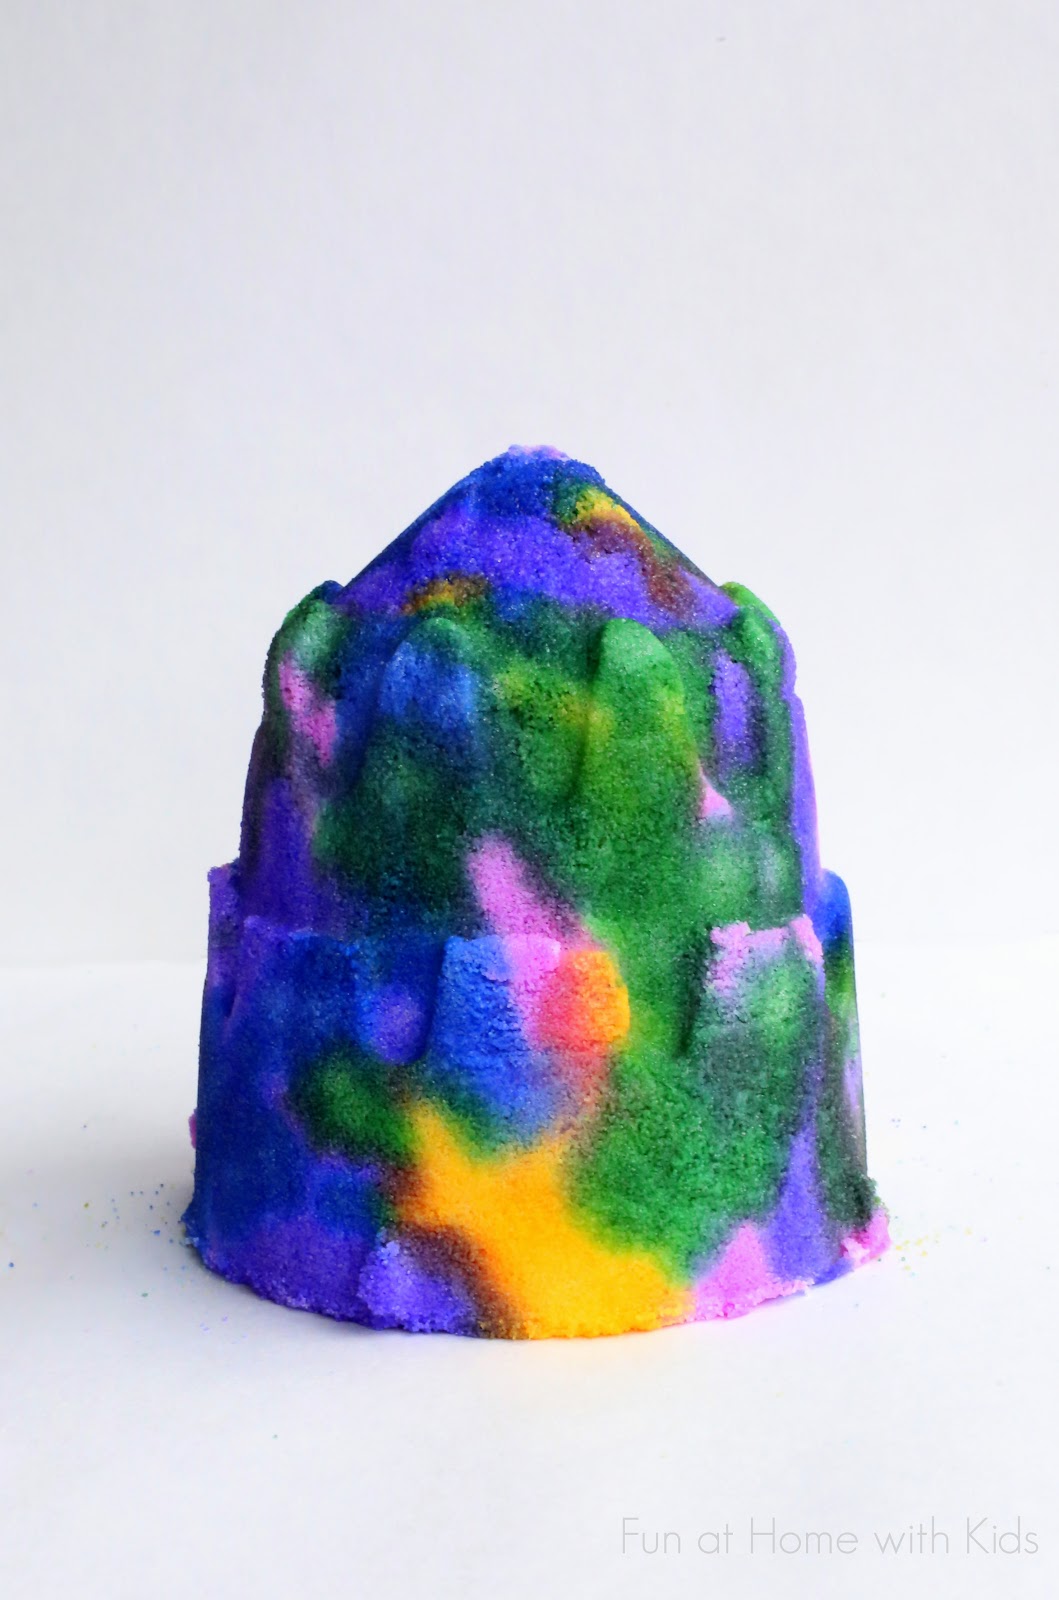
You can use anything as a mold for the salt sculptures - this was shaped by the bottom 2/3rds of one of our drinking glasses - but by far the easiest thing to use are those hard plastic sandcastle molds. We found that the glass gripped the molded salt for a few hours even after we tipped it upside down, whereas the hard plastic sandcastle molds released the salt sculptures right away.
Any shape of sandcastle mold works - though the longer shapes are slightly less stable than the square shapes.

The square shaped sand castles are the hardiest.

This post contains affiliate links for your convenience.
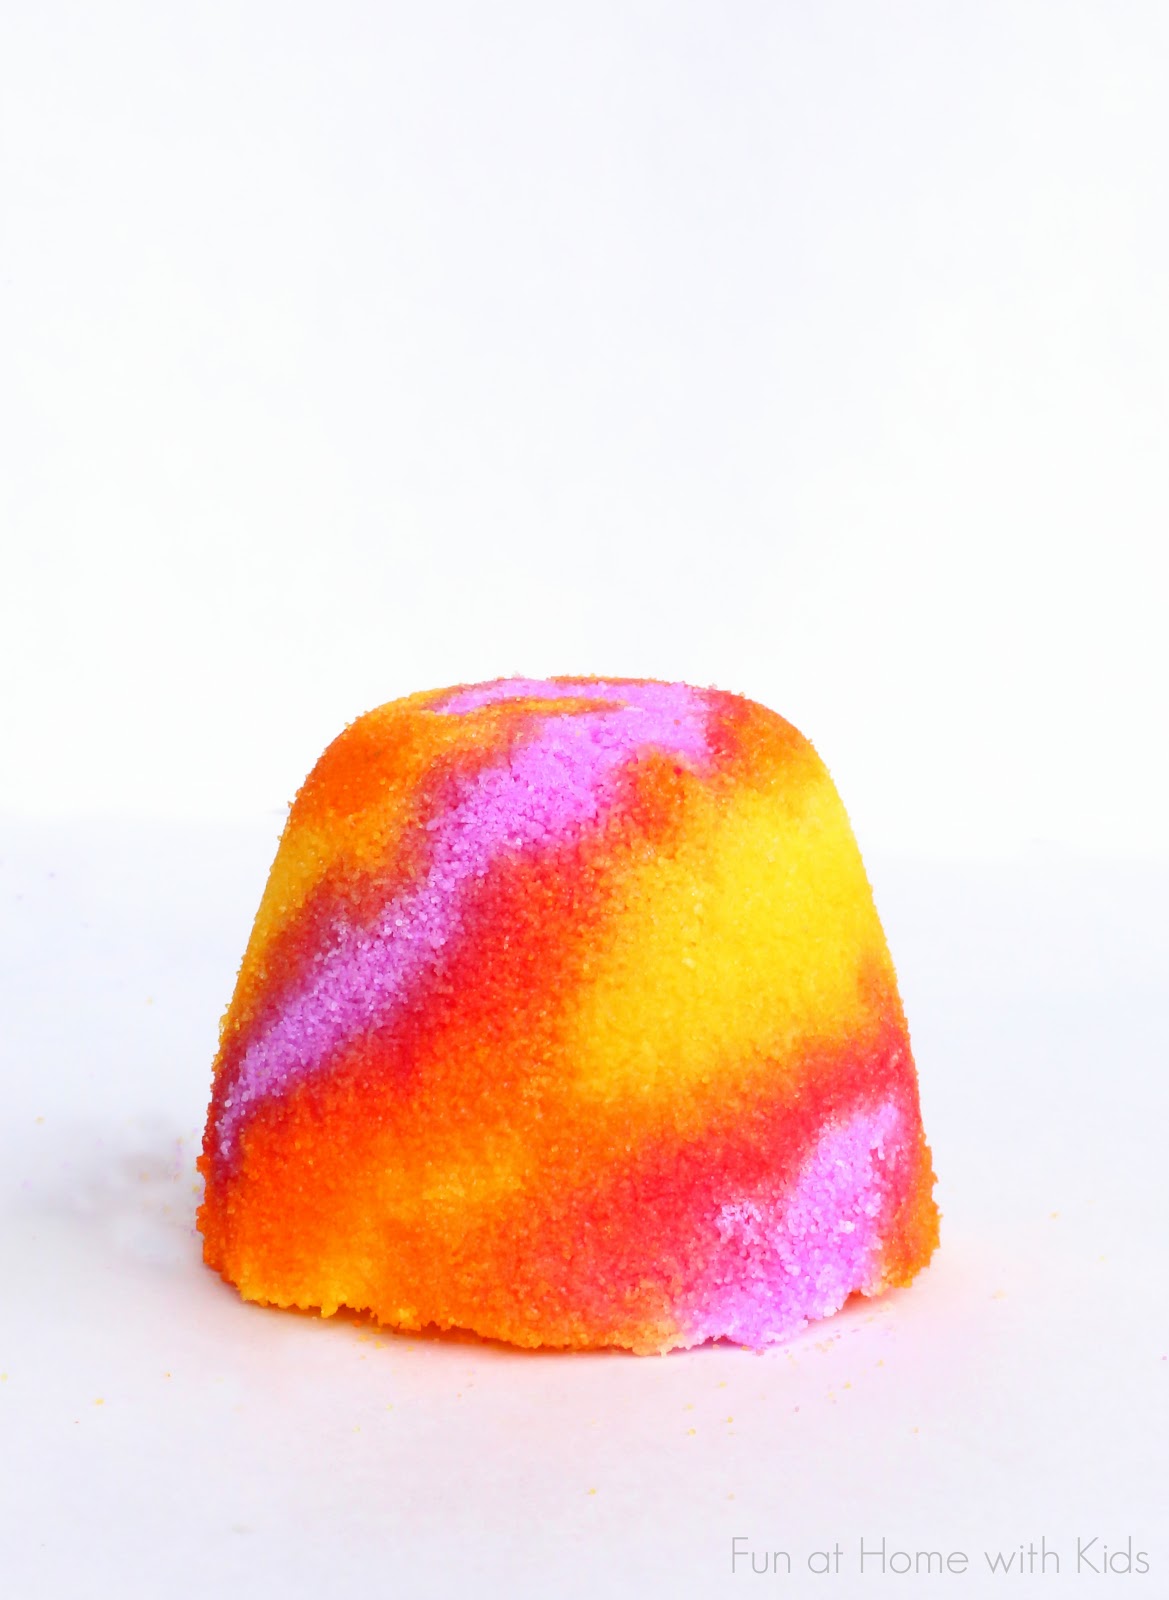
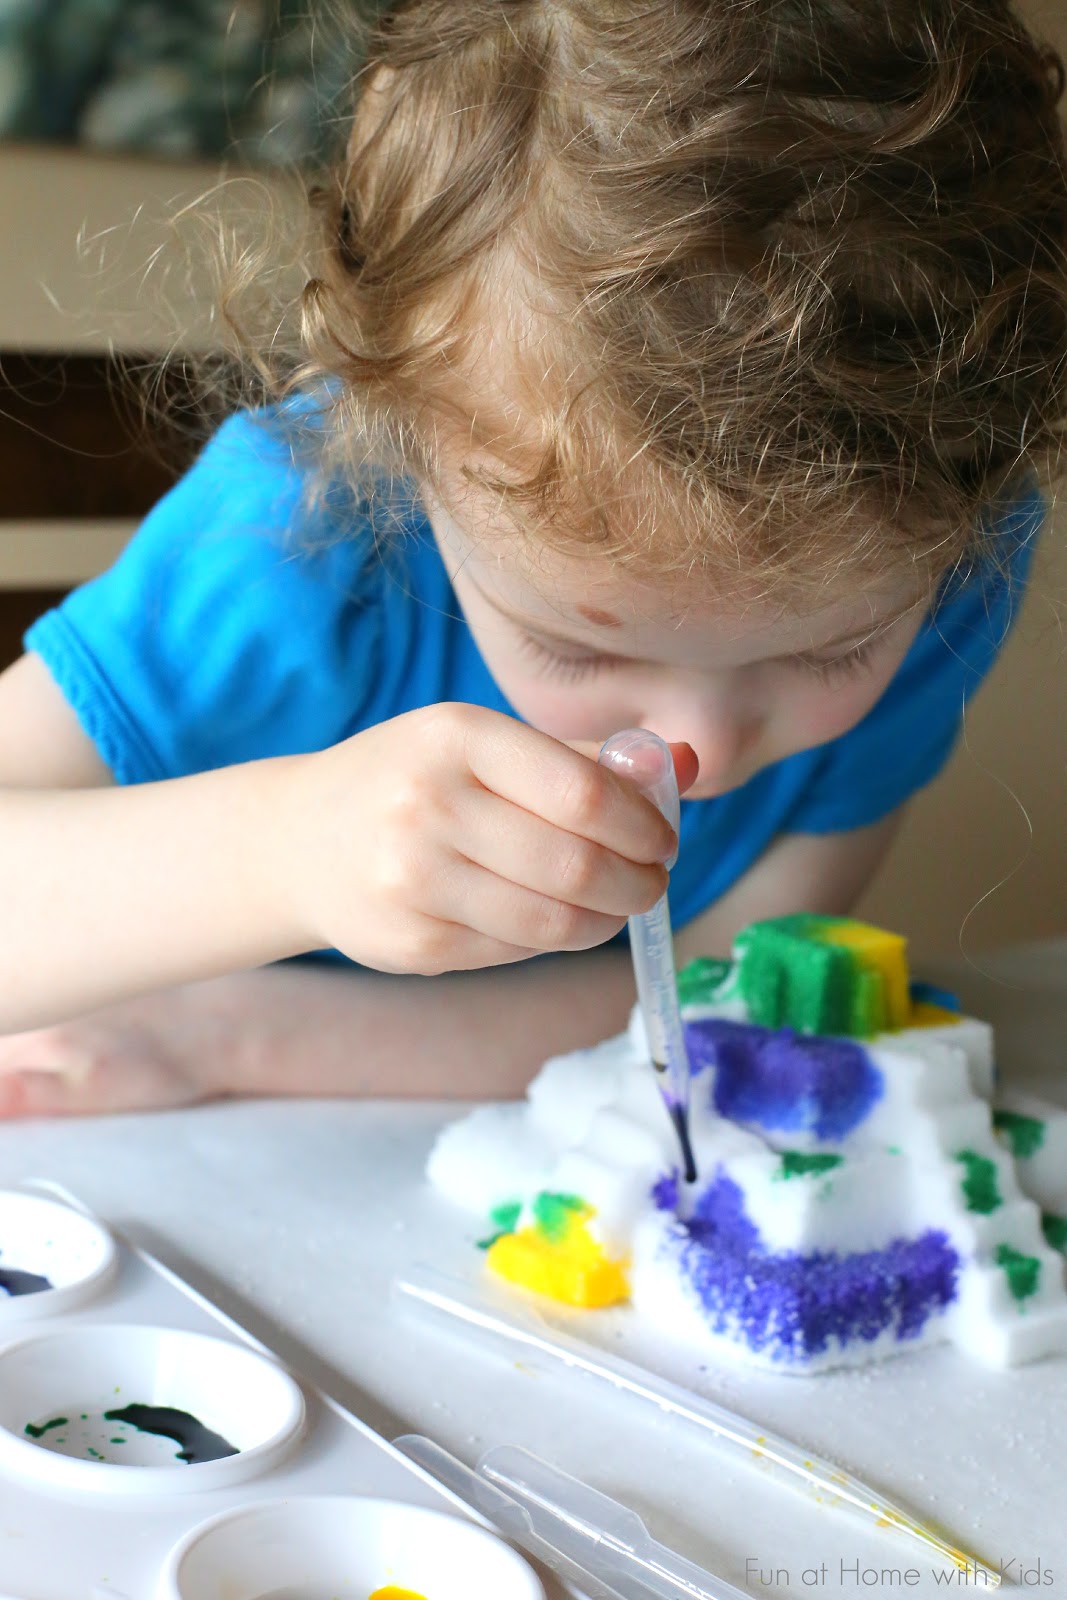
To paint the salt sculpture, we really recommend using liquid watercolors. If you don't have some, you can mix up some diluted food coloring. Though you can use a paintbrush to paint them, the bristles can disturb the salt a bit, so we recommend using eyedroppers if you can.

It's so beautiful to watch the color fan out through the salt! We never tired of it!!!
To make your own salt sculptures, you'll need:
Some sort of mold (sandcastle, drinking glass, anything you can think of!)
Table salt
Water
Add 3 cups of salt and 3 teaspoons of water to a bowl. Stir extremely well - every bit of salt should appear wet/crumbly. If there is still dry salt, continue to stir. It shouldn't be necessary to add more water, but if for some reason after a lot of stirring you still have dry patches of salt, add 1/4 teaspoon of water. Once your salt is uniformly crumbly and damp, spoon or pour it into your mold and press hard to compact it. Leave it in the mold for at least 12 hours (24 hours or more is best). After that, you can flip it over and it should slide out of the mold. Allow it to dry for an additional 12 or more hours (24 hours or more is ideal) after it's been removed from the mold. Because it takes so much time to dry, I made these after the kids were asleep one night, and didn't mention it to them until they were ready (so they didn't get frustrated with the dry times).
Check that it is dry and solid to the touch before painting it with liquid watercolors (or dilute food coloring). Before painting it, transfer it to a container or paint it in a spot where you can leave it to dry undisturbed for 12 or more hours. Once painted, it will be very delicate until it dries once again and moving it by hand will result in a crumbled sculpture.
Once it has completely dried, it is pretty solid. I'm sure if you dropped it, it would shatter, but you can easily handle/move it. You can keep the sculptures on display, or you can break them with a hammer or mallet and use the salt for sensory play or art!
Follow along with Fun at Home with Kids on Facebook, Google+, Pinterest or Subscribe by Email or Bloglovin'!
All activities here are activities I feel are safe for my own children. As your child's parents/guardians, you will need to decide what you feel is safe for your family. I always encourage contacting your child's pediatrician for guidance if you are not sure about the safety/age appropriateness of an activity. All activities on this blog are intended to be performed with adult supervision. Appropriate and reasonable caution should be used when activities call for the use of materials that could potentially be harmful, such as scissors, or items that could present a choking risk (small items), or a drowning risk (water activities), and with introducing a new food/ingredient to a child (allergies). Observe caution and safety at all times. The author and blog disclaim liability for any damage, mishap, or injury that may occur from engaging in any of these activities on this blog.


Wow! So cool and they are absolutely gorgeous!
ReplyDeleteThank you, Dyan!!!! :) :) :)
DeleteSeriously cool!!! I love it! Going to mold a bunch for my daycare kids to do. Thanks for the post and congrats on your book!
DeleteAwesome, Linda!!!! I would love to see a photo if you have a chance to snap one! And thank you!!
DeleteWow this is amazing I really want to make it hahaha. When you say a cup is like a tea glass, normal glass...? Congratulations for your book I can't wait to read it :)
ReplyDeleteDo it, Laura!!!! ;) We used a normal sized drinking glass, but one of the short stubby kind. A tea glass would be cool too, though! Try a bunch of different glasses! And thank you SO much!!! :)
DeleteLaura, do you mean when she said 3 cups? That was the measurement ☺it equals 750 ml of salt
DeleteOhhh!!!! That must have been what she meant! Thank you, Twila!!!!
DeleteWow that's so cool and colorful! Love it. Can't wait to try it out with M and her buddies. Welcome Back.
ReplyDeleteThank you so much! :)
DeleteThese are gorgeous! Well done, Asia!
ReplyDeleteCongratulations on your upcoming book :)
Thank you so much, Aleacia!!!! And thank you! I'm so thrilled you love these - you always have the coolest art projects! :)
DeleteSuch a cute project, my kids would have loved this when they were smaller!
ReplyDeleteThank you, Steph!
DeleteYou did it again!!! This is AWESOME Asia!
ReplyDeleteThank you so much, Meri!!!! :)
DeleteWhat a fun idea! And they look awesome! We have to give this one a try!
ReplyDeleteThank you, Tracey! I hope you all love them!!! :)
DeleteThese are so so beautiful! I can't wait to try this with Skyler!!
ReplyDeleteThank you, Hayley!!!! :)
DeleteOh, what a cool project!! All the scuptures look so beautiful and everybody seems to be having so much fun!
ReplyDeleteThank you, onel! We totally were!!! :)
DeleteHi there, is there a way to create the salt sculpture in just 15 min? Cause I run a weekly programme with kids and it would be hard to wait for 12h. Thanks!
ReplyDeleteYou could prep them ahead of time - then the kids could have 15 minutes to paint them. If they needed to take them home right then, have boxes or disposable trays they can use to carry them and be sure to make them in a square shape as those are the sturdiest.
DeleteCan you eat them?
ReplyDeleteThis is really wonderful! I keep thinking about all the science concepts we could discuss while exploring this project.
ReplyDeleteThank you, Deirdre! And absolutely!!!
DeleteMy thoughts exactly... Lessons are endless.
DeleteI love these! The colors are so vibrant and the shapes are fun and whimsical. I pinned this and I definitely want to try this with our children! Thank you for your great tutorial. I'd love it if you'd share this on Artsy Play Wednesday (open until Saturday night).
ReplyDeleteThank you so much, Theresa! I will try to remember to link up! :)
DeleteI LOVE this! We are definitely trying this. Thank you for such an idea. I know few friends who would love to do this with their children too so I will be sending them here. A perfect summer activity too.
ReplyDeleteThank you so so much, Royena!!!!
DeleteI am sure Aarya would break it before painting it :) But this is seriously cool
ReplyDeleteHahaha - they are pretty sturdy once they're dry, but if you get a lot of watercolors on them, they become delicate again. Still could be fun! :)
DeleteWow. Do you think it will work with sugar as my daughter is still putting things in her mouth. I shal save for when she's a bit older though. Thank you :)
ReplyDeleteI think yes, but it would probably be sticky. The sugar should take the color the same. As long as you don't have ants and don't mind the sticky?
DeleteI have made the outer shells for peekaboo Easter eggs with sugar molded just like the salt. It should work.
DeleteMy girls had a great time making these! They drizzled diluted food coloring over top and didn't have over-saturation issues (well, until they realized that would be a cool effect and purposely dumped the liquid over their sculptures to watch them "melt"). Thanks for all your great ideas! You made a long, tough winter easier to deal with!
ReplyDeleteHahahahaaha - well I bet that was fun, too! SO glad you guys tried them and loved them!!!!! :) :) :)
DeleteTotally buying the dollar store out of salt this weekend ....
ReplyDeleteYessssss! I want pictures!!!! :)
DeleteOk this is reallyyyyy cool!!!!
ReplyDeleteThank you so much, Jeanine!! :) :) :)
DeleteWOW! Can't wait to try this! going to share with all our nannies. Thank you!
ReplyDeletewww.aznannies.com
Thank you, Daniela! :)
DeleteYour blog is an EC educators dream, and some could be used with primary aged kids too. Thank you so much for sharing. Will your book be published world wide?
ReplyDeleteThank you so much, Sara! This totally makes my day!!!! :) I very much hope it will. I haven't heard the final word yet, but I will do everything in my power to make it available everywhere since about 25% of my audience is International. I should know for sure in a few weeks. :)
DeleteHi, I was wondering if when we flip it out after the first twelve hours if it's not completely dry is that normal. I tried it and when I flipped the inside still crumbled to the touch. The bottom was fairly dry.
ReplyDeleteYep! Totally normal. The plastic mold traps some of the moisture inside it. If you gently flip and allow the top to air dry for the next 12, it should be nice and solid. :)
DeleteThanks!
ReplyDeleteHello, I tried this yesterday but it didn't work for me. The open part of the mould once turned over fell apart and the top hold its shape but once lightly touched crumbled. Any ideas what I might have done wrong? I used fine salt would that be it?
ReplyDeleteHmmmm. It sounds like either the salt wasn't wet enough to bind together OR that it wasn't finished drying. Was the salt that crumbled wet? If yes, it might be humid enough where you live that you will need to do a longer drying time. If the salt was very dry, try adding 1-2 more Tablespoons of water. The only other guess I have is if you used a soft mould. It seems to only work well with hard moulds...Hopefully this helps! I used table salt, which is pretty fine, so I don't think that is it.
Deleteyes the salt was still very dry so i tried with a lot more water now to see how it goes.. I live in Cyprus which about 40 degrees celsius and humidity levels around 70 - 80%
DeleteI'll keep you posted when I turned them over
Oh so interesting! I bet the humidity levels will affect it a lot - it's like 5% humid here. I hope this second batch works better!!!!
DeleteAny tips on getting it out of the mould? I couldn't get it out without damaging it :(
ReplyDeleteAre you using hard-sided moulds? For us, I just tipped it over and it slid right out. I think it clung a bit more when I used the drinking glass mould, so I left it right-side up for a few hours and then it slid out. Is it sliding out in two pieces? If yes, it may be that there is a dry patch of salt that didn't get coated with water. Let me know if there's any other way I can help! So sorry it's causing trouble!
DeleteI was, I used a pretty flared wineglass. It is stuck firm! :( Maybe I'll try again with a soft mould.
DeleteIf you can, try leaving it upside down overnight. Hard plastic seems to be the easiest. Glass seems to hold it a bit tighter - but soft moulds tend to crumble when you remove them. Let me know if leaving it overnight does the trick! Fingers crossed!
Delete(1) Stick the tray or plate on the open side of the mould (2) holding the plate and mould tight, turn it 180 degrees (3) Then take the mould off.
DeleteHi,
ReplyDeleteIm thinking of trying this out with the kids I babysit, looks fun!! I was wondering once the sculpture is finished... for how long can it be on display (without touching it or moving it.. ) after certain time (days, weeks, months), does the sculpture fall apart on its own?? Thank you in advance!! :)
It would probably depend on humidity and other factors - kept out of direct sunlight, I'd say definitely weeks, very likely months. We kept ours for over a month, but then my daughter wanted to demo them with a hammer (really fun), so I'm not sure what the max would be for sure. Hope that helps a little! :)
DeleteCan silicone molds be used at all?
ReplyDeleteYes, but they tend to be trickier. The salt can stick a little more to them and when you're trying to remove them, the wiggly sides can knock some salt loose. As long as you wait a LONG time and then proceed carefully, you should be fine. The hard sided plastic containers are just much easier to work with. :)
DeleteIs it possible to make the salt too wet? My Wednesday night kids class is going to mold these tonight and painting them next week...But they're going to be just devastated if the molds dont set because they were too dry...
ReplyDeleteIt is, but if you have a week to let them set, go ahead and add a little extra water to be on the safe side. The salt should look crumbly when the water is evenly distributed --- you might want to do a quick spot check before they add it to the mold to be sure that there aren't any dry pockets of salt.
DeleteI may have left them in the mold too long :/ they are stuck. Any idea on how to get them out?
DeleteGravity is your best friend. The one I tried in glass stuck a little so I just propped it up a tiny bit and the weight of the salt pulled it out overnight. Hope that helps!
DeleteI love this activity and am wondering if you think it would work with a sphere. I was thinking about using a spherical ice mold so that the sculptures will resemble planets. Do you think it would be possible to put a string in the middle of the mold so that it would be hangable?? Wondering if the salt structure would be strong enough....
ReplyDeleteThat would be SO COOL! I think it's definitely possible that they could hold string. They are a tiny bit delicate when you first remove them from the mold, but after painting and drying again they are pretty hardy (in my experience). I'd try one and not try hanging it until after the second drying. Let me know if it works - such a great idea!
DeleteWe use a *lot* of salt for our Art Projects!! But never thought of making salt castles! I saw this post and pulled out our moulds right away. Unfortunately I could find only one mould so made only 1 salt castle, my kid was thrilled to paint it ! Thanks for the idea!
ReplyDeleteSo glad you enjoyed it! It's one of my favorite inventions of ours! :) :) :)
Deletewhat a wonderful idea. going to try this with the kids on Thursday. id you publish your book what is the title and how can I buy it?
ReplyDeleteThank you so much! I actually have two books now! You can find a ton of links to all sorts of different countries here: http://www.funathomewithkids.com/p/book.html
DeleteIf you are in the US they are available online and in stores almost everywhere (the second one will be once it's out in a few weeks). :)
The directions say 3 teaspoons of water. Should that be tablespoons? Mine came out very crumbly. I am also considering adding a small amount of modpodge n the water to make them extra firm. Such a cute project!
ReplyDeleteThree teaspoons well-mixed. You can do more, but it will take much longer for them to dry out -- depending on where you live, it could take weeks if you add more water. The goal is to make it *just* wet enough that it holds together and then allow it to dry out completely. You can try modpodge, but I don't know how it will affect the ability to paint them after. Could be fine -- I just haven't tried it so I'm not sure. Hope that helps!
DeleteWonderful!!!! M (4yrs) & I (Grama) Added a Twist to Sand Castle Mold! Took a Clear Plastic Easter Egg and put Egg, rounded end left above bottom of Sand Mold, when Salt Mold was Dry, Removed bottom of Egg so now Castle will sit Flat. We Added a Battery Tea Lite!!! Our Salt Castle NOW GLOWS!!! M & I made our Paint Glue, Forth Paint, and Forth Water. This made Salt Sculptures more stable. Fantabulous Site. €:)
ReplyDeleteThat sounds amazing! What a fantastic idea!!!
DeleteLove this idea! Hoping I can try this with my sons soon.
ReplyDeleteAwesome! Hope you love it!
DeleteI love these but didn't have much luck making them in silicone molds. Not sure if they were too deep and I didn't let them dry long enough?? Have you tried these with silicone molds?
ReplyDeleteSilicone is a lot tougher to use than a hard-sided mould. I would pack them extra hard and let them dry extra long. Theoretically they should slip out on their own at that point.
Delete