
If there's one thing we can't get enough of around here, it's COLOR. Well, that and liquid watercolors, but those two kind of go hand in hand. As you know, Seattle has some dreary and gray winters. To bring the feeling of spring to our house, S and I decided to work together to figure out how to make the brightest and most vibrant coffee filter flowers we could.
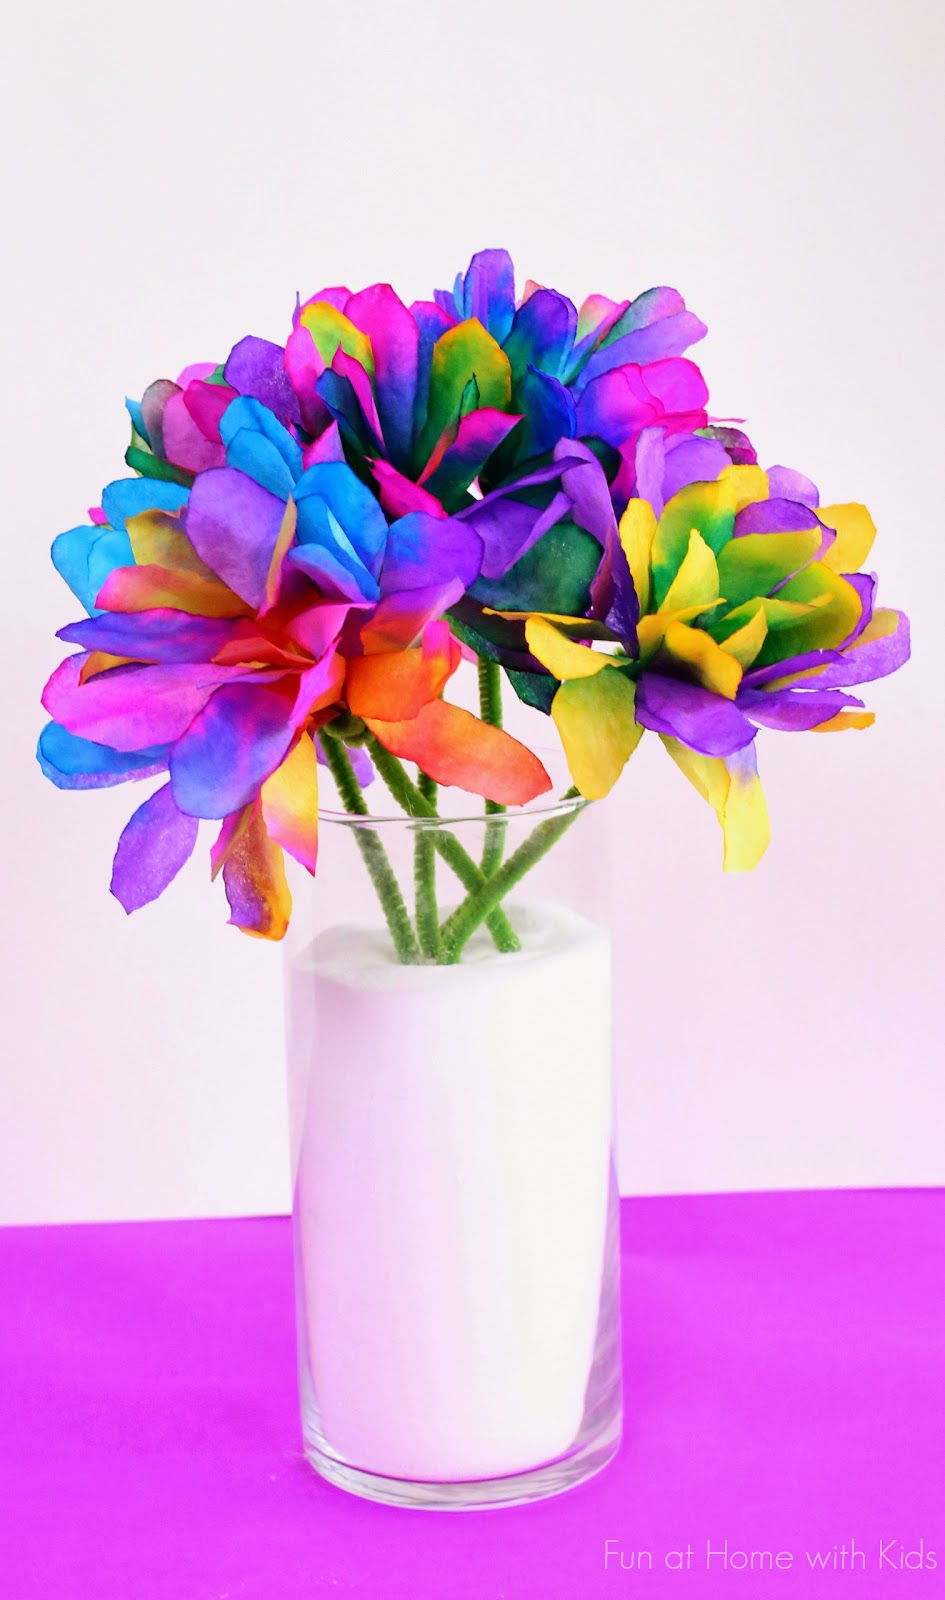
They are sooooo pretty. I stare at them a lot.
This post contains affiliate links for your convenience.
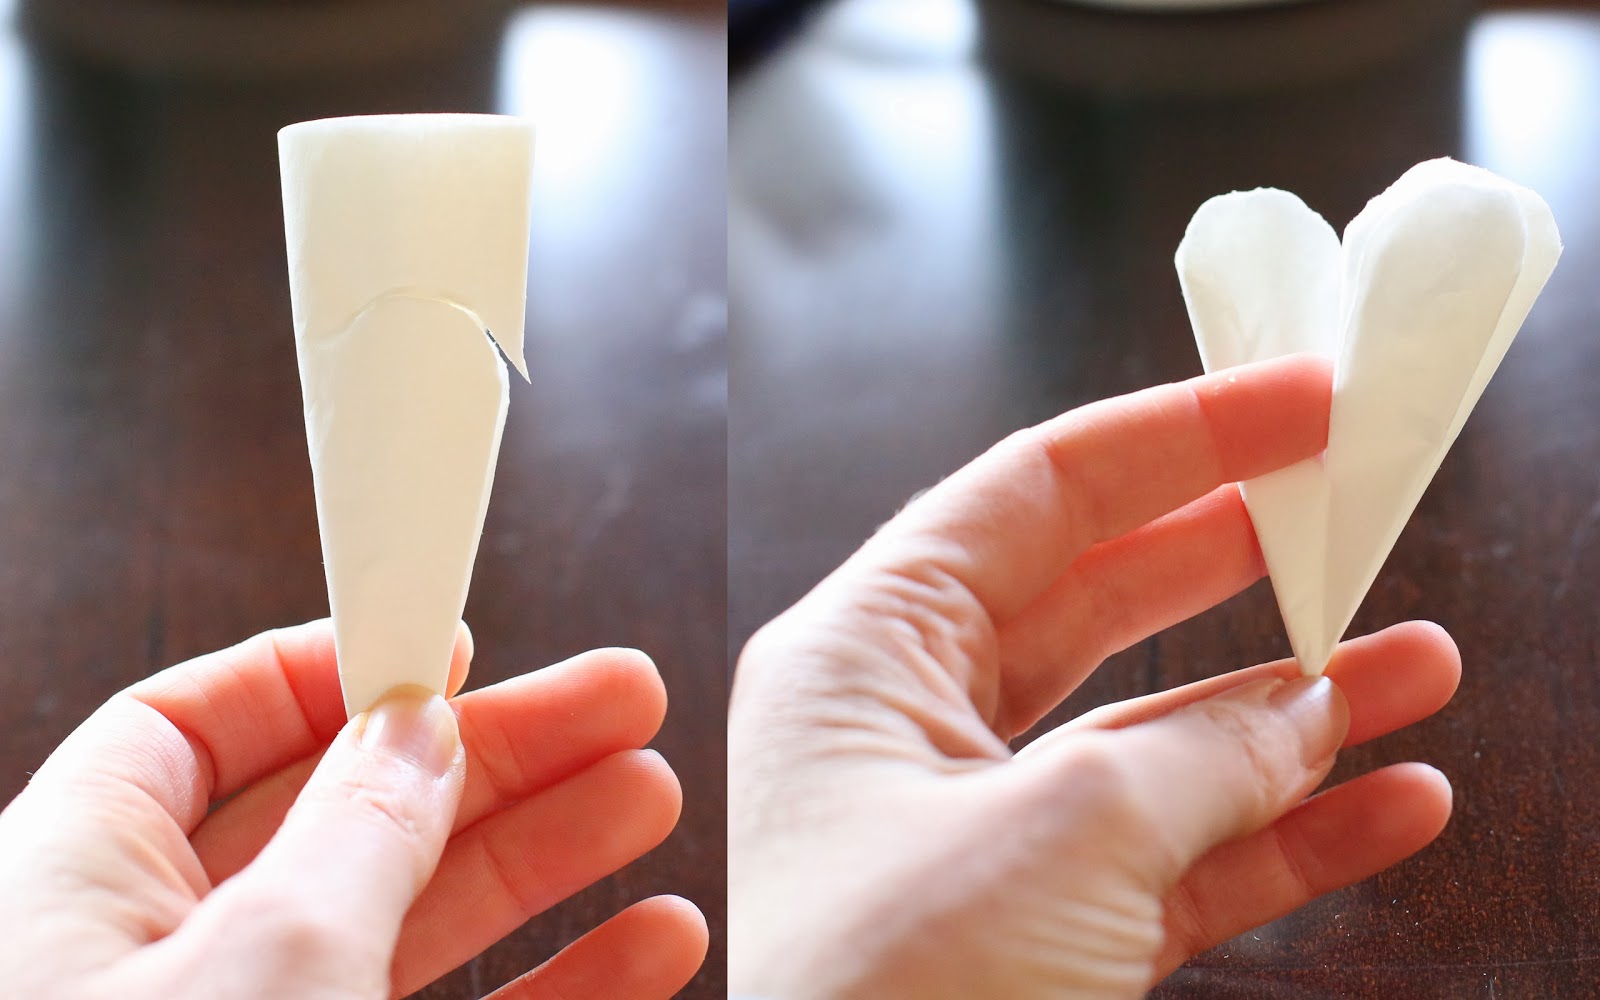
So first thing's first. You need some large white coffee filters . Flatten them out, then, laying two on top of each other, fold them in half, then fold in half again, and once more, and finally one last time. That's a total of four times where you fold it in half. It should look like the coffee filter on the left. Now about 1/3 of the way down, cut an arch like you see on the left. Once you've cut all the way through, carefully unfold the coffee filter until they are again laying flat (directly on top of one another). Carefully cut down the folded lines about 2/3 of the way toward the center. This will give your petals more movement.
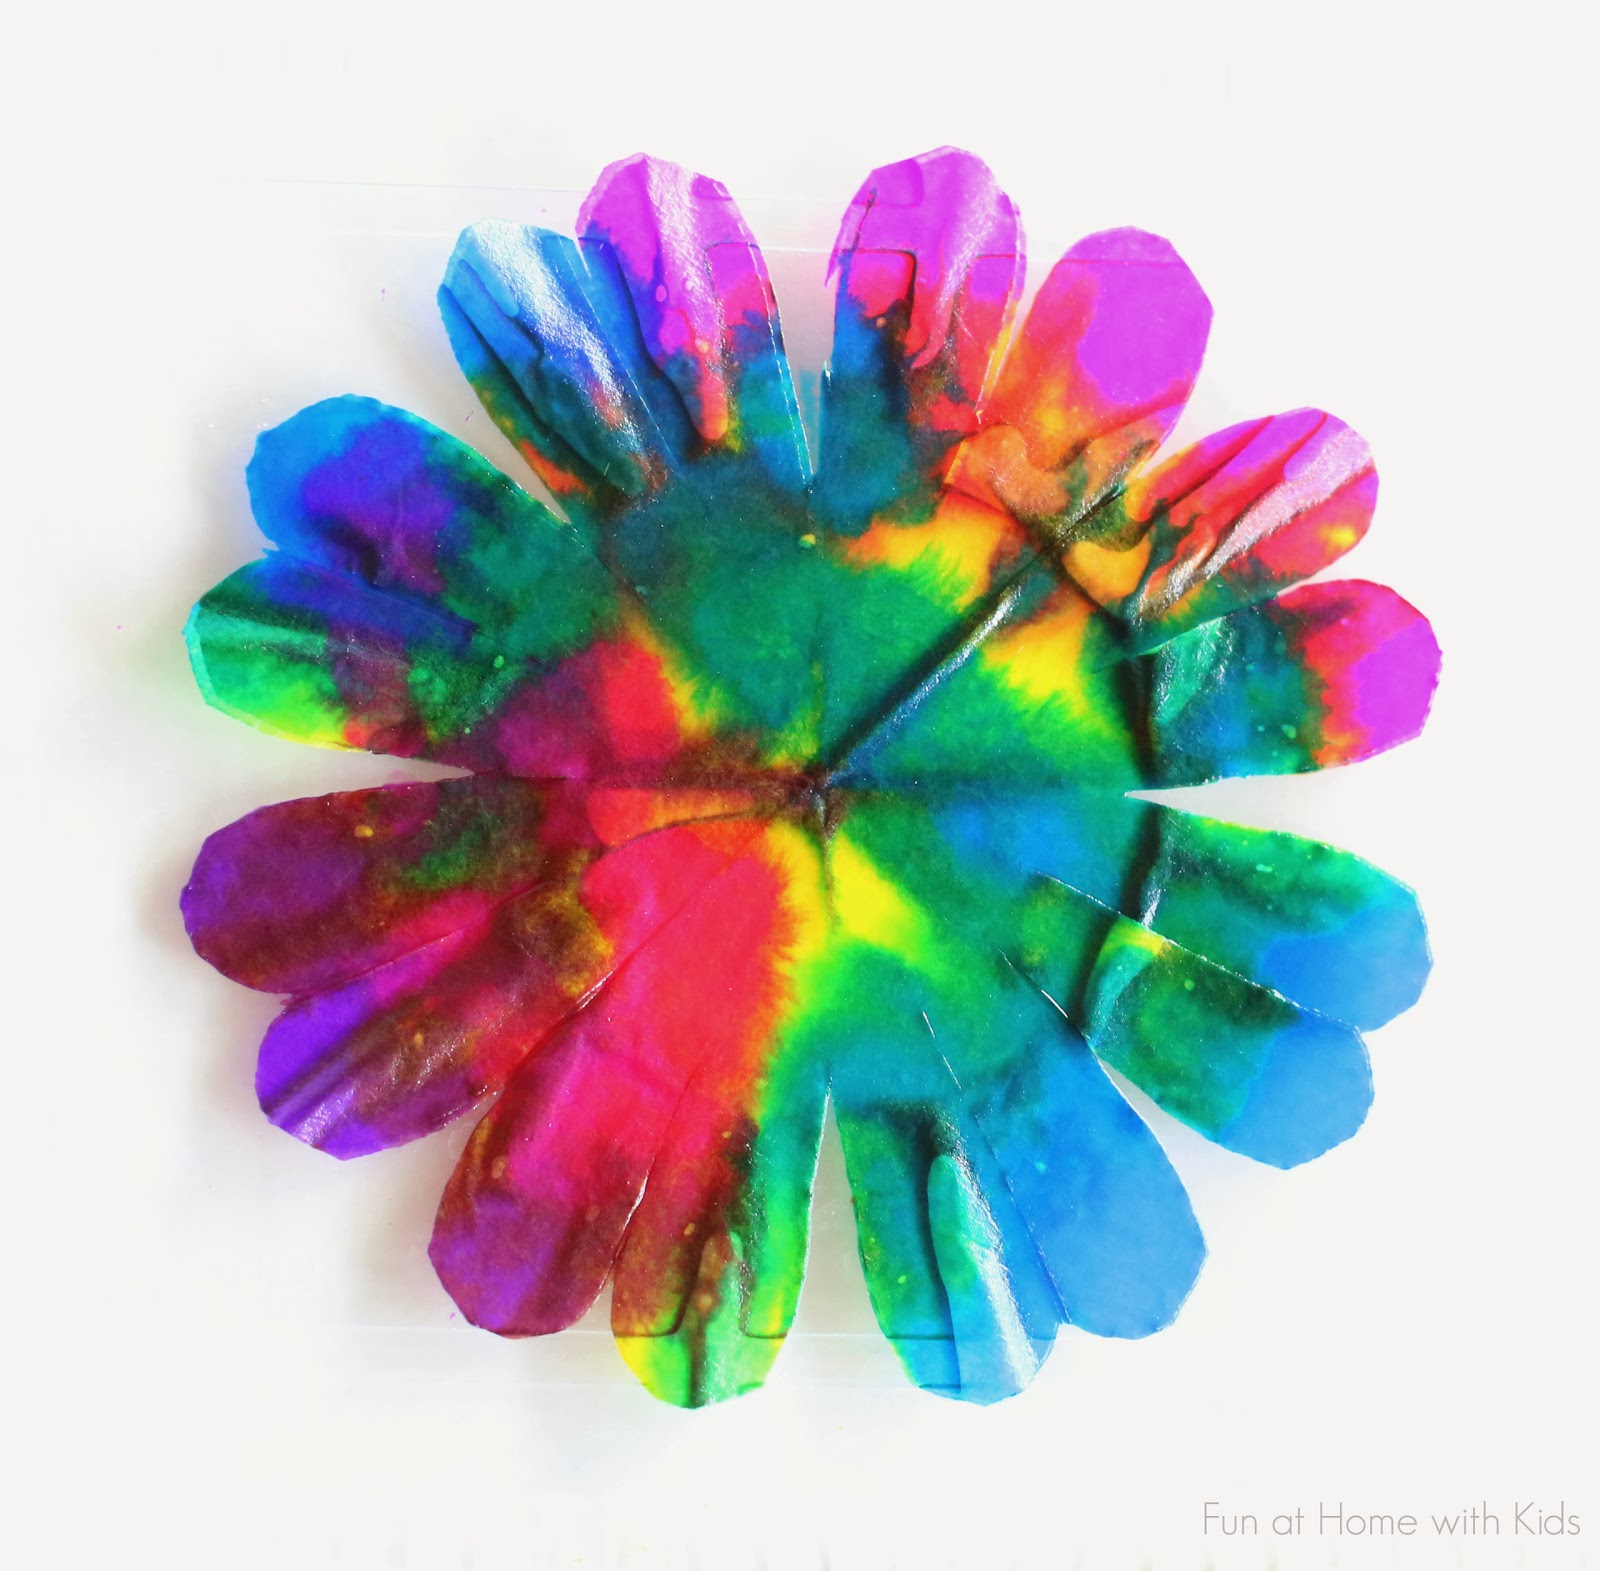
After you've cut along the lines to give the petals a bit more separation, lay your double-thick coffee filter flower flat in a tray or dish. Using an eyedropper, have your child add the smallest number of drops of liquid watercolor possible to completely color the flower (note: if you do not have liquid watercolors, you can use slightly diluted food coloring in its place). Adding too much color will decrease the brightness. S and I discovered that just two well placed drops were enough to color each petal. It is so fun to watch the colors mix and swirl when they meet!

When you're done, there should be very little overflow of color into the tray, as you can see here. Carefully transfer the completed flower to something that is resistant to absorption - a plastic tray, or a plastic wrap covered tray. Placing them on something like a paper towel will again decrease the brightness.
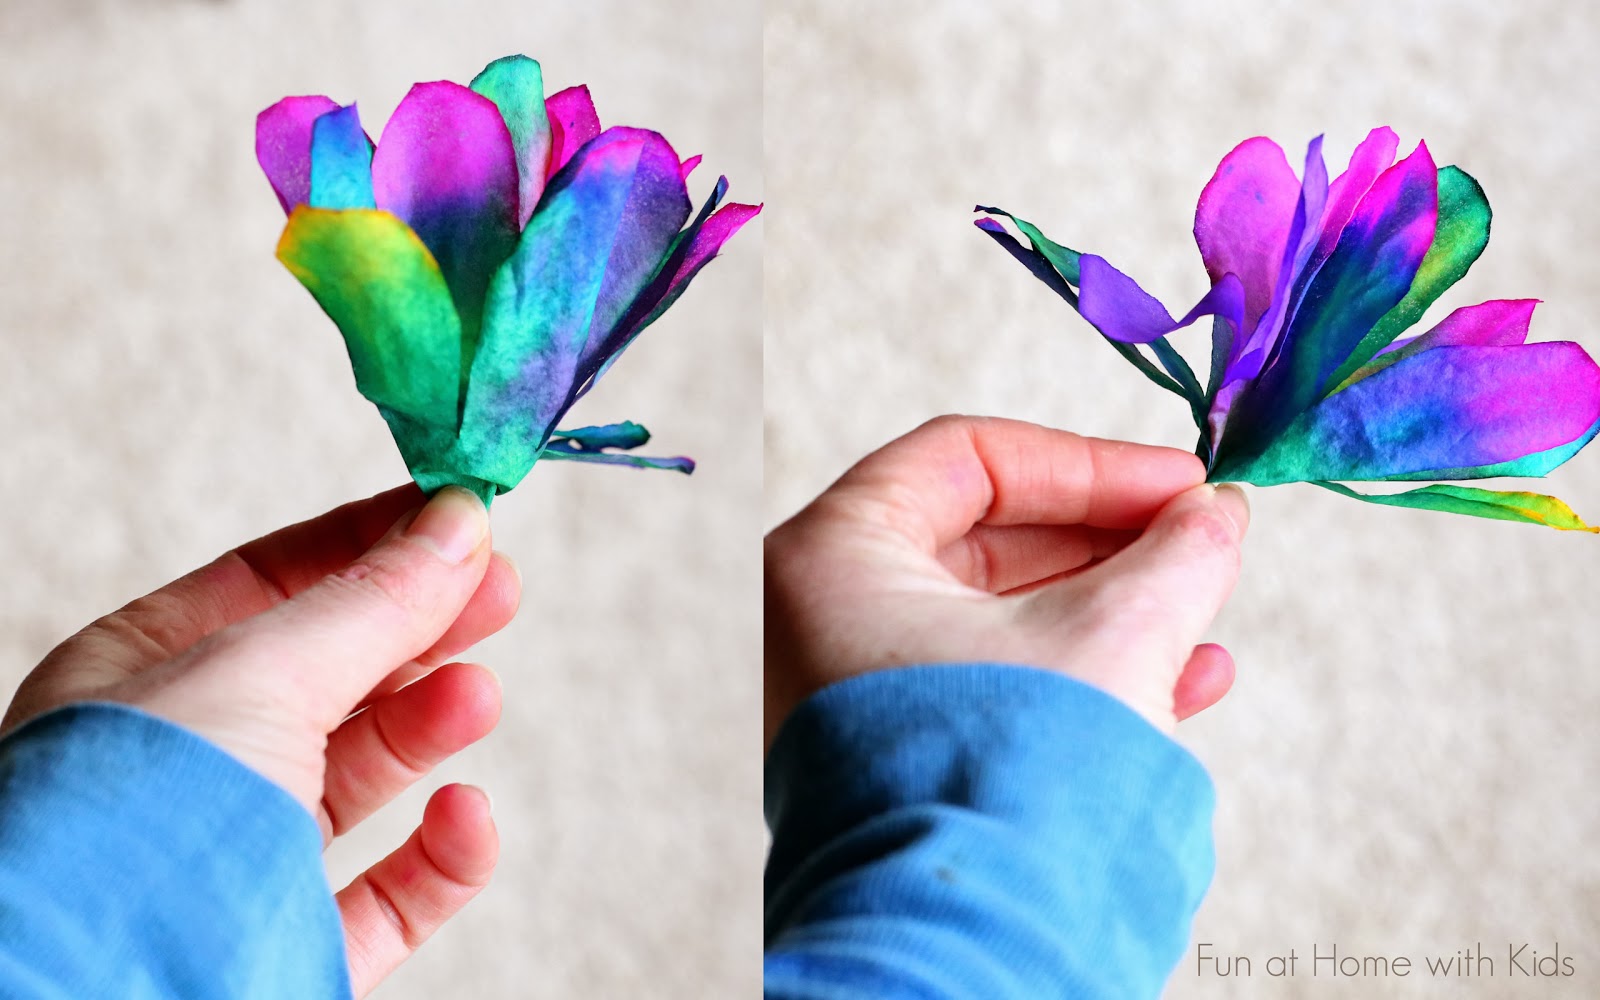
Allow them to fully dry (3-4 hours at least), then carefully separate the two coffee filters from each other. Gather one up, adding a small crimp/twist to hold it together as you see on the left. Then fluff the petals a bit as you see on the right. Next take the second duplicate filter and wrap it around the outside of your first. I rotated the copy flower so that the patterns were offset. I also added a dab of glue at the base between the two flowers to hold them together. Because I'm impatient, I used hot glue, but if you are a patient person, you can use regular glue and just wait for it to dry before attaching stems. :)
Using hot glue, I attached the base of each flower to a green pipecleaner and then placed them in a salt filled vase from the Dollar Tree. :) You can use marbles or whatever you would like as a vase filler - I just loved the contrast between the white salt and the colorful flowers.

Thanks to our beautiful flowers, it's been feeling like spring in our house for weeks now! Now if only the weather would get the hint....
Follow along with Fun at Home with Kids on Facebook, Google+, Pinterest or Subscribe by Email or Bloglovin'!
All activities here are activities I feel are safe for my own children. As your child's parents/guardians, you will need to decide what you feel is safe for your family. I always encourage contacting your child's pediatrician for guidance if you are not sure about the safety/age appropriateness of an activity. All activities on this blog are intended to be performed with adult supervision. Appropriate and reasonable caution should be used when activities call for the use of materials that could potentially be harmful, such as scissors, or items that could present a choking risk (small items), or a drowning risk (water activities), and with introducing a new food/ingredient to a child (allergies). Observe caution and safety at all times. The author and blog disclaim liability for any damage, mishap, or injury that may occur from engaging in any of these activities on this blog.


These are gorgeous! A great thing to tide us over until we see the real thing! :)
ReplyDeleteThank you, Emma!!!!! :)
Deletei am totally agree with you!
DeleteI love the bold colours! That's what we need - it is so grey outside in UK now :-)
ReplyDeleteYessss, out with the gray, in with the bright happy spring colors! :)
Deleteya right!
DeleteWe tried this project out today! Not sure ours will be as gorgeous as yours, but we're still getting the hang of liquid watercolors. Now to get some more green pipe colors to finish them off so we can really see how they turned out. I'm definitely in the mood for lots of spring color here, too, so I love that you have ideas like this. I have some spring plans for your crystalizing watercolors, too. :)
ReplyDeleteYAY!!!! I'm so glad!!! And awesome - I can't wait to see what you come up with!!! :)
DeleteI'll keep you posted! We really are so glad we found your blog!
DeleteYay! Me too! I love seeing the photos of your two little guys. :) :) :)
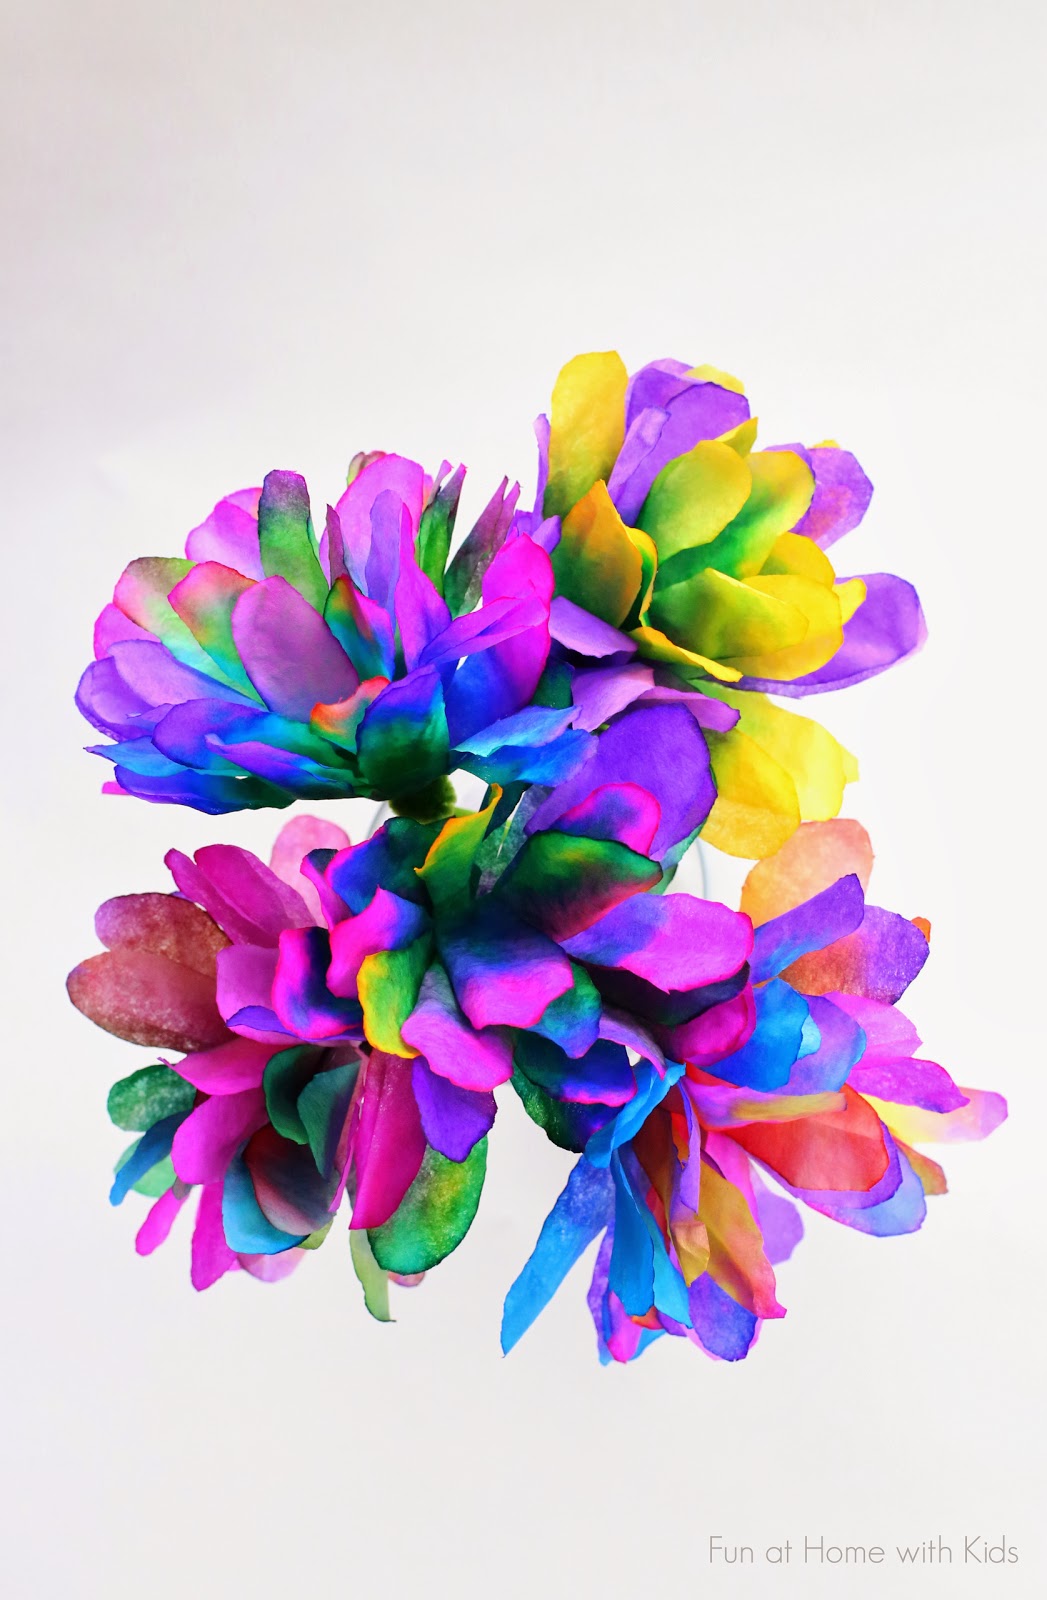
DeleteThese are so pretty - thank you! I think your second photo should be turned into a print and framed as modern art.
ReplyDeleteThank you so much, Ann! And I totally think that one looks like a painting! Maybe I will! :)
DeleteI love how these turned out. I have got to get my daughter to help me make some of these for her room. She just loves these kind of things!
ReplyDeleteThanks, Steph! I hope she has fun making them! :)
DeleteThese are gorgeous! I've never used liquid watercolors on coffee filters and I'm so excited to try it out! :)
ReplyDeleteOh you will love it, Rachel!!!! And thank you!
DeleteThese flowers look vibrant and gorgeous. Since the spring is coming, this project seems perfect for me and my kids to have fun and at the same time bring some spring colors to our apartment. Thanks for sharing!
ReplyDeleteYay! I hope you love them, Cindy! They really do make it feel like Spring! :)
DeleteI'm allergic to flowers and I found that coffee filter flowers are a great alternative to have and inexpensive to make!!!
ReplyDeletePerfect! And they never die, either! :)
DeleteLove this! I featured and linked it in my craft/diy blog in a "Inspired by Watercolor" post. (It should be posted today, if not, it'll be up tomorrow)
ReplyDeleteGreat Job. I'll have to remember this for Mother's Day!
That's great as long as you only use one photo and link for the tutorial! Thank you! :)
DeleteWhat a fantastic idea - I've done a number of different versions of paper flowers but these are very different and creative. I can't wait to give them a try with my kids! Thanks for the idea :)
ReplyDeleteThank you so much, Pleasantville Mom! :)
DeleteI just advertised for you...my drive through espresso barista saw the bunch of flowers we made for Teacher Appreciation week in my car and asked about them. I let her know where she could find the instructions! I will try to send you a photo, Thanks!
ReplyDeleteHahahaha - that is SO awesome, Margaret! Thank you!!!! And I would love to see a photo! :)
DeleteLove it! Beautiful and simple enough for us "artistically challenged!"
ReplyDeleteHahahaha! Perfect, Kathy!
DeleteWow, they are so pretty. what a fantastic project and not just for the kids either!
ReplyDeleteThank you, Julia! And for sure!! ;)
DeleteMy K students painted coffee filters today. Now that I'm home I wanted to practice cutting them out and the only scissors I could find (because the rest are at school!) were pinking shears. I went ahead and cut and the zigzag pattern on the edges adds even more texture to these gorgeous flowers! A happy accident!!! Who knew!!
ReplyDeleteOh awesome! I bet they are gorgeous!!! :)
DeleteWhat to do with a 4 year old on a sick day? This! The suggestion of less is more really does help to keep the colors bright (although my daughter did not want to heed my advice as she was "doing a style"). No pipe cleaners so we strung them on bakery string to make a garland for her room. They're gorgeous!
ReplyDeleteHAHAHAHA I love "doing a style". What a cutie. Hope she's feeling better and LOVE the idea of a garland - perfection!!!
DeleteI did this project with my 6-7 grade girls class at church. We added ribbon to the vases and a couple of the girls used paint pens to write on their vases. Turned out good! The girls had a lot of fun making these for their Mom's. Thanks for the idea!!
ReplyDeleteWhat a wonderful idea for a Mother's Day project! So glad to hear it went well!!! :)
Deletebeautiful post! great idea...thanks for sharing.
ReplyDeleteThank you so much! :)
Deletei like these flowers very very very much!
ReplyDeleteThank you so much! :)
DeleteI love coffee filter projects, they are so much fun. Mine never look as lovely as this though! It's beautiful!
ReplyDeleteI included it in a post I did with my favorite rainbow crafts, DIY projects and recipes! I'd love for you to take a peek and share if you think you're audience would be interested in it.
http://hellocreativefamily.com/27-rainbow-crafts-diy-projects-and-recipes-your-family-will-love/
Best Wishes,
Crystal
Thank you for including me! :)
DeleteI used a hair dryer and dried ours in about ten seconds.
ReplyDeleteGreat idea!
DeleteVery beautiful flower
ReplyDeleteMy daughter is very very love it
Thanks
Thank you! :)
DeleteOMG... This is so awesome... thank you so much
ReplyDelete