
When my friend Niki shared her family's recipe for making Giant Easter Eggs, I knew we had to try them! Thank you to Niki for letting us share your family tradition with everyone!!! It's so much fun!
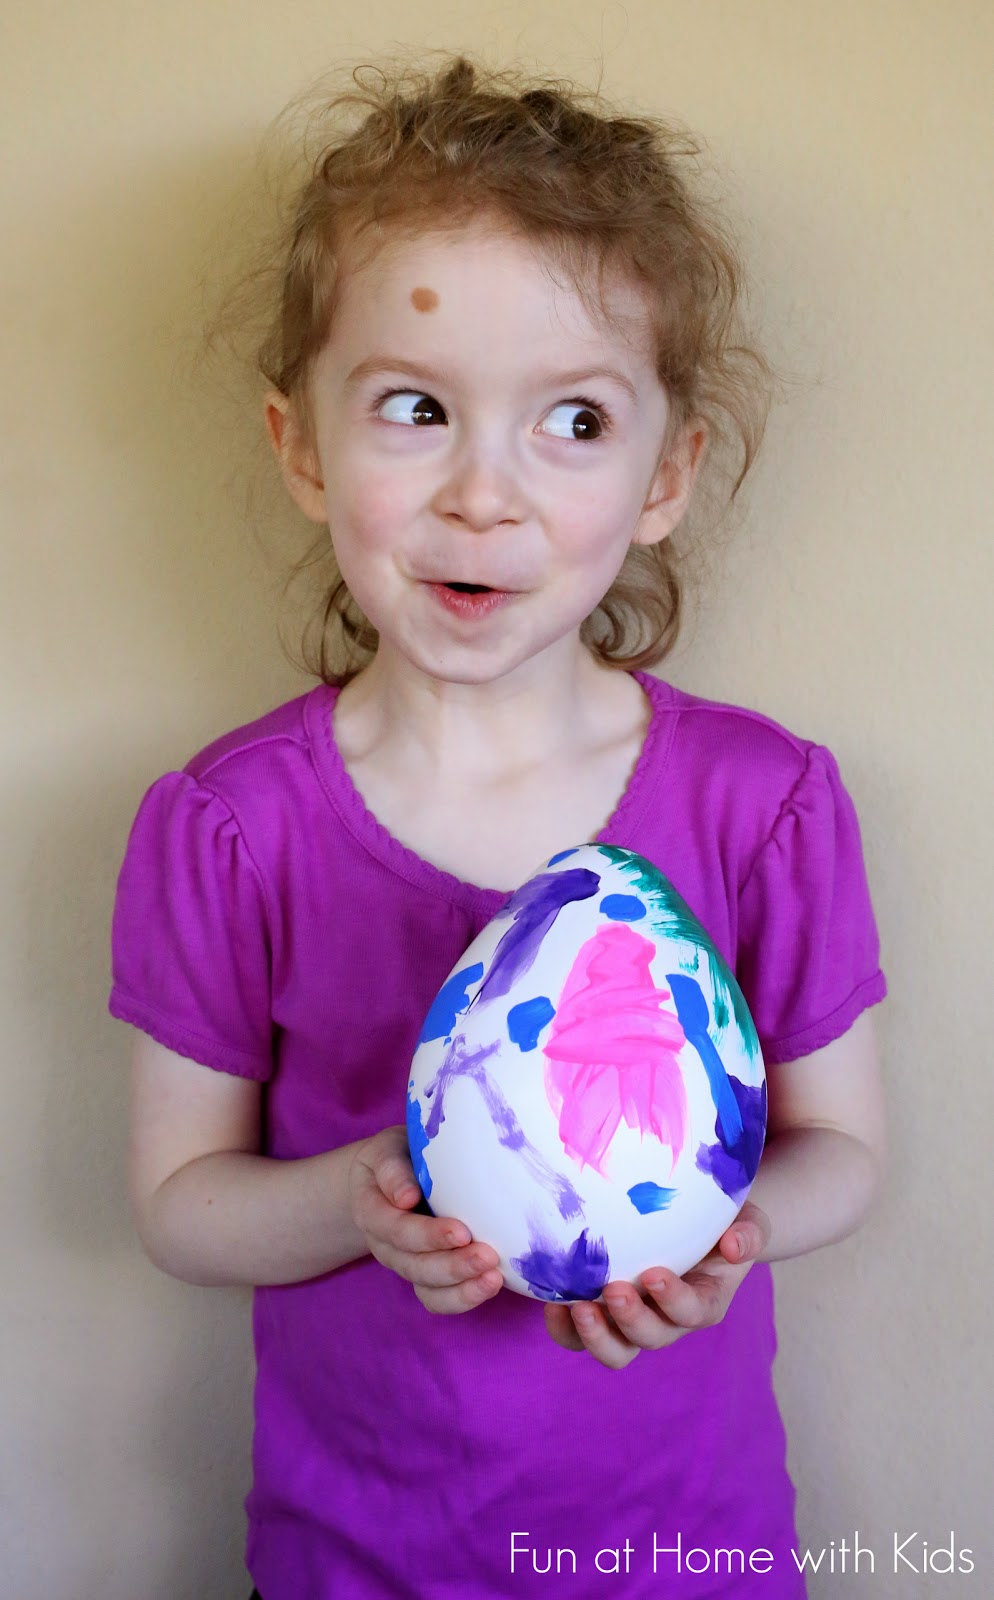
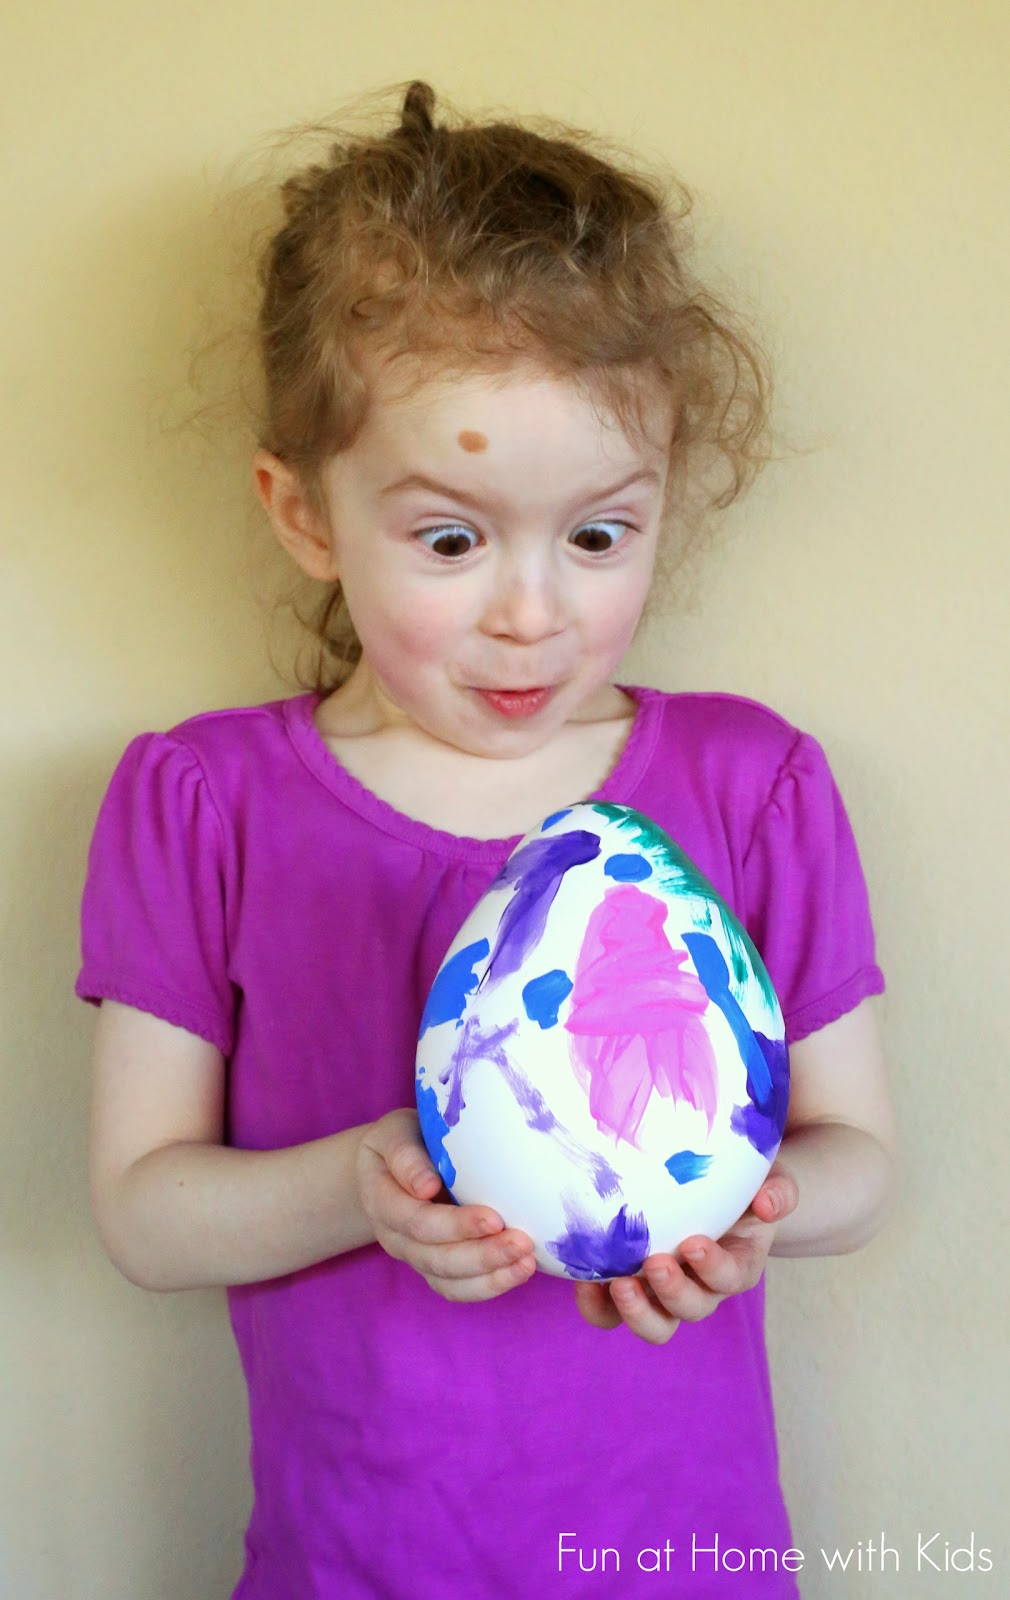
I had quite the adventure learning how to make these eggs. I initially wanted to make them colored and have S decorate them with a white paint pen, but the colors would not cooperate! Liquid watercolors worked the best, but I could only get very light pastels unless I used such a significant amount that it wasn't worth it. Food coloring looked great initially, but as the eggs dried, they became horribly blotchy. So the best way to make these eggs is plain. And then you can decorate them however you please. S wanted a whole array of acrylic paints to choose from in decorating her egg.
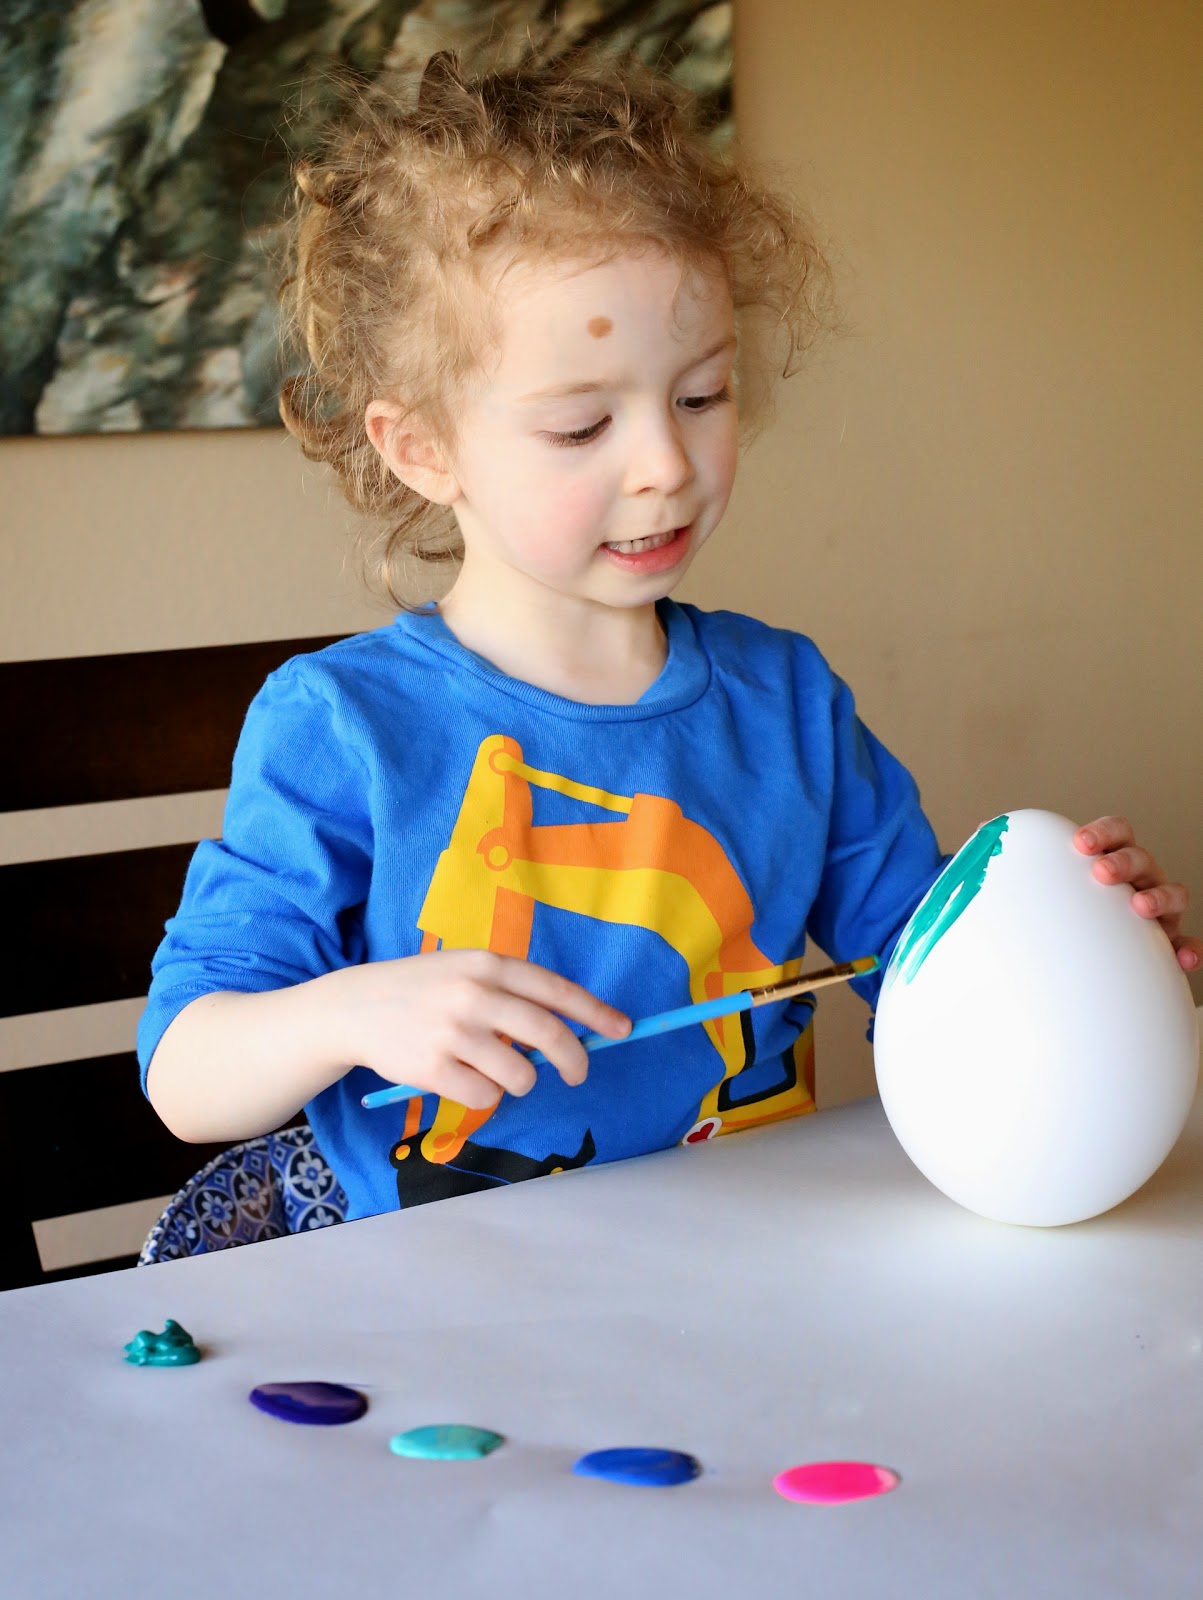
Making these eggs is definitely a grown-up job as they can be a little finicky. The end product is SO cool though, I ultimately think they are worth a bit of patience and careful handling. To make your own Giant Easter Eggs you'll need balloons, Plaster of Paris (which you can get by the bucket at a craft store or home improvement store), and Squeezy Bottles . We found that acrylic paints did the best job for decorating the finished eggs. We tried making regular sized balloon eggs, and they were really cool, but fairly delicate. I found that the smaller 5 inch balloons
produced stronger eggs that were a bit easier for kid hands to handle, so that's what we went with.
. We found that acrylic paints did the best job for decorating the finished eggs. We tried making regular sized balloon eggs, and they were really cool, but fairly delicate. I found that the smaller 5 inch balloons
produced stronger eggs that were a bit easier for kid hands to handle, so that's what we went with.

For 5" balloons, mix 1/2 cup plaster of paris with sliiiightly less than 1/2 cup of water (double the recipe for a standard sized balloon). You want your plaster mix to be thick, but not so thick that it doesn't squeeze out of your Squeezy Bottle
. If it's too watery, it will take forever to set inside the balloon and I am just not that patient, ha! I used a funnel from the Dollar Tree to add the Plaster of Paris and water directly into the squeezy bottle and mixed it there, but you could mix it in a cup or other container and pour it into your squeezy bottle.
Once your squeezy bottle is full of mixed Plaster, blow up your balloon. With the balloon pinched shut in one hand and the squeezy bottle in another, quickly insert the squeezy bottle into the balloon opening and pinch the balloon shut around the neck of the squeezy bottle. Squeeze all of the plaster into the bottle, then quickly pop the squeezy bottle out and tie off your balloon. Now shake your balloon to coat all the sides with the plaster mix. If you've made thick enough plaster, it should start setting within a minute. If your plaster is watery, you may be shaking and/or rolling the balloon for some time. You will feel the sides of the balloon begin to firm up - and once you do, it's time to set your balloon down to dry overnight. I set ours carefully in a bowl. If you place them like an egg (fat half down), it will make a flatter spot so the finished egg will actually sit.
Leave your balloon to set for several hours, then caaaareeeefulllly use a pair of scissors to cut the balloon off. The egg will still be wet and very breakable at this point. So be cautious. Once the balloon is off, let your egg dry for at least 24 hours. During this time it will harden and be much less fragile (though if you drop it, it will still break). It will also dry out enough that you can paint. If you paint before the 24 hours are up, the moisture leaching out from the inside of the egg may make the paint run.
And voila! You will have your very own Giant Easter Eggs!
Follow along with Fun at Home with Kids on Facebook, Google+, Pinterest or Subscribe by Email or Bloglovin'!
All activities here are activities I feel are safe for my own children. As your child's parents/guardians, you will need to decide what you feel is safe for your family. I always encourage contacting your child's pediatrician for guidance if you are not sure about the safety/age appropriateness of an activity. All activities on this blog are intended to be performed with adult supervision. Appropriate and reasonable caution should be used when activities call for the use of materials that could potentially be harmful, such as scissors, or items that could present a choking risk (small items), or a drowning risk (water activities), and with introducing a new food/ingredient to a child (allergies). Observe caution and safety at all times. The author and blog disclaim liability for any damage, mishap, or injury that may occur from engaging in any of these activities on this blog.


Verrrrrrry cool!
ReplyDeleteThank you!!! We thought they were pretty amazing! Niki's family is SO smart!!!!!
DeleteHow the heck did you get these to be so thick and perfect? We just did this project and the solution as mixed from your recipe was very runny, so we added more plaster--we actually did 4 different versions and all cracked in the balloons as they dried...is your's solid or just a shell? I'm confused how you got this to turn out so great!
DeleteAhhhhhh! How frustrating! I did have that happen to me once - the egg cracked in the balloon as it dried - and it happened because I didn't add enough plaster and the balloon was too big (I'd used 1/2 cup plaster + 1/2 cup water for a regular sized balloon). Mine are just shells. Did you get the smaller balloons? Are you shaking until the plaster doesn't move anymore and then allowing the balloon to sit untouched for 3-4 hours? It sounds like the trouble is that the plaster coating on the inside of the balloon isn't thick enough. If you were willing to try again, I'd blow the balloon up less, add more plaster, and shake it really well until you can't hear the plaster moving anymore. I suspect it's just coating too thinly. Sorry it's giving you so much trouble!
Deletehi there, is Plaster of Paris same or similar to Polyfillia? x
ReplyDeleteYou know, I am not sure at all! I tried to figure that out just now. It's very possible. Plaster of Paris comes in a bucket as a powder - not sure if Polyfillia is the same? It looked to be more of a dough when I was nosing around on the internet just now....
DeleteOk awesome project, but the expressions S is making I love! So cute.
ReplyDeleteHahahahhaaa, thank you Amber! Love that crazy girl of mine! :)
DeleteSooooo ya think it would be possible to stick something inside it? So it could be like a suprise when the kids breaks it?
ReplyDeleteI hope so! I didn't have a chance to experiment with it more - but I want to try making little dinosaur eggs with them! I *think* it would work - the only trouble might be that whatever you stick inside might get some plaster on it...
Deleteyou could easily use a Dremel or other rotary tool to cut it in half fill the base then glue it back together. After just brush a little plaster along the seam to hide it.
DeleteThese are fantastic! Definitely want to try these!
ReplyDeleteThank you, Melissa! We're so glad our friend Niki taught us how!
DeleteOh we have to do this ......
ReplyDeleteYes you do!!!
DeleteSorry - me again - but I was thinking what would happen if you put food coloring into the plaster & added glitter - then the kids could mix the mixture (my kids love to mix) and you pour it in - making a wonderful sparkly egg as a result ..... hum .... experiment time.
ReplyDeleteUnfortunately the food coloring turns all blotchy. We used like 20 drops - maybe if you hit a certain point of saturation it wouldn't blotch out? The glitter I think would work? Though maybe it would clump. Hmmmm. Let us know if you figure anything out!!!!
Delete