
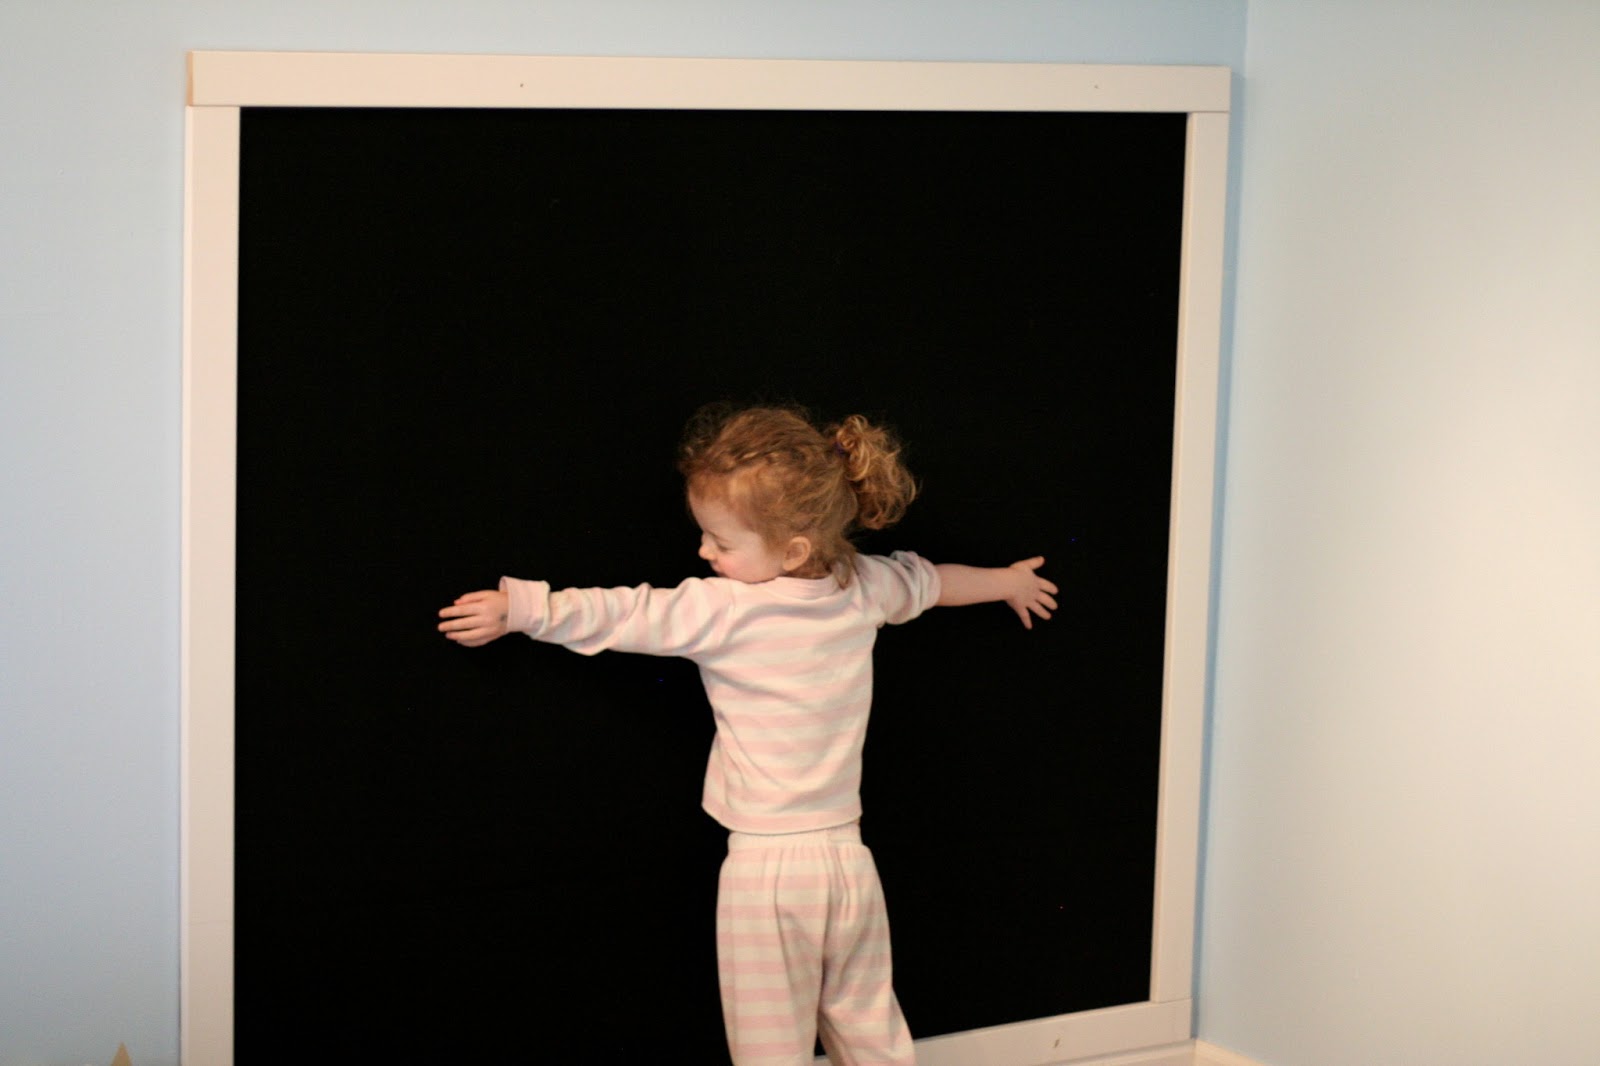
As you may have noticed, we love felt. It's so inexpensive and versatile and even durable! We use it a lot. Because our felt Christmas tree was such a big hit, I was inspired to make a HUGE felt board for S in the Reading Room. I used just the prickly side of self-adhesive velcro to stick the felt sheet to the wall. This is roughly a yard and a half of black felt. I waited until I had a good coupon for a local fabric store, so it was less than $5! I chose to frame it out with wood, but you certainly don't have to. I used MDF floor trim - the most basic kind - and had Home Depot cut it for me (I had pre-measured the lengths I wanted). So the trim cost roughly another $6. If you don't have room for something like this in one of your rooms, it would be a great addition to hallway, perhaps? We had our felt Christmas tree up on one of our dining room walls.
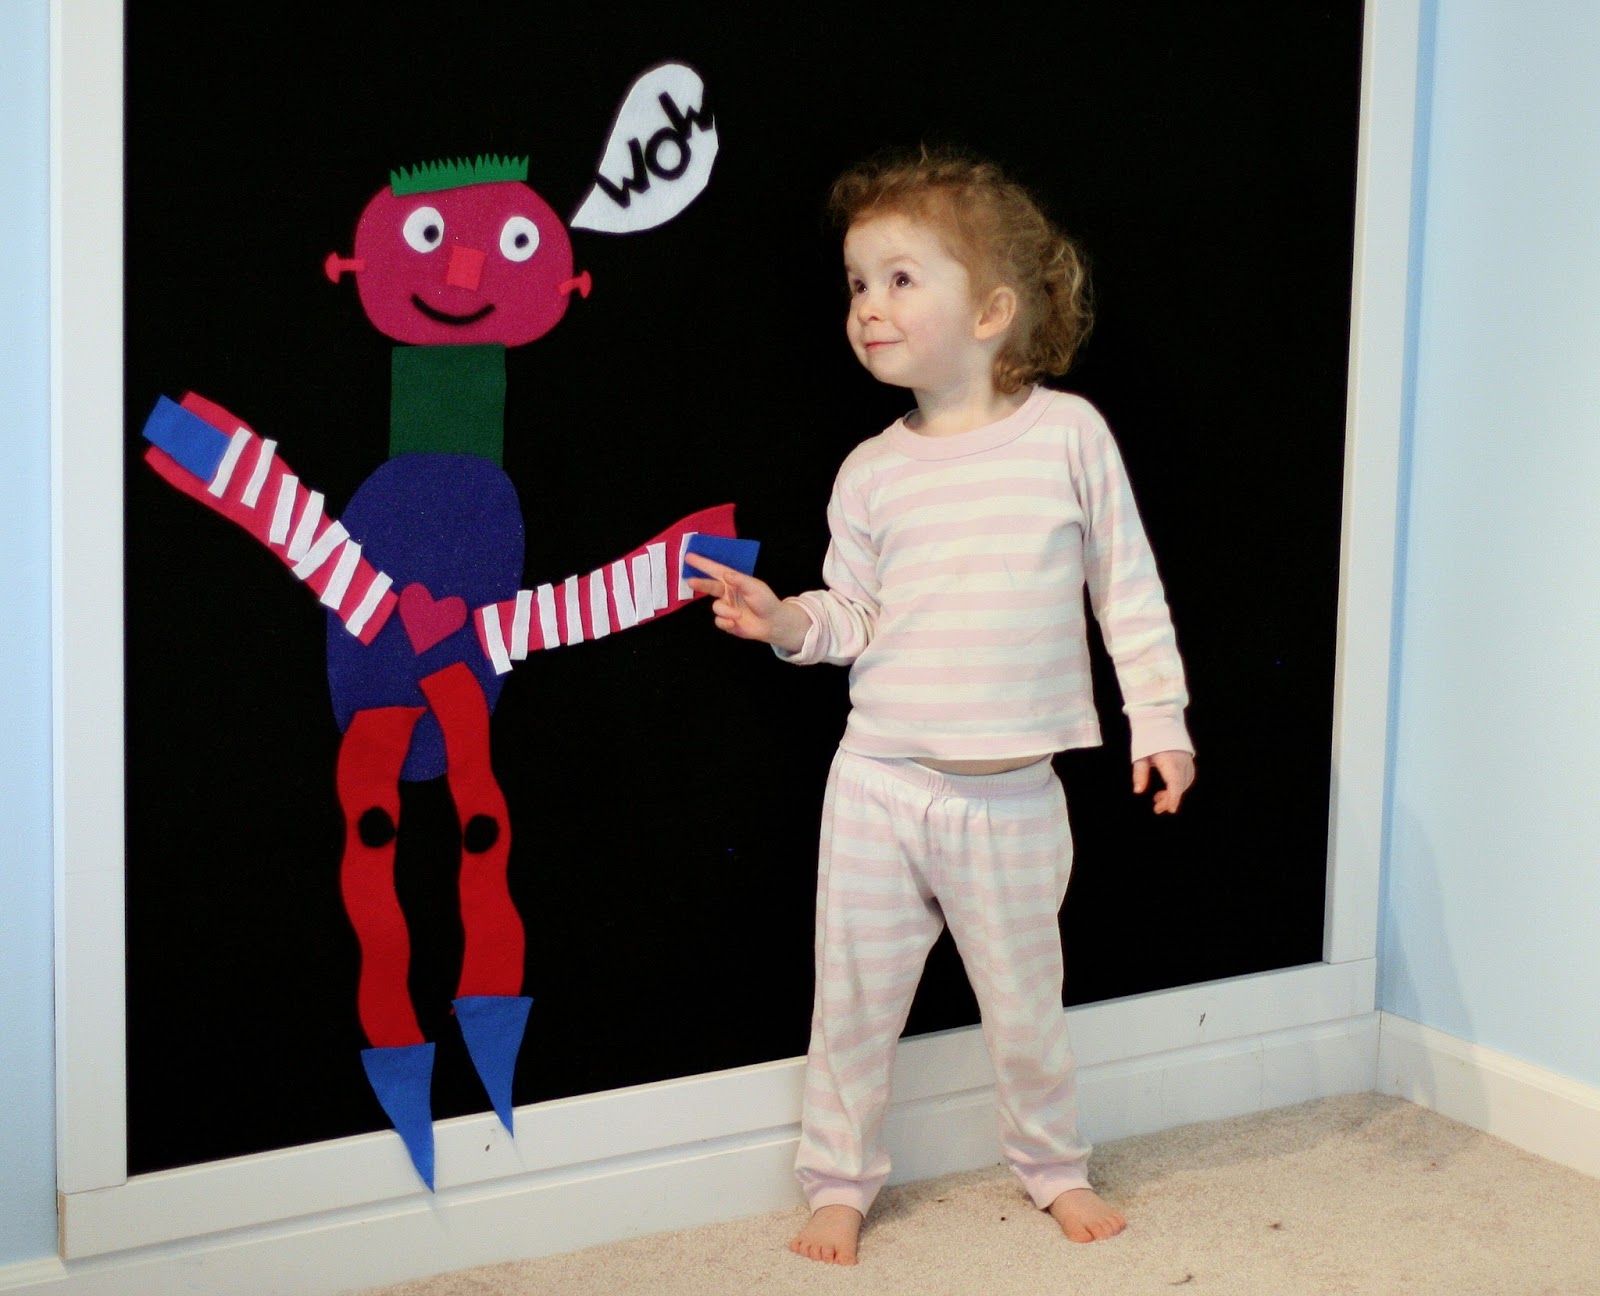
I like that the board is bigger than S, so that we can make S-sized creations. Our first undertaking with the new board was to create a robot. S loves robots almost as much as dinos.
My Dad (my go-to project helper, hahaha) had just helped me finish hanging the frame the night before. S and I both just love it!
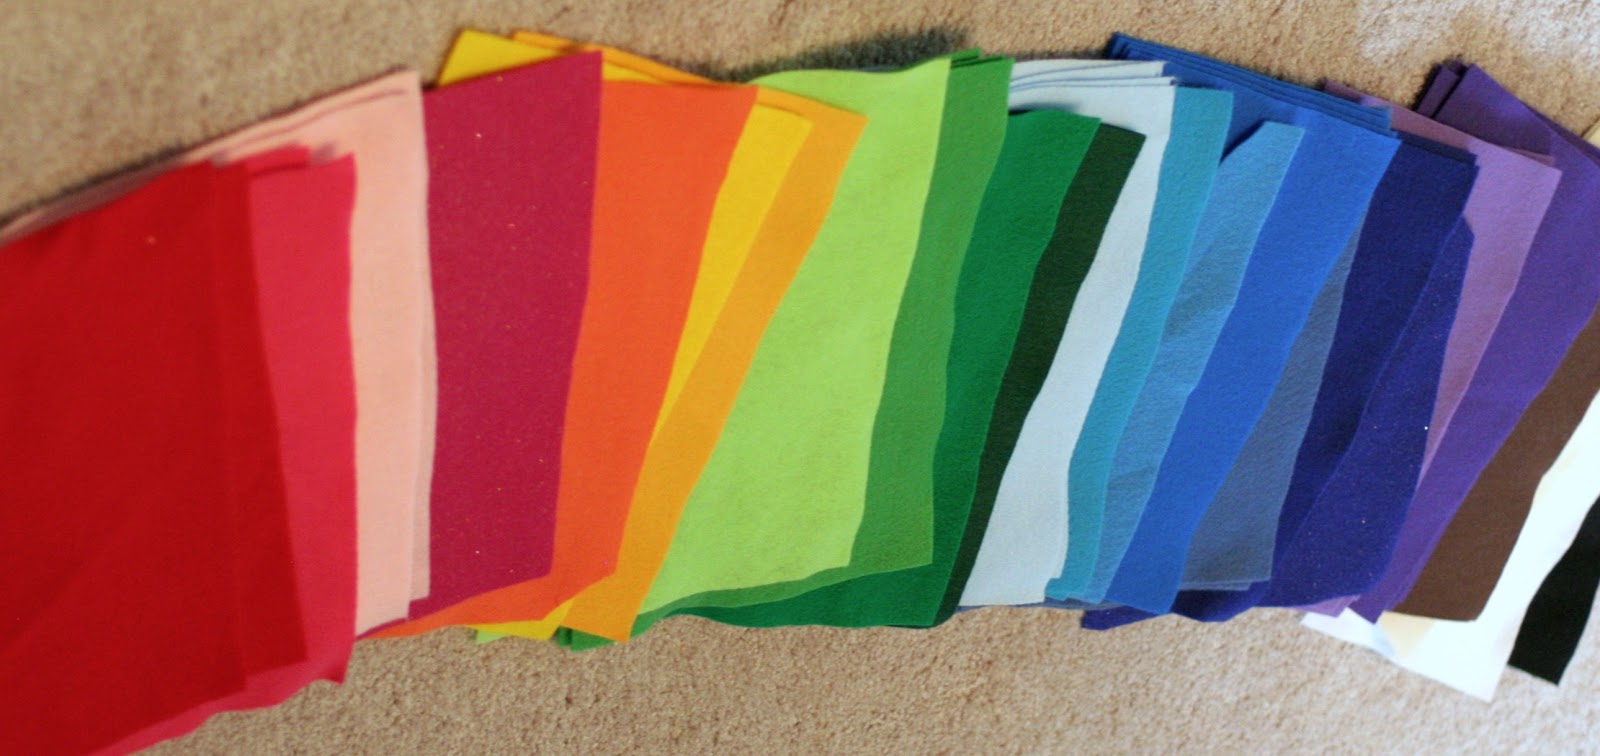
I used a coupon at the fabric store to score all these felt sheets at 20% off (and they're only 29 cents to start with!).
'
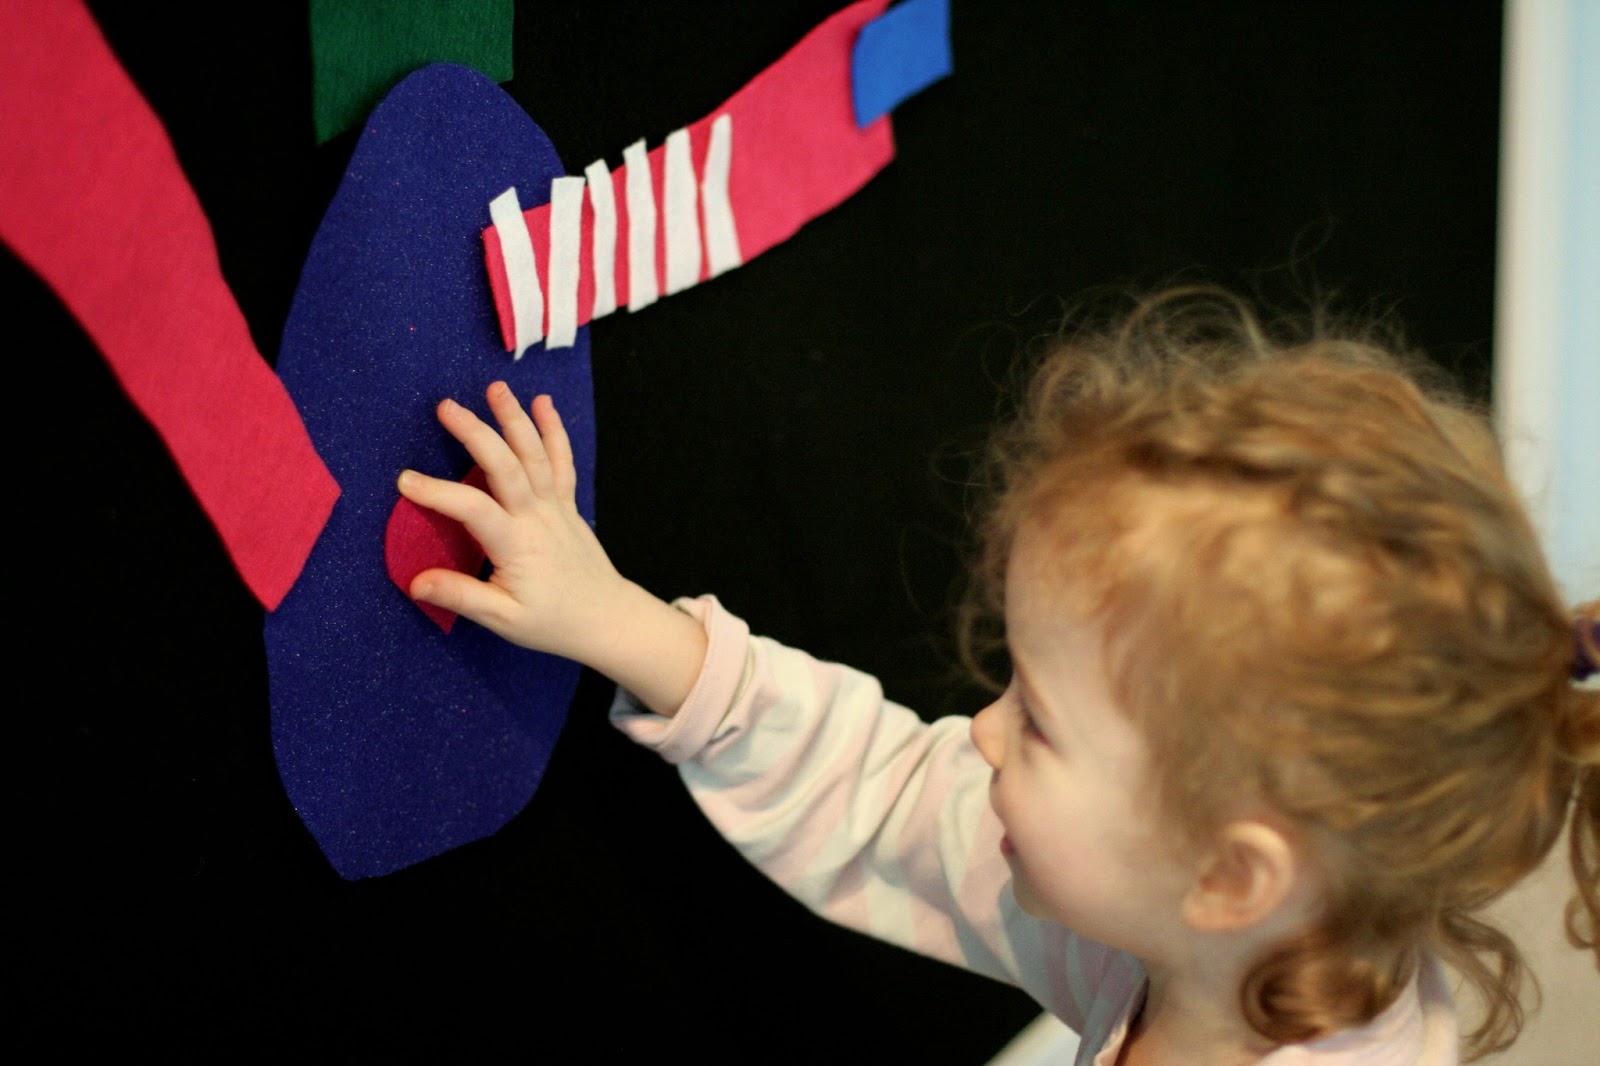
S got to dictate color size and shape of every robot part - and she was also in charge of placement. Learning how to stick pieces of felt to a board does take a bit of practice. I feel like S wasn't able to do this without getting frustrated until she was an older toddler (she's a seasoned pro now). This could also be fun for a younger toddler, but it would involve a lot of parental help (which sometimes young toddlers don't want! Ha!).

Robot's arms needed "thick, white stripes".

And of course he needed "a sparkly red heart" - she was undecided at first as to whether his heart should be under his body so it was "inside his body" or whether it should show on top.
And finally, she decided he ought to be saying "Wow", so I cut out the letters and she sounded out the letter ordering. I had planned on making one or two other robots, thereby completing a "mix and match" robot felt set, but alas, S insisted on only one. The mention of other robot friends joining him on the giant felt board was met with a "but I am his friend!!!" Hahaha. She finally relented the next day and let him have some pets. I think he's much happier now, don't you?
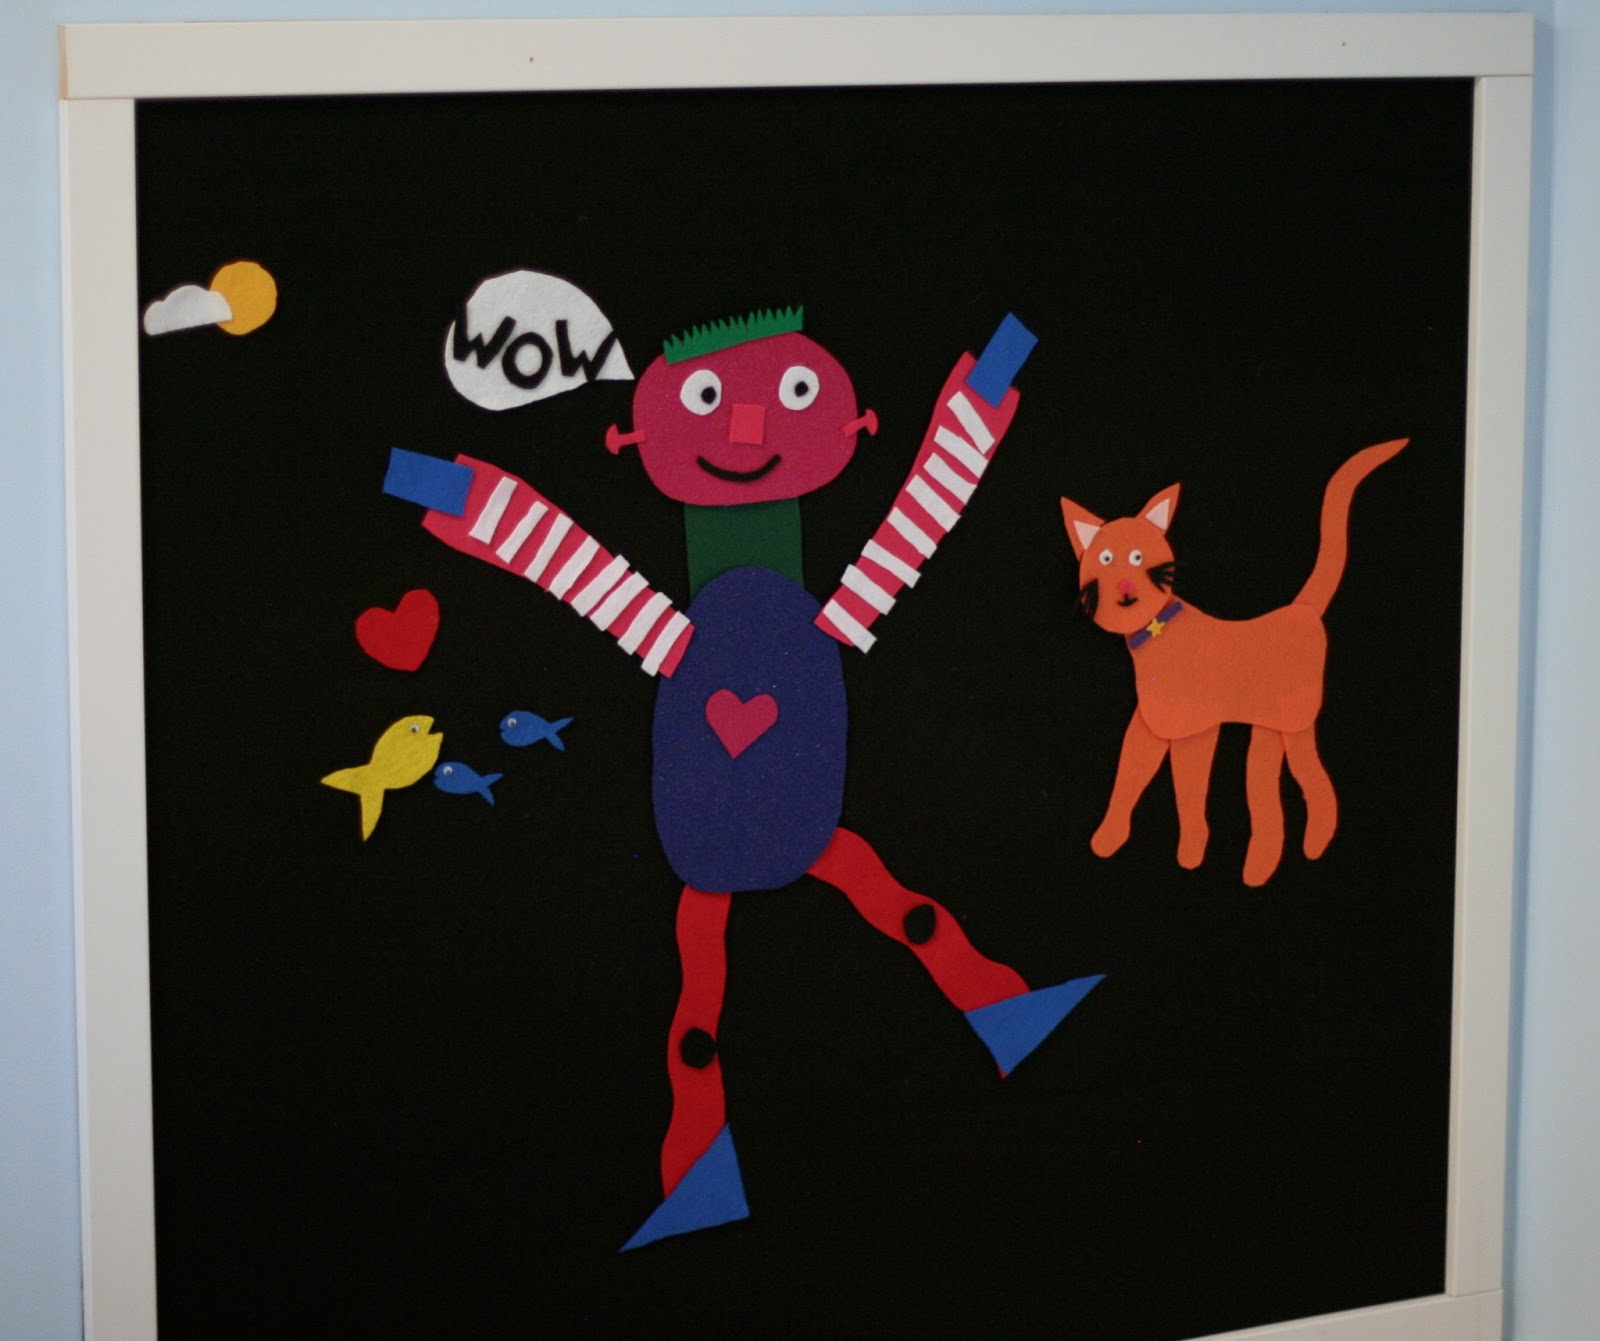
I just love following her directions to create whatever it is that's in her head. This is definitely not how I would have made a robot, which is what is so special to me about the process. If I'd just made a robot set for her, I would have missed meeting the robot friend she'd envisioned! And since he's pretty cute, it would have been quite a shame. :)
You can read more about our Reading Room, where the giant felt board lives here.
+(2).jpg)
Follow along with Fun at Home with Kids on Facebook, Google+, Pinterest or Subscribe by Email or Bloglovin'!
All activities here are activities I feel are safe for my own children. As your child's parents/guardians, you will need to decide what you feel is safe for your family. I always encourage contacting your child's pediatrician for guidance if you are not sure about the safety/age appropriateness of an activity. All activities on this blog are intended to be performed with adult supervision. Appropriate and reasonable caution should be used when activities call for the use of materials that could potentially be harmful, such as scissors, or items that could present a choking risk (small items), or a drowning risk (water activities), and with introducing a new food/ingredient to a child (allergies). Observe caution and safety at all times. The author and blog disclaim liability for any damage, mishap, or injury that may occur from engaging in any of these activities on this blog.


Love this, Ive been testing out making felt playboards for the wall lately, did you have to scrub the black felt or anything before? I tried scouring my backing felt first, just in case, but was wondering if it would work without!
ReplyDeleteI just bought the generic felt by the yard, and used the "prickly" side of adhesive velcro circles to have it stick to the wall. I didn't have to prep it at all - just smoothed it over the velcro and it adhered just fine. We've had it for weeks at this point and no problems with it falling off. :)
Deleteok, thanks for letting me know!
DeleteYour shapes come out so lovely. Whenever I try to cut felt it looks terrible. Any recommendations? Thank you :)
DeleteThank you, Heather! Yes! You want VERY sharp scissors. I don't actually buy really nice scissors because I'm too cheap, so in my case I use my newest pair of scissors. If your scissors aren't sharp enough it will fray and stretch the edges. I hope that helps! :)
Deletemay I learn Learning how to stick pieces of felt to a board ?I couldnt undersand it.
DeleteHi Asliaykan! Felt has a bit of texture to it, so it just sticks together if you put two pieces together. It's pretty neat! No need to add anything else - felt just sticks to other felt if you pat two pieces together! :)
DeleteCould you talk a little more about how you mounted it? How does it stay on the wall? Did you take a long strip of velcro and run it around the perimeter or did you make a grid or something? I'm thinking about trying this in our next house and want to make sure it doesn't get pulled down by over-eager felters ;-)
ReplyDeleteHi Becki! So I took those large sticky adhesive velcro circles you can buy at a fabric/craft store and used several of them spaced out behind the felt. I just used the "grabby" side sticking out from the wall because the felt acted like the "smooth" side of the velcro (hope that makes sense). I suppose it looks roughly like a grid - I just spaced them out by eye. Then I smoothed the felt over them. After that we located studs in the wall and hammered the wooden frame in around the perimeter. Hopefully that helps!
DeleteWe have a small felt board, but a giant one looks like giant fun!
ReplyDeleteThank you, Emma! We love to make things GIANT! :)
DeleteThank you!!! Awesome explanation of the project! I have a 17 month old who really dislikes her crib... I'm buying a Kura from ikea that I'll reverse and set up as her toddler bed and I'm trying to entice her into wanting to spend time in her bed/room... I decided no noisy toys... books and creative activities only! I'm going to do this on the length of the bed that's along the wall and have a selection of felts for her to play with till she's ready to lay down and sleep. Creative and not messy!
ReplyDeleteOh I LOVE that idea! Genius!!!
DeleteIs the felt board put straight onto the wall, or mounted on a board (ex cork?) first?
ReplyDeleteStraight on the wall. :)
DeleteHello,
ReplyDeleteI love this idea of the felt wall.
I was wondering... is it still working well and looking goo after a couple of years?
It is! Felt is amazing that way!!!
DeleteThis is great! But I really dont understand how is possible to fix those felt pieces on the board. Doesnt that require velcro or something like that? Gravity would be enough to put them down... Can you help me?
ReplyDeleteFelt sticks to itself because of the fibers. :)
Delete