
I've wanted to make something similar to this for quite awhile now, and when my friends tipped me off about a great store (sadly in its last week of business) that sold recycled materials and medical and scientific surplus supplies, I finally had some inexpensive materials!

This post contains affiliate links for your convenience.
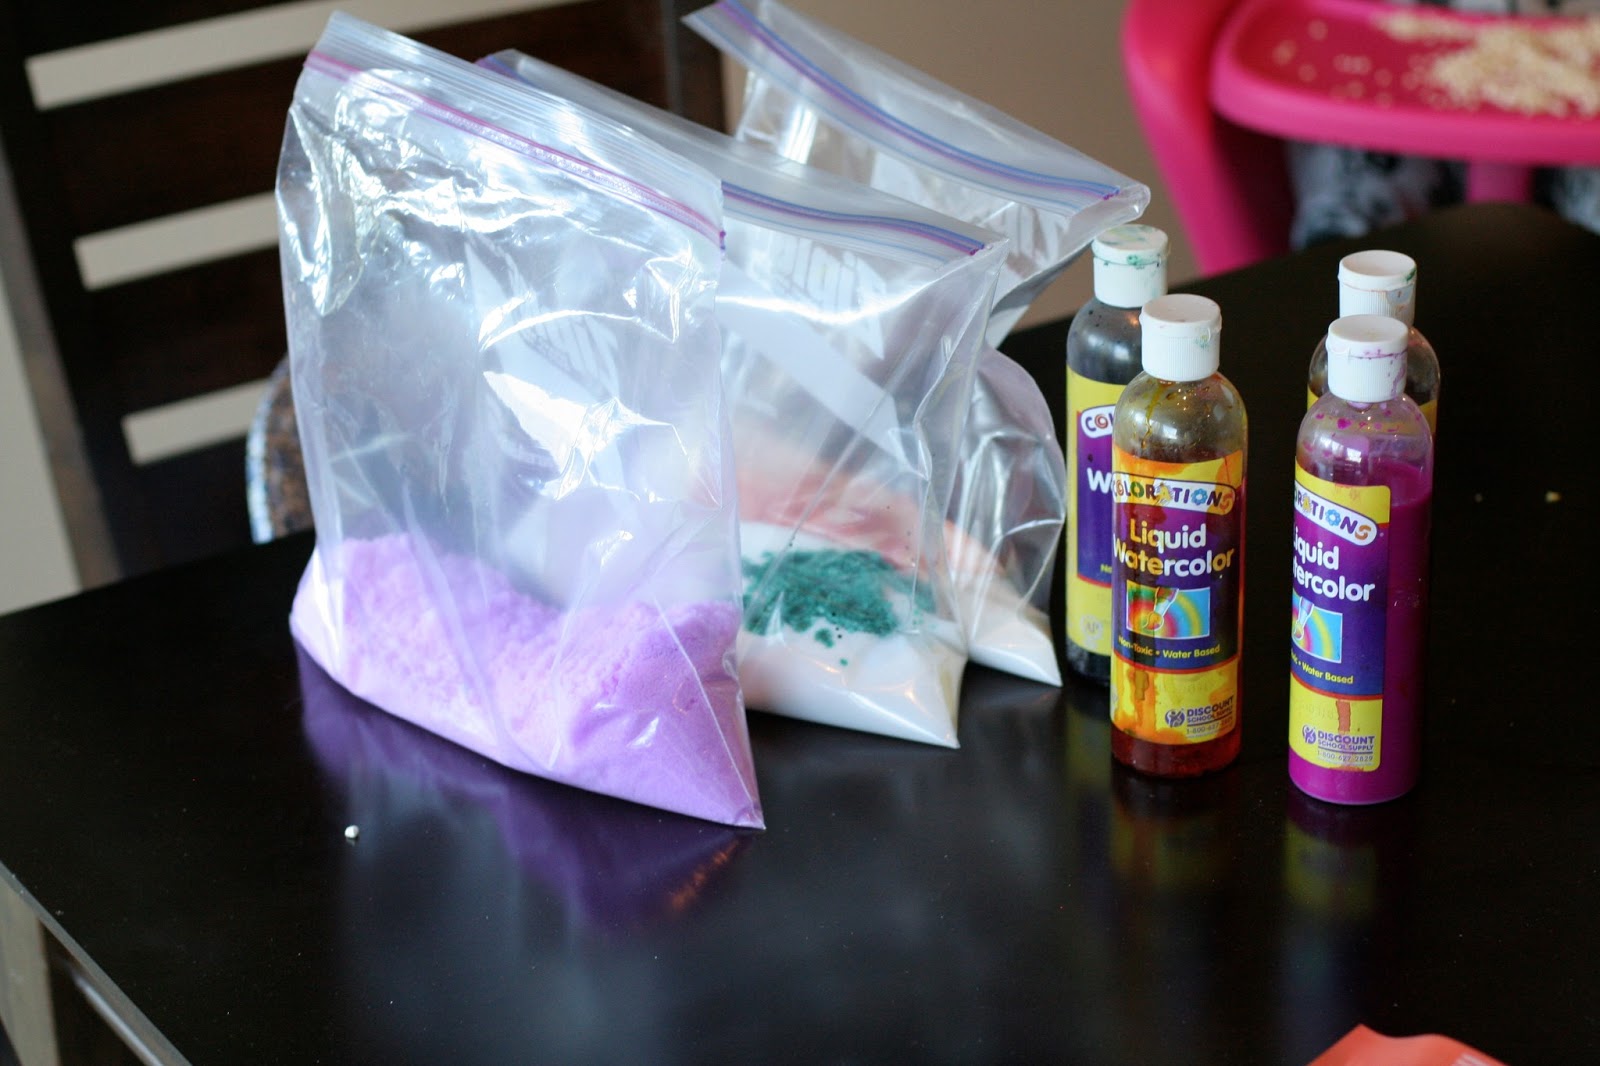
To create this awesome masterpiece, you'll need:
Funnels (the Dollar Store has a great set of three - these are pictured below)
Flexible tubing (The Dollar Tree sound tubes would work as well, I think)
Suction cups
Fishing line
Large containers (for gathering salt)
Salt
Food coloring or Colorations Liquid Watercolors
Marbles

When we first started, I didn't know if I'd need to use my trusty hot glue gun to get the suction cups to stay in place, but tying knots around the "nub" on the back of the suction cup and then tying it tightly around the tubing worked just fine! Here my assistant, S, is helping pull the suction cups off of the clips they came with.
After assembling the tubing with 3-4 suction cups per unit of tubing, we set up a trial run and made sure that it would work. Once we had success, we set off to color our salt - because everything is more fun when it's colored! Coloring salt is SUPER easy and it creates very inviting beautiful salt that looks like that craft sand (but doesn't have weird dust and is much easier to vacuum up!). We use it to do a lot of our craft/art projects. To color salt, just take a Ziploc bag, add whatever amount of salt, and a healthy dose of Liquid Watercolors or food coloring. The more you add, the richer the color.
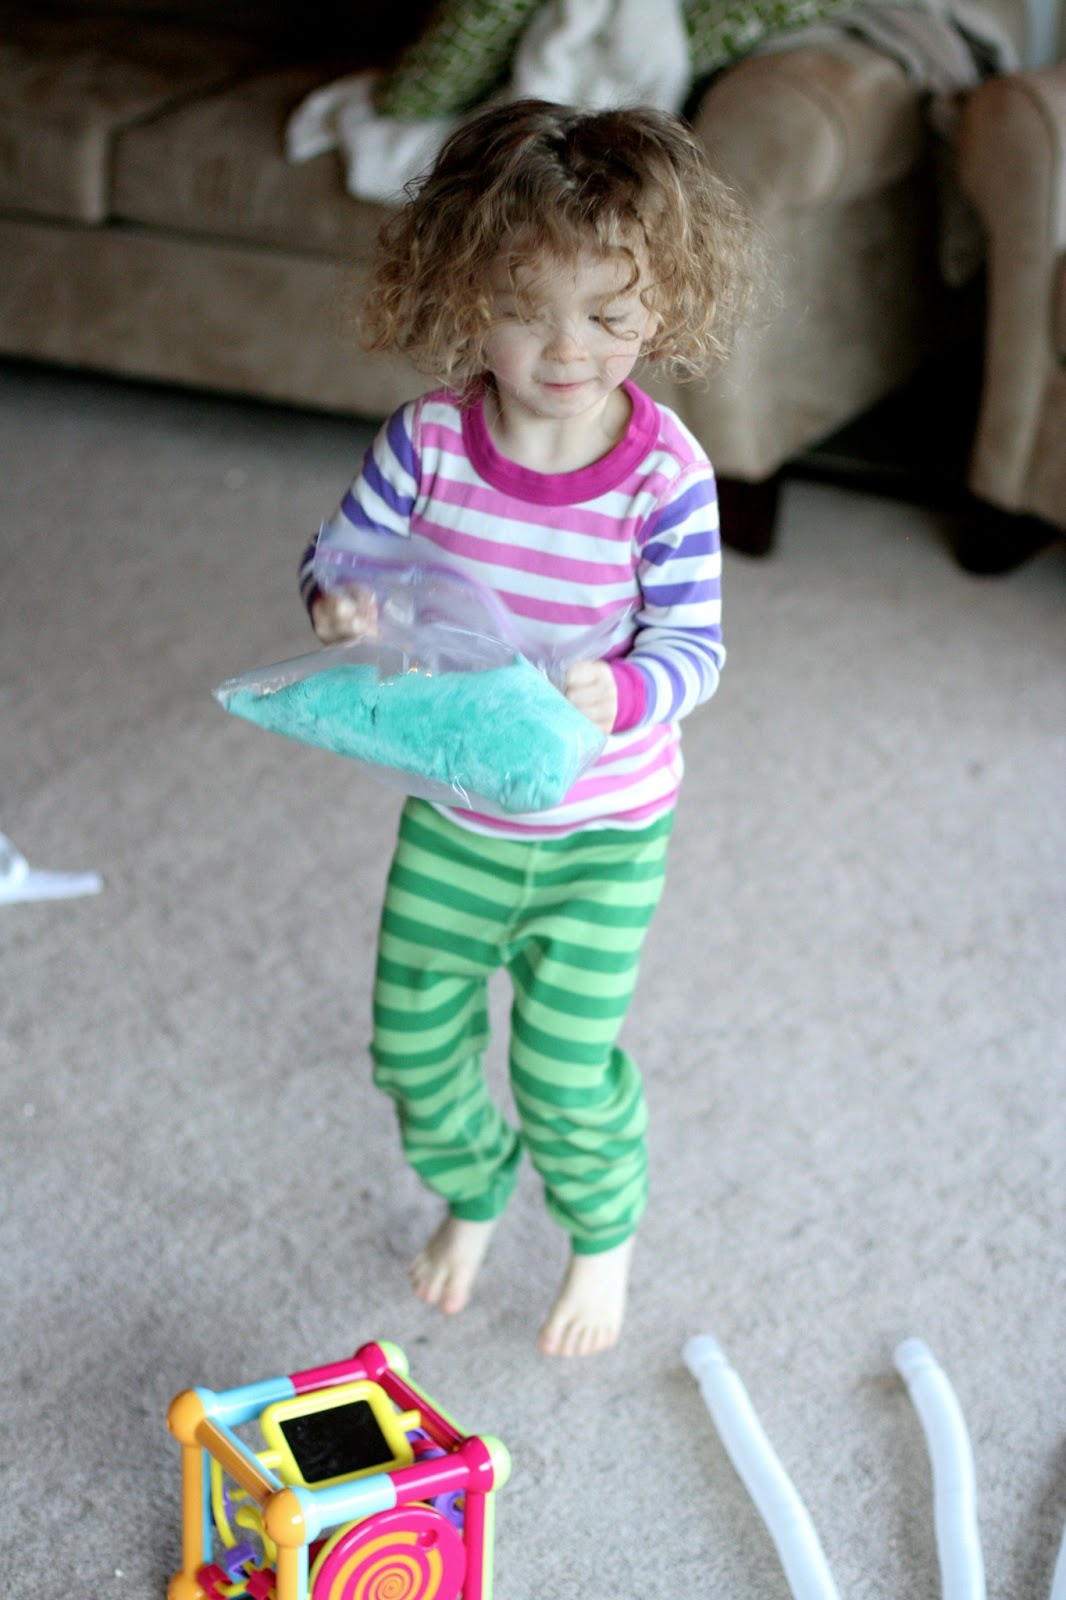
After that, you shake it to combine. S is very good at mixing in the colors, as you can see.
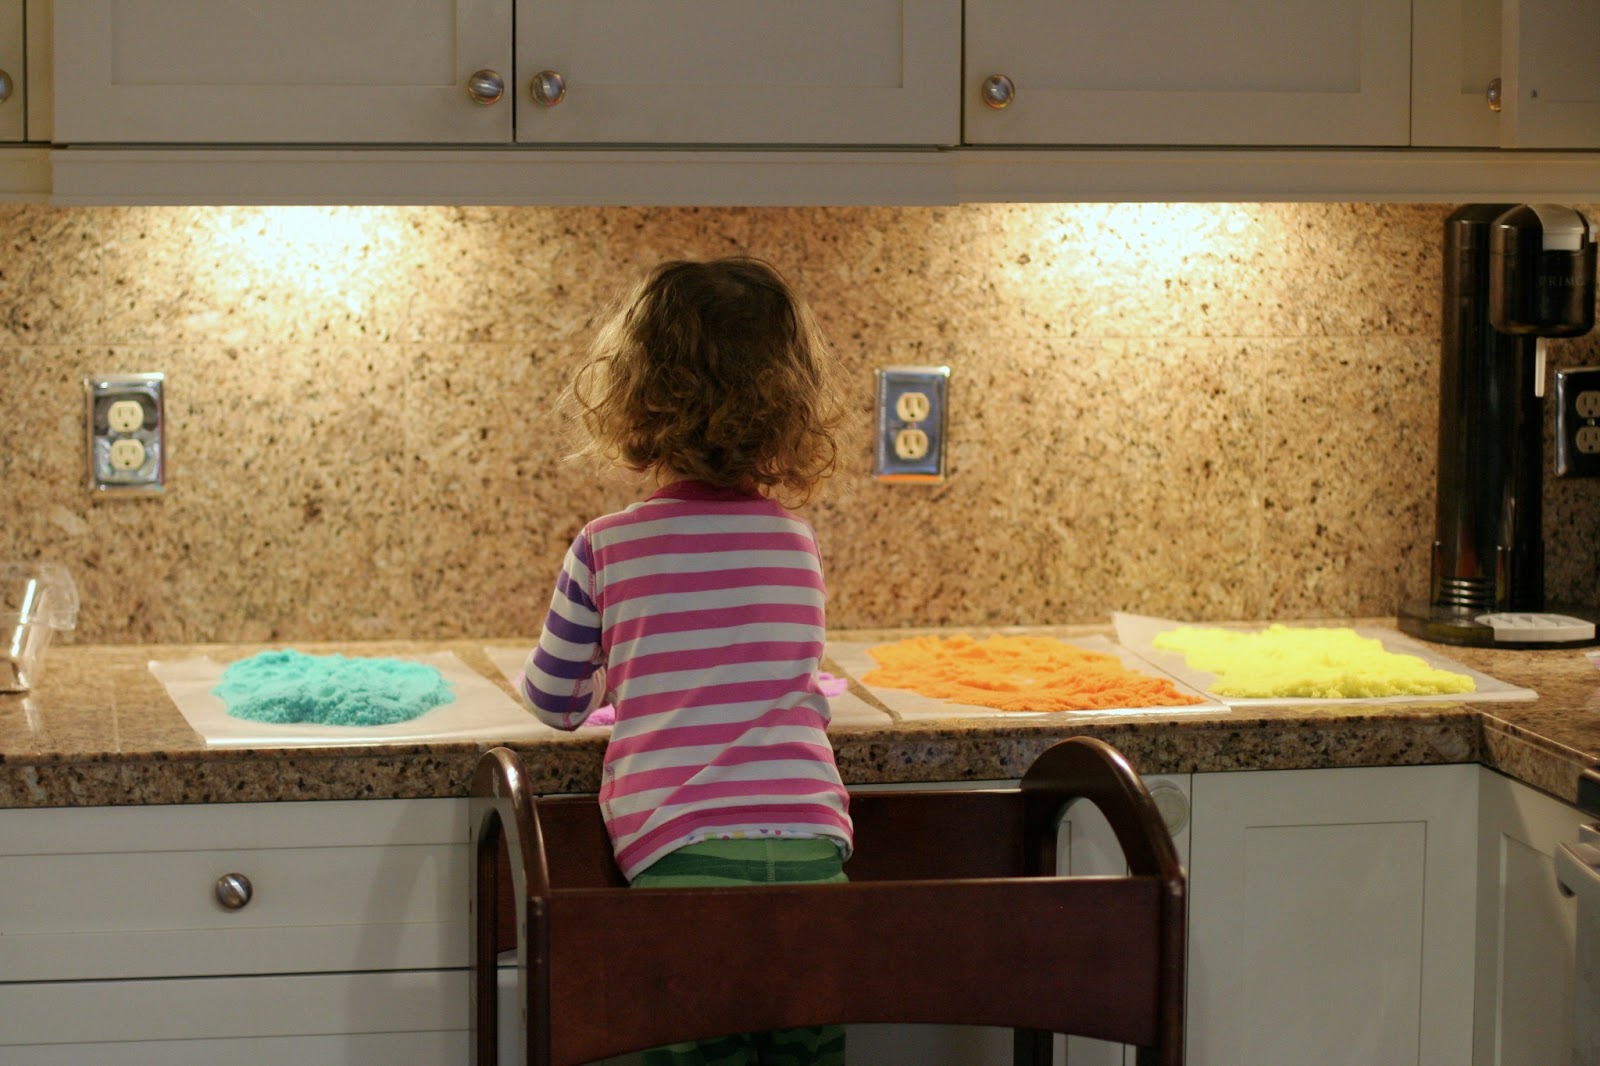
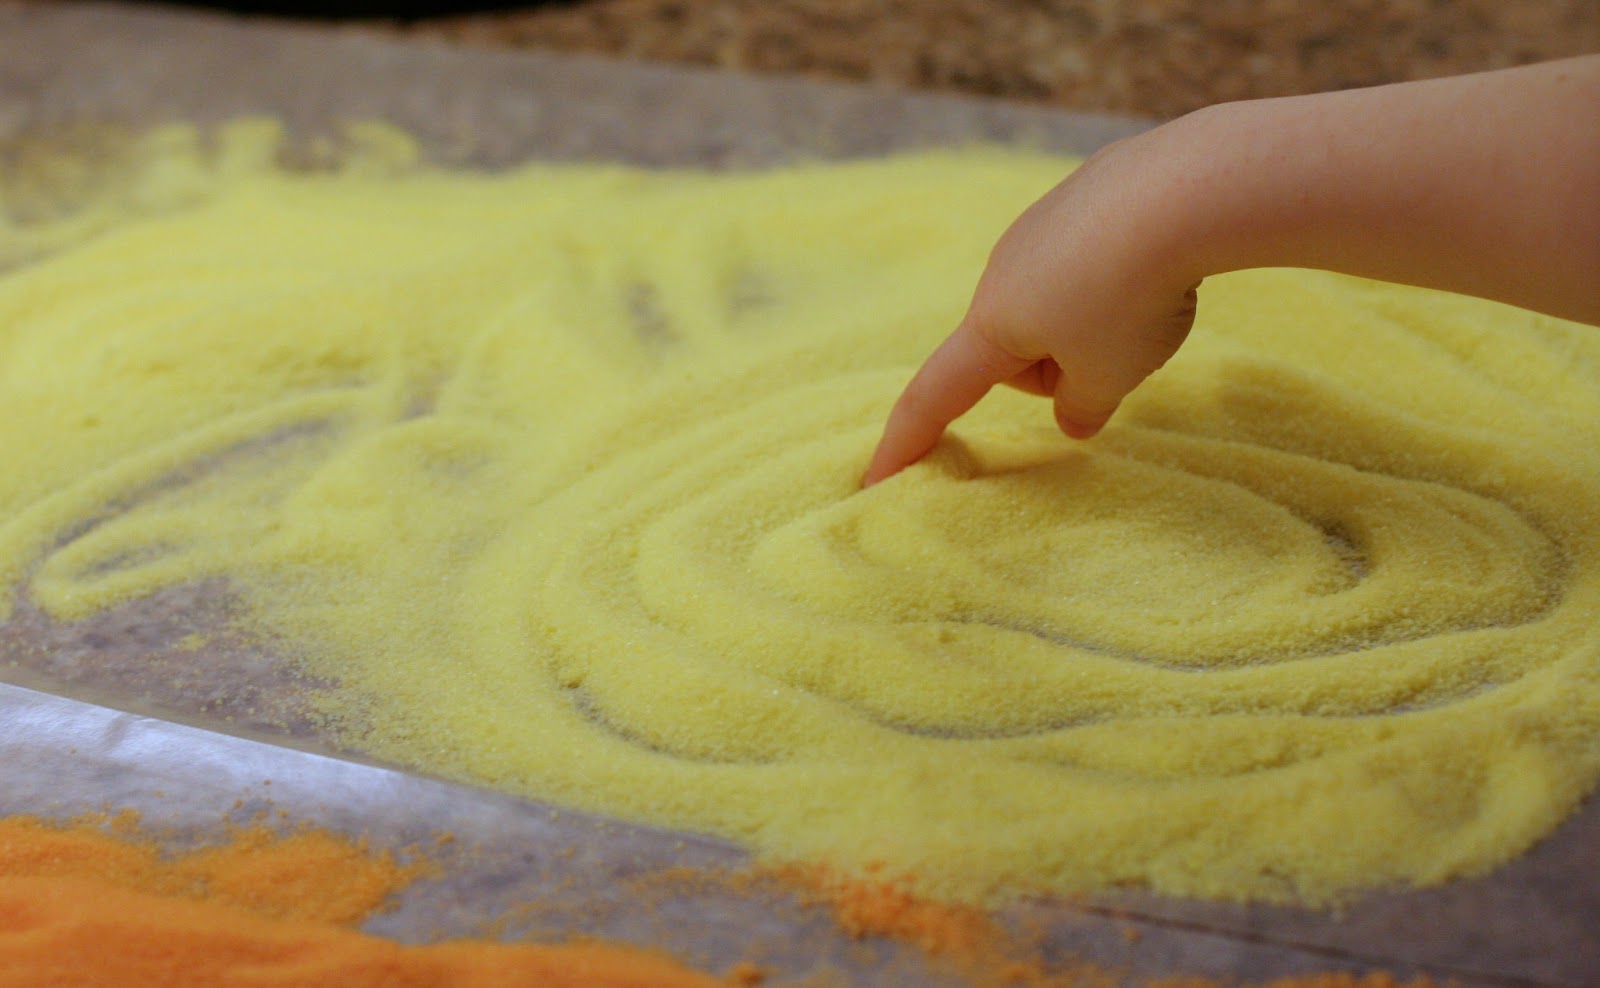
Then you spread your salt out to dry. It doesn't take very long - maybe an hour or so. We spread ours out on wax paper.
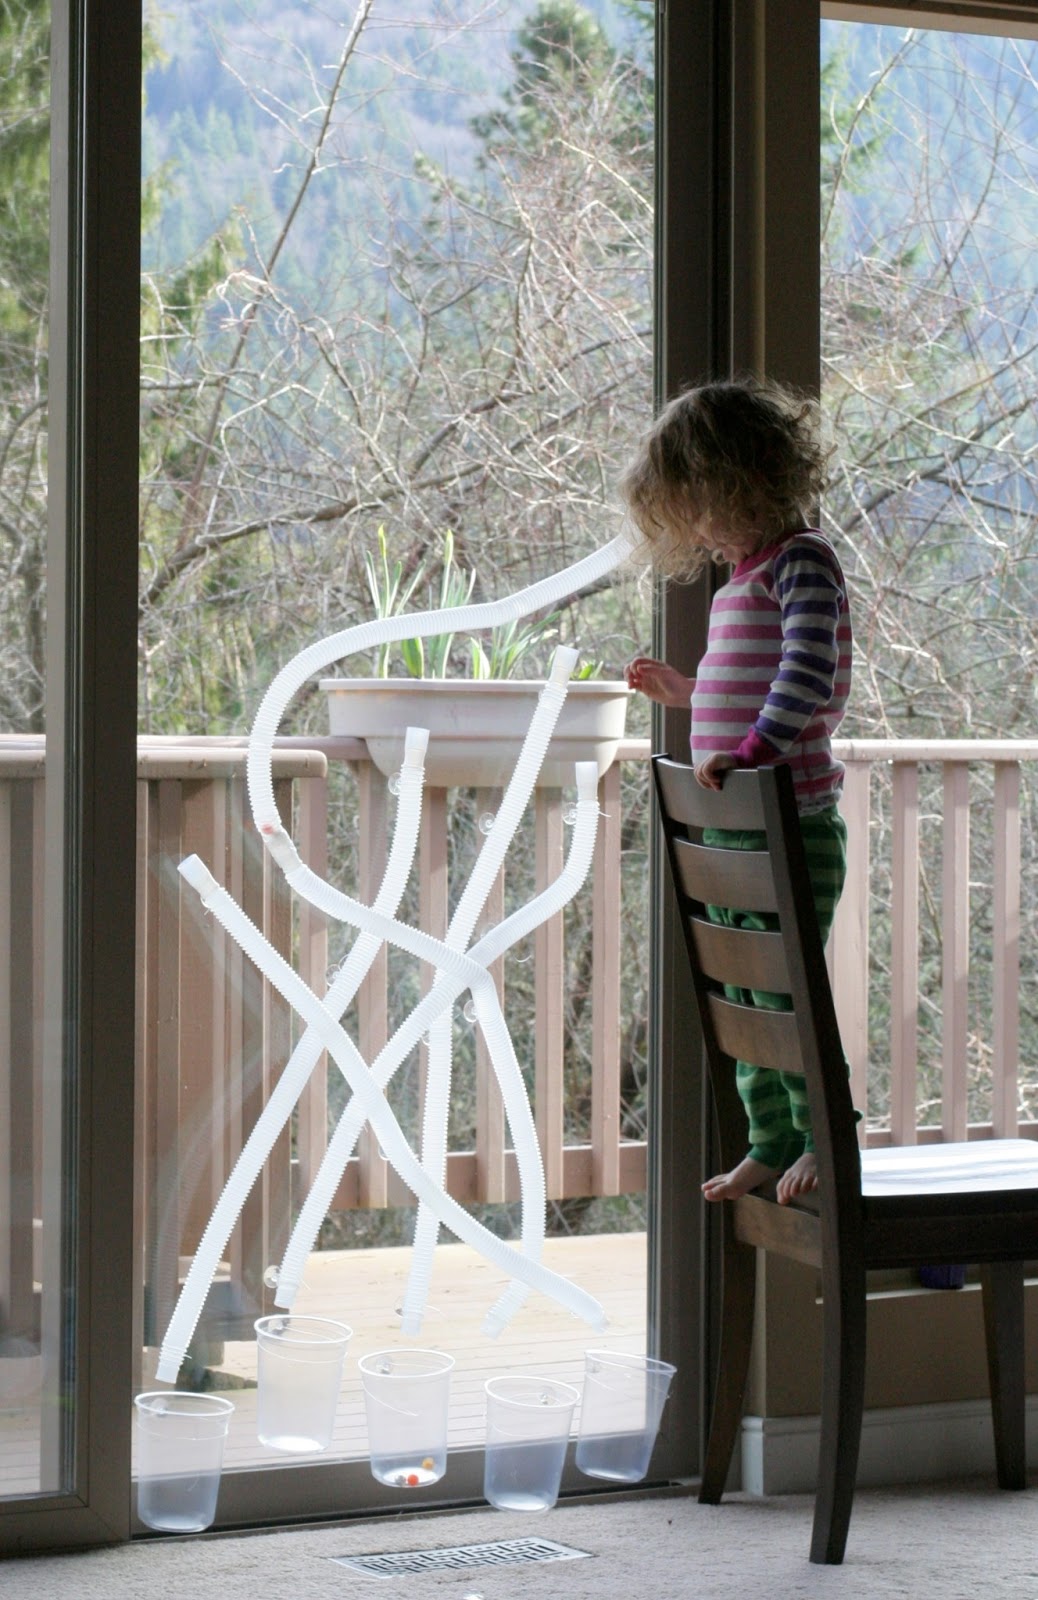
While we waited for the colored salt to dry, we used the tubes as a marble run. S had fun trying to get marbles into specific containers, since the tubes were set up a bit like a maze (she's a big maze fan lately).
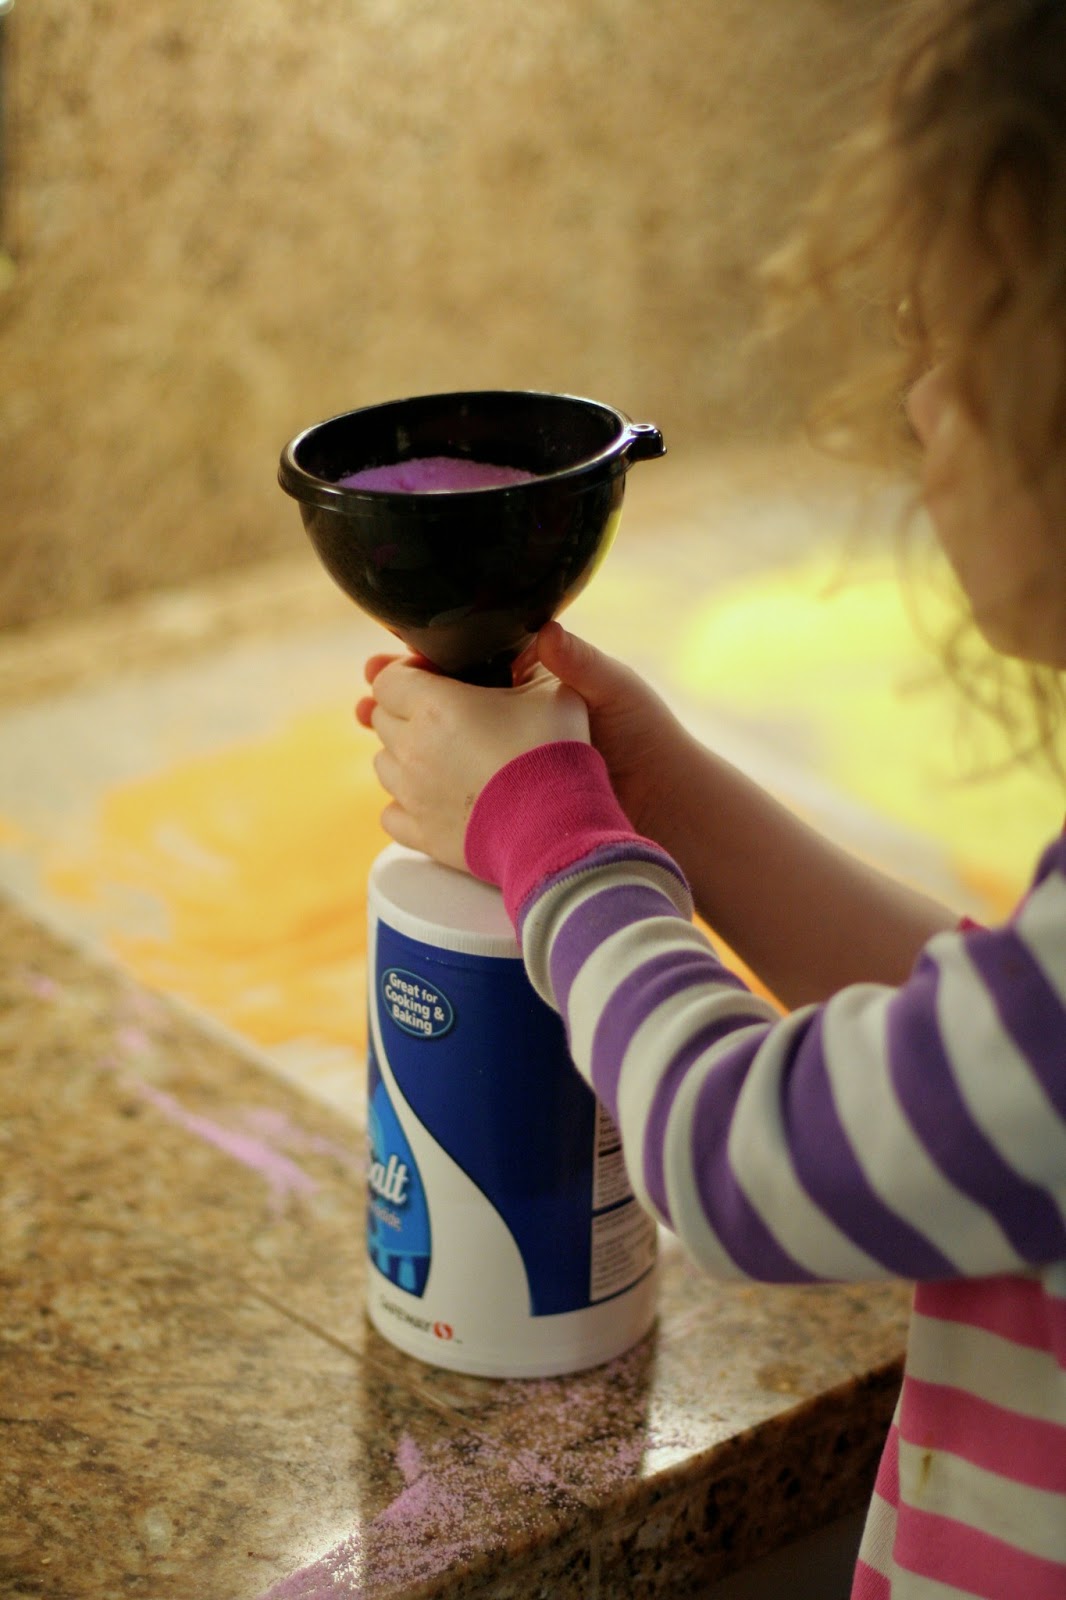
Once the salt was dry, we broke up the pieces and smoothed it out and then used a funnel to put it back into the containers. Salt containers are very sturdy, and I find that the little metal spout lets just enough salt out to make it easy for little hands to pour. Not to mention, if that little metal spout is closed, and you knock over a container you won't get salt everywhere!
We had fun playing in the dried colored salt. Here S is practicing a spiral, but we also did some letter practice.
We made one stretch of tubing double long, which was great fun, but then only Mama could reach it to pour, so S had to watch for that one.
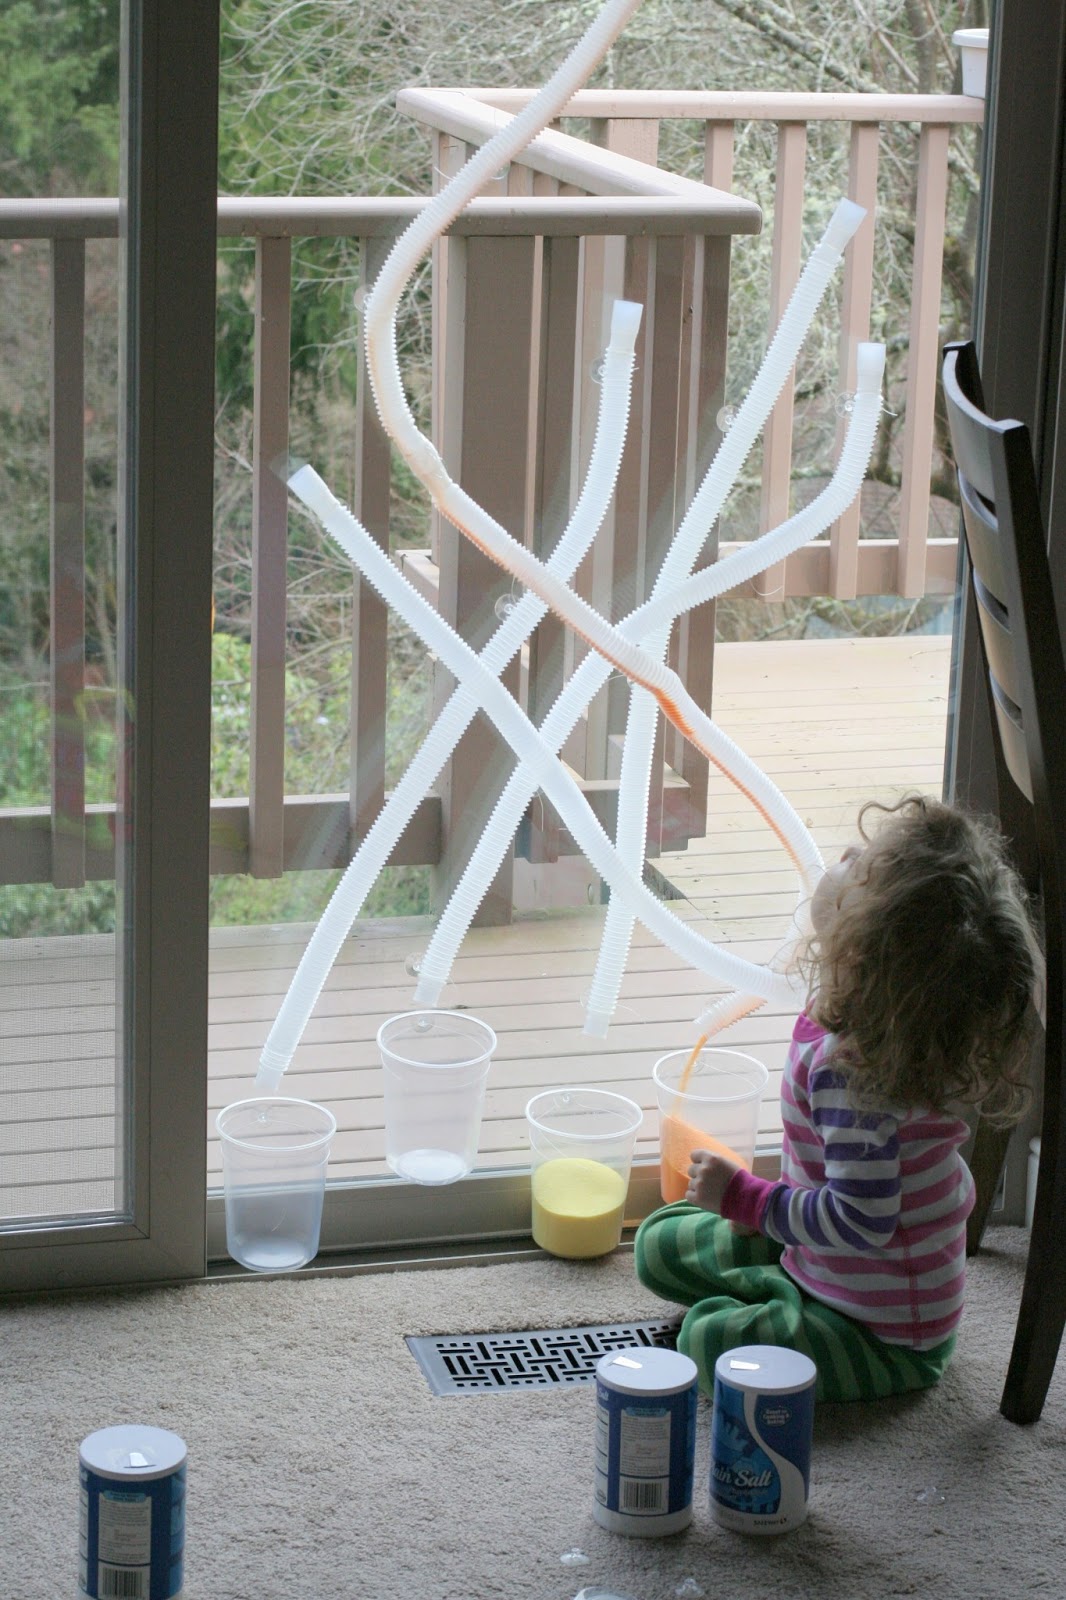
But otherwise she was in charge of the pouring! As we poured through each tube, we got to troubleshoot. Sometimes the angle wasn't steep enough, or the weight of the sand would misalign the tube and the container. We'd talk about the changes that needed to be made, I'd move the tube or container the way she thought it ought to be and we'd try it again. The suction cups were too hard for her to move herself, unfortunately. But since she got to do all the other steps herself, and got to direct me during placement of the tubes, it didn't seem to bother her too much. :)
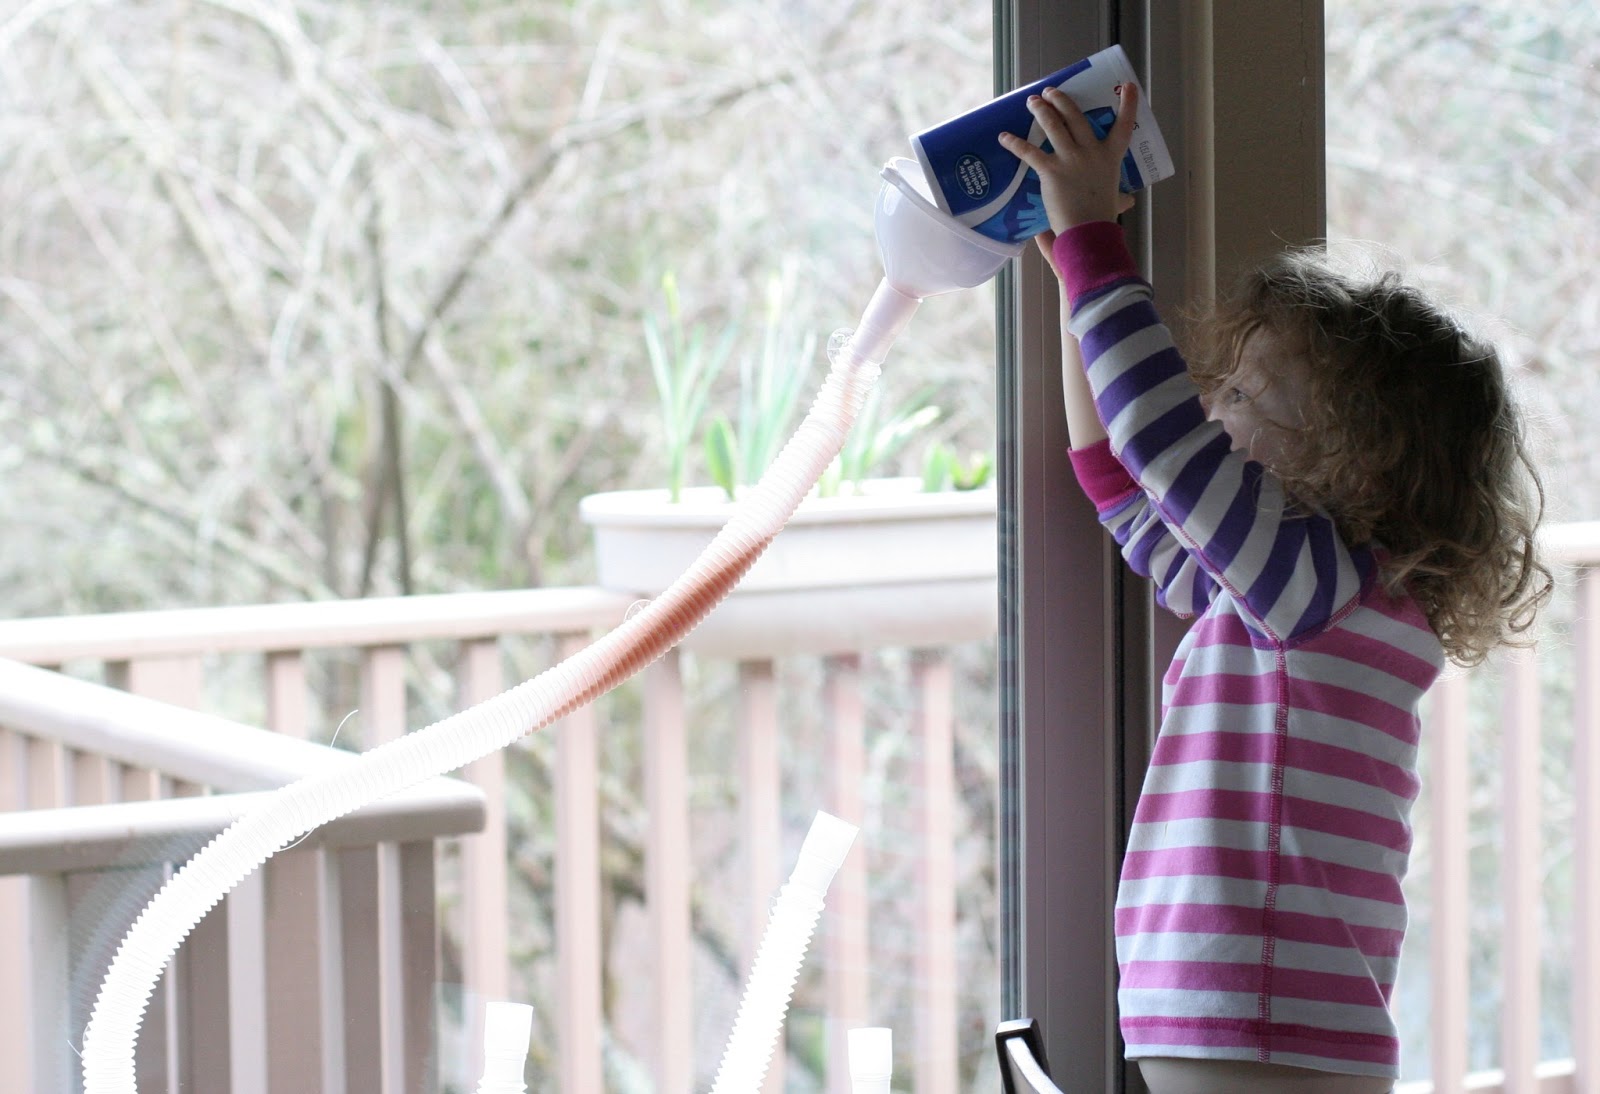
We did have a few small spills from funnels falling out or containers losing suction, but the salt vacuums very easily, so it was no problem!

Follow along with Fun at Home with Kids on Facebook, Google+, Pinterest or Subscribe by Email or Bloglovin'!
All activities here are activities I feel are safe for my own children. As your child's parents/guardians, you will need to decide what you feel is safe for your family. I always encourage contacting your child's pediatrician for guidance if you are not sure about the safety/age appropriateness of an activity. All activities on this blog are intended to be performed with adult supervision. Appropriate and reasonable caution should be used when activities call for the use of materials that could potentially be harmful, such as scissors, or items that could present a choking risk (small items), or a drowning risk (water activities), and with introducing a new food/ingredient to a child (allergies). Observe caution and safety at all times. The author and blog disclaim liability for any damage, mishap, or injury that may occur from engaging in any of these activities on this blog.


What a great idea! My son would love doing this! :)
ReplyDeleteThank you! S loves playing with it...and so do her Dada and I! ;)
DeleteI love that you did it on the window!
ReplyDeleteThanks, Heather! The backlighting really highlighted the colored salt in an awesome way. Plus I found the suction cups for $2! :)
Deletefantastic, we have made a water sculpture but i've never seen it done with salt and indoors. And the marbles are a great idea too, but i do love how you can see the progression of the salt down the tube.
ReplyDeleteS really loves the salt the most. I think it's being able to pour over and over again. And it sounds like rain - super pretty. We're lucky to have lots of windows to use it on. :)
Delete