

Last May, S and I were on a serious watercolor kick. (OK, we still might be) We started things off with our Fizzing Watercolors and then moved on to the traditional salt and watercolors activity. I had seen these gorgeous salt watercolors from my friend Amber (check them out here) and I loved how she used different types of salt. So we decided to try that ourselves. Here's little 3 year old S creating a watercolor masterpiece.

I gave S a cup of Epsom Salts and a cup of table salt. I also gave her a spray bottle. Most of our art pieces turned out like Amber's. SUPER beautiful. But one, where S had reallllly gone to town with the spray bottle, did this amazing thing:
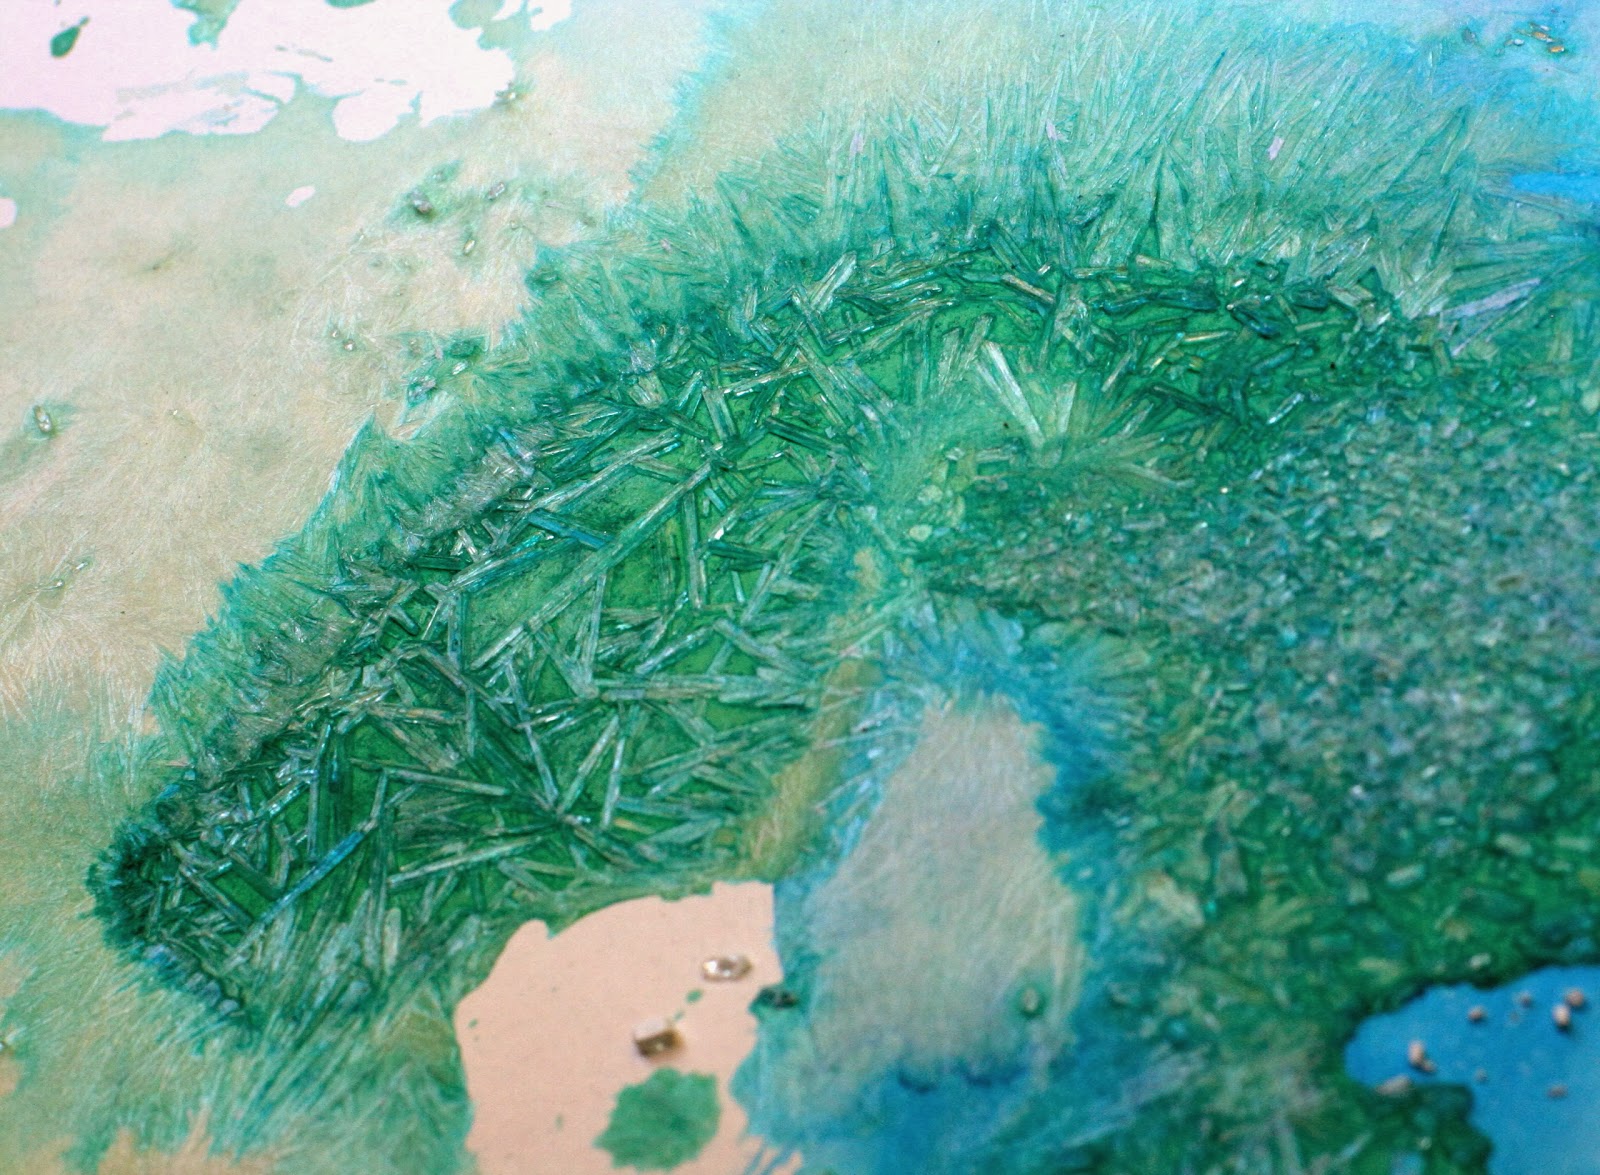
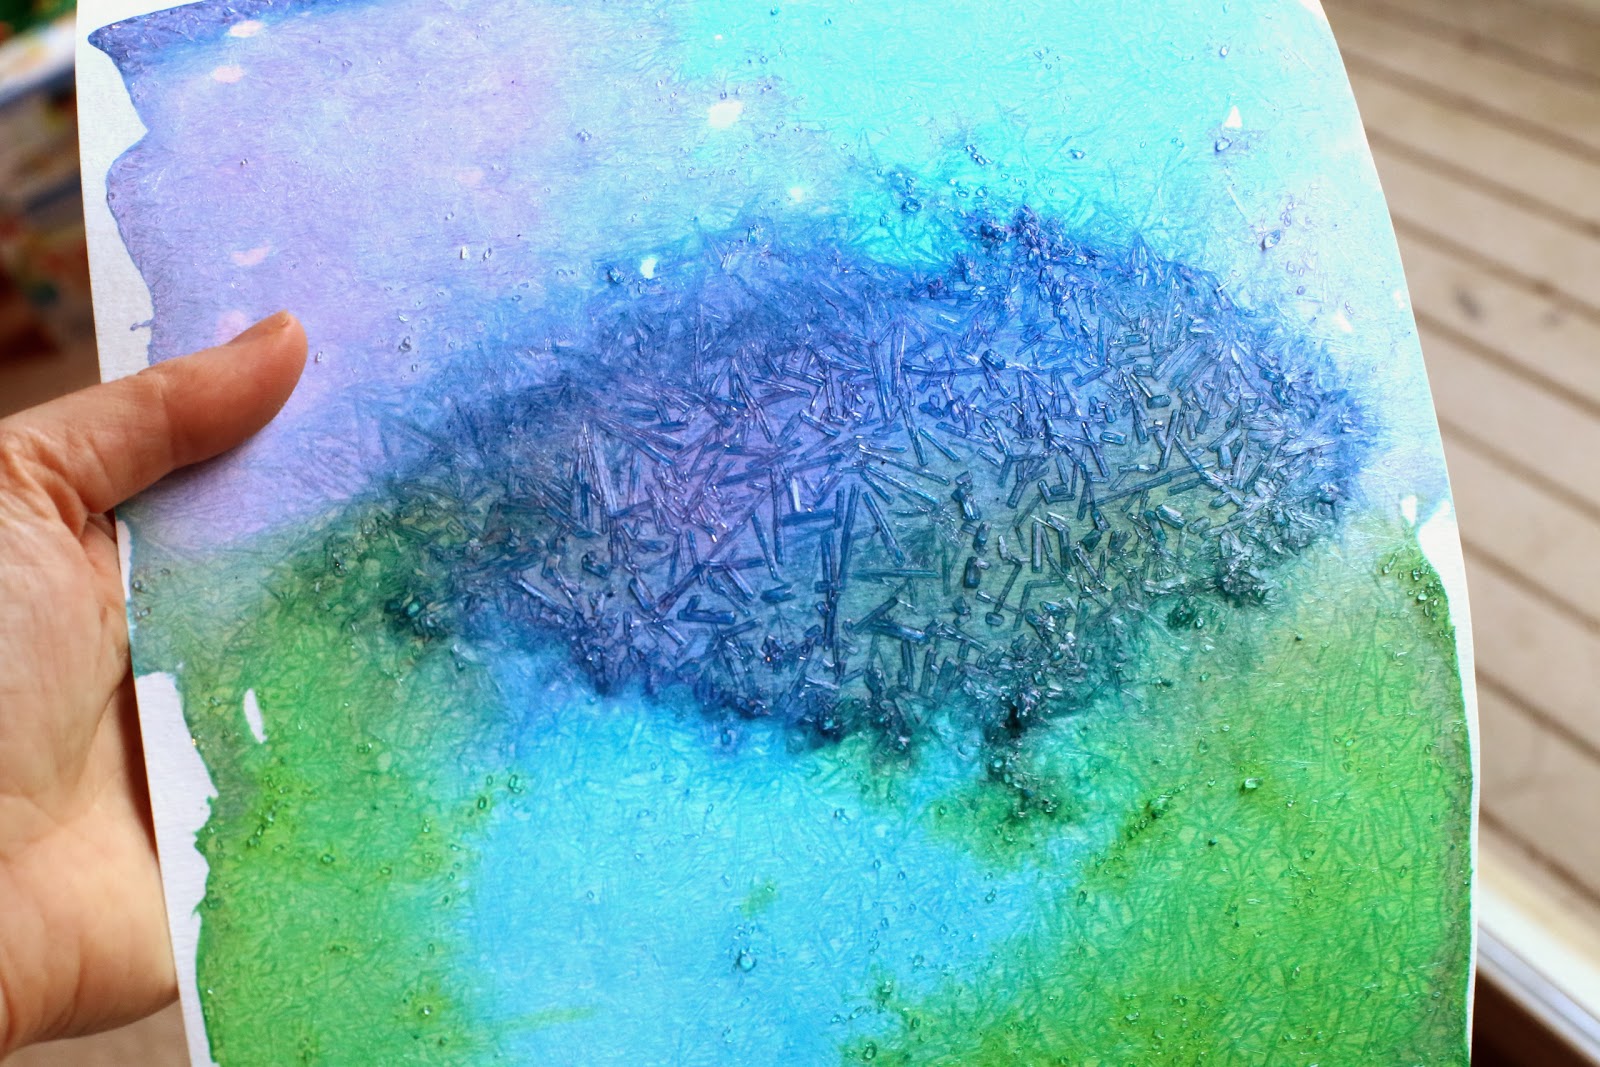
So I made a note to work on a recipe for recreating those beautiful watercolor crystals....and it's somehow taken me until now to get to it and get the ratios perfect. This paint is seriously SO COOL. My camera does not do it justice. I implore you to try it because it is just not to be missed. I tried to angle the paper correctly to catch some of the shimmering crystally gorgeousness...
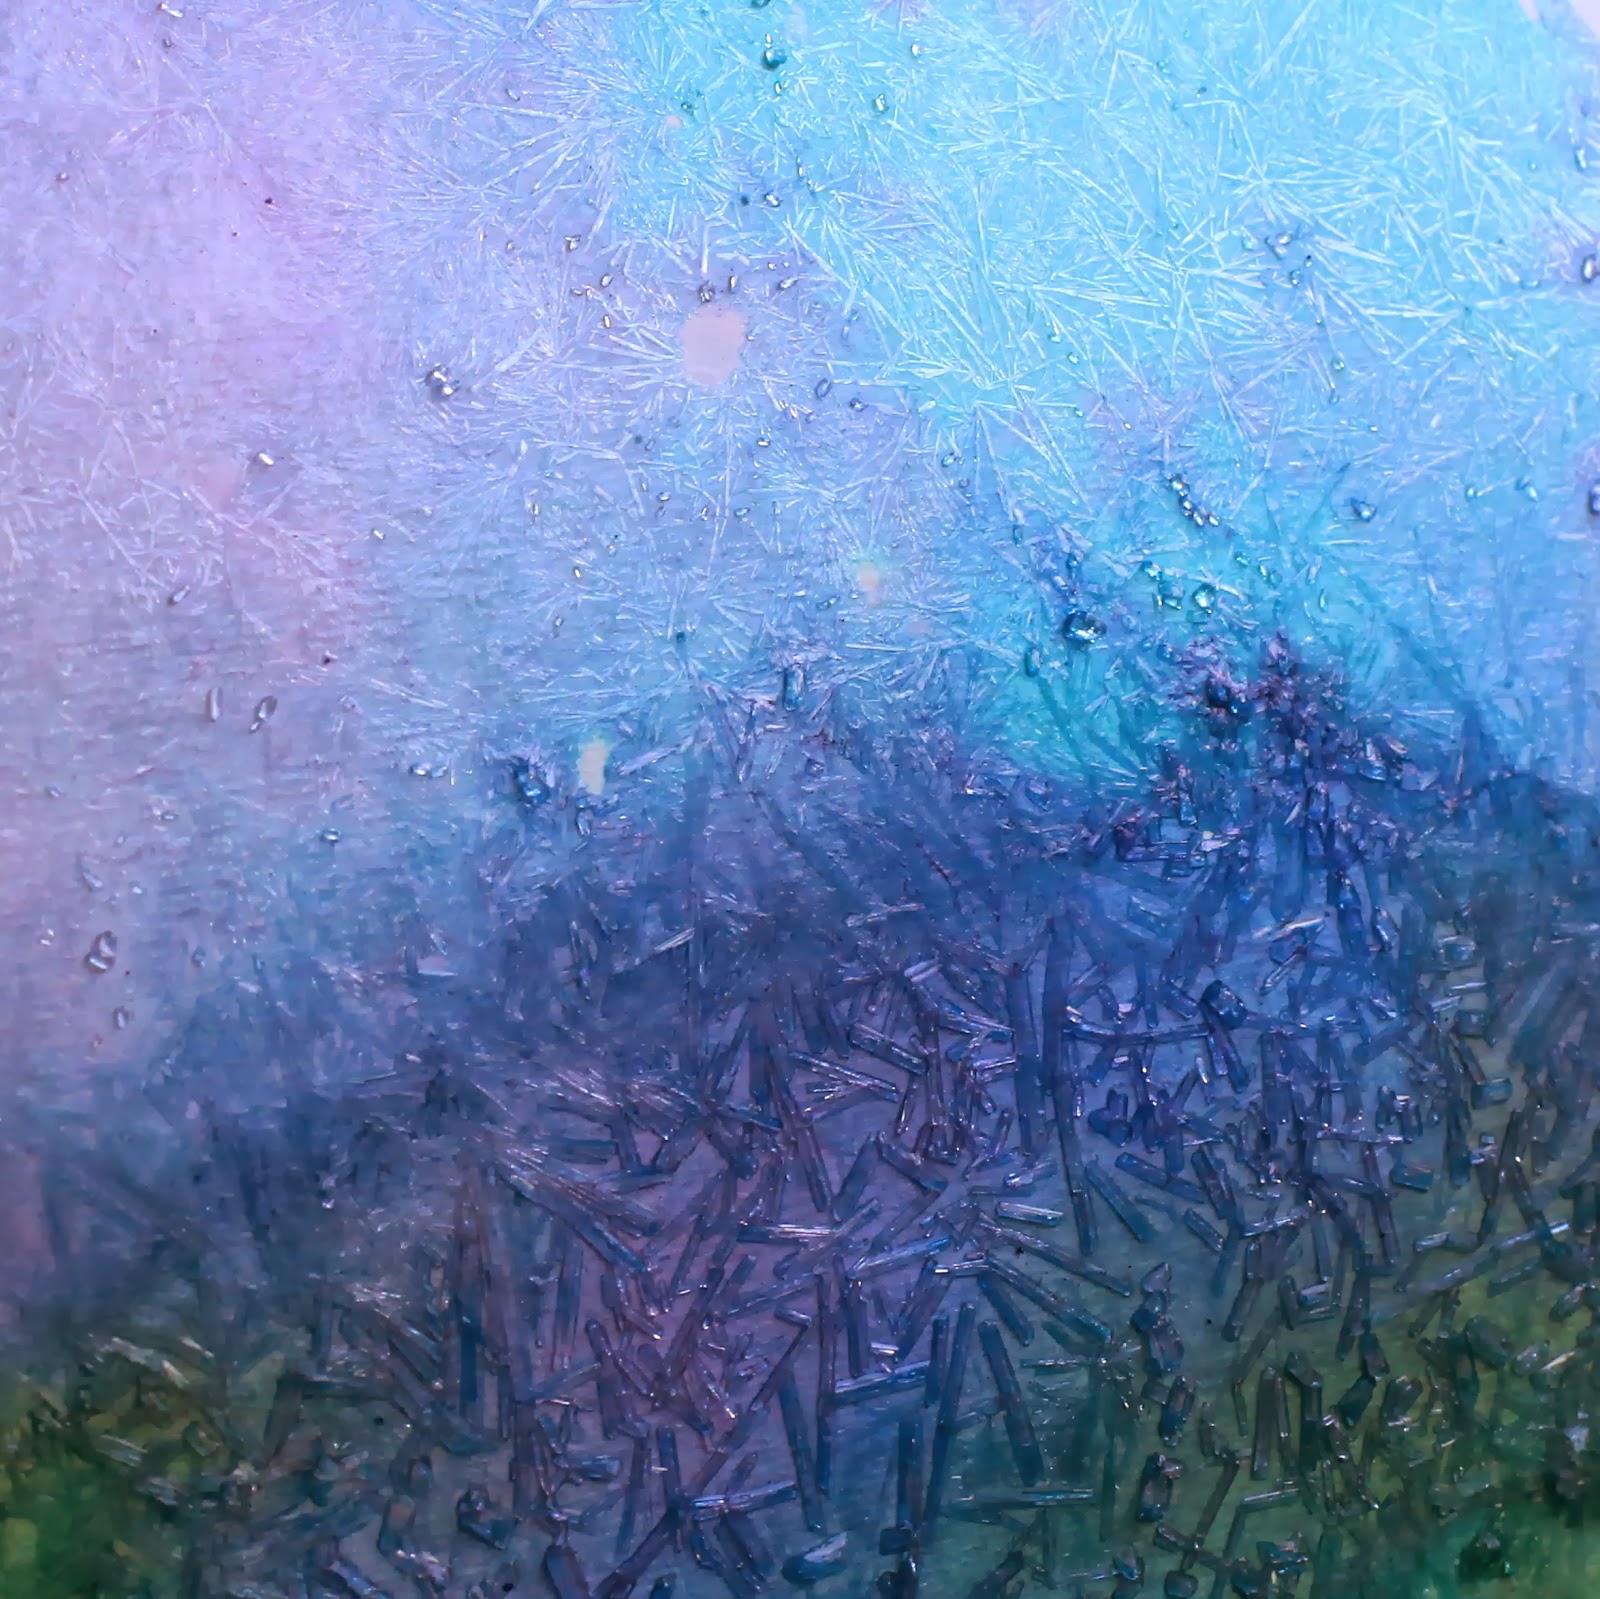
A close up - mind you, these are way more beautiful in person. WAY.
S and I are now completely obsessed with these paints. We've (both!) been creating tons of shimmery art - our whole dining room table was covered with our crystallized art the other day.

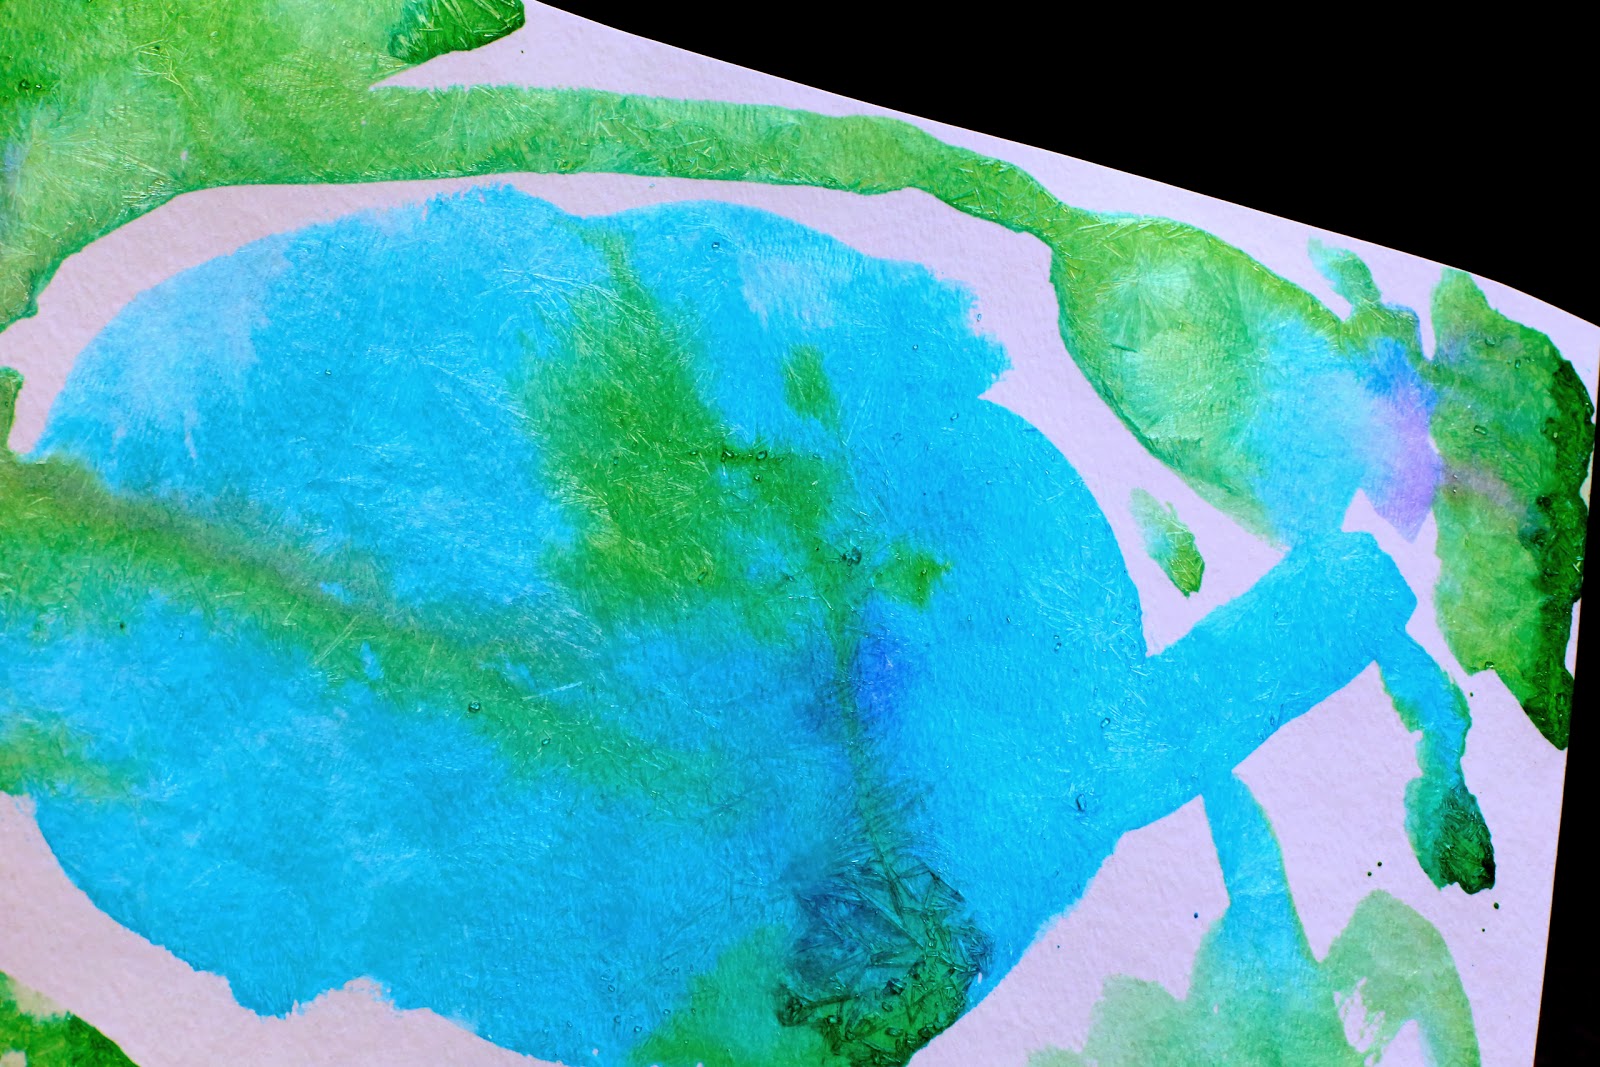
Here's a shot of one of S's - she made a lake out of blue Crystallizing Watercolors and it looks like a beautiful frozen winter lake in person. It is beyond cool.
This post contains affiliate links for your convenience.
To make your own Crystallizing Watercolors, you will need:
Epsom Salt (usually found inexpensively at a grocery or drugstore)
Water
Liquid Watercolors (or food coloring)
In a glass or some other container you can swirl/shake, add 1/2 Tablespoon of Epsom Salts, 1/2 Tablespoon of water, a pinch (roughly 1/8th of a teaspoon) of table salt and liquid watercolors/food coloring to your desired shade. Swirl the mixture gently for 2 minutes. I used a muffin tin from the Dollar Tree we use for paints and I gently swished it back and forth (this was awesome because I mixed all the colors all at the same time). Nearly all of your Epsom Salts should be dissolved (if a few grains are left, that's OK). If you still see a ton of salt, swirl/swish for another 2 minutes. Then paint as usual. The thinner layers of paint will crystallize in around 2 hours. They make a shiny shimmery finish. If you want to have some larger crystals, you need to add lots of paint (because they are watercolors, this means that your paper will be quite wet). The larger crystals take up to 24 hours to completely form.
We think this paint is amazing and we really hope you try it!!!
.jpg)
Epsom salts are really nifty things - here are some other projects to try with them:
Epsom Salt Painting from Blog Me Mom
Overnight Crystal Garden from Babble Dabble Do
Rainbow Lemon Eruptions from Blog Me Mom
Crystal Suncatcher Craft from Babble Dabble Do
Winter Sensory with Pretend Snow from Blog Me Mom
Follow along with Fun at Home with Kids on Facebook, Google+, Pinterest or Subscribe by Email or Bloglovin'!


Absolutely gorgeous! I can't wait to try this!!! I mean "we." :)
ReplyDeleteHahahaha! Yes, this is definitely one paint I used as much as S! I hope you both love it!
DeleteWould it still work on regular paper?
DeleteYes, though I wouldn't try moving the wet paper -- maybe do it on a cookie sheet or with wax paper underneath?
DeleteThese are gorgeous! Pinned and I can't wait to try it for ourselves! :)
ReplyDeleteThank you so much, Emma! I hope you guys love them!!!!
DeleteAmazing! They are so beautiful, thanks for sharing your secret!
ReplyDeleteThank you, Crystal!!!
DeleteAwesome! We really need to do this :)
ReplyDeleteYou definitely need to, Veena!!!!!!
DeleteI'm so glad you guys tried this! I still love this art, and the results seriously are framable, so pretty. Thanks for the shout out too Asia! :)
ReplyDeleteTotally agree! And that photo of yours is SO stunning. Everyone should look at that. Thank YOU for the inspiration! :)
DeleteBrilliant! I have recently discovered the magic of epsom salt too! Can't wait to try this one!
ReplyDeleteYay! They really are so neat, right? Anything that forms crystals and is less than $3 is a win in my book. ;)
DeleteWe just tried this two days in a row (yay snow days) and they came out so cool! Thanks for sharing the recipe. On the 2nd day I made a big batch of the salt water and then rationed out portions into an ice cube tray and added color. It was much easier to mix the salt this way (I used a salad dressing mixing bottle so it shook up very fast). The finished masterpieces are waiting to be matted and framed - I love it!
ReplyDeleteHooray!!!! I'm so glad you tried it - SO much prettier in person, right? Love the idea of making one big batch of salt water - so smart!!!
DeleteOoohhh what an excellent idea! We are at this painting project again and I'm super excited to share with my daughters friends!! Thank you for the pre-mixing idea. I think I will do the elbow grease work before, then let the kids divide and conquer with the paints! Perfect rationing idea! Thanks again!
DeleteI am SOO excited to have found this new recipe! We will try it this weekend!
ReplyDeleteAwesome! Thank you, Jeanine! :)
DeleteBeautiful! Do you think this would this work on a canvas or just on the paper? Being able to paint onto a large canvas would make a great collaborative work for our preschool classrooms!
ReplyDeleteI think it would - though I suspect over time the crystals may flake off (like over a period of months). Other than that I think it would make for a gorgeous collaborative art project! If you do it, I would love to see a photo!!! :)
DeleteI wonder if you could spray with an acrylic sealer spray?
DeleteOoh, good idea! I guess the only problem might be if there was enough moisture in the spray to dissolve the crystals...it doesn't seem like there would be, but I have no idea! If you try it and it works, let us know!
DeleteThere would probably be more moisture in the paint than the spray I would suspect. And sealer or protectent is usually designed to dry quickly as possible plus the crystals are coated with dry paint. Maybe coming up with a mixture that has a little clear drying elmers glue in it would solve that issue. The paint would be a little thicker but maybe just use it in the areas you are using salt.Just a thought.
DeleteI knew you'd share a brilliant watercolor idea on my FB wall, Asia. LOVE IT! ~Sheryl
ReplyDeleteThank you so much, Sheryl! I'm so glad you love it!!! :) :) :)
DeleteThis was SO COOL!!!! Thanks so much for this awesome info. My son made mini cards or his grandmas for Mother's Day and they look great! And I agree mom wants to make some now!!!! Thanks!
ReplyDeleteYAY! I'm so glad you guys tried it and loved it!!!! :) :) :) (And yes, you must! SO fun!!!) :)
DeleteI can't wait to give it a try! I'll be sharing this on The Crafty Crow soon!
ReplyDeleteThank you, Cassi!
DeleteIf I line a piece of regular construction paper with say...packing tape, will that still work? Can I use construction paper by itself? I'm on a tight budget and can't access the quality water coloring paper.
ReplyDeleteI can't decide if a sheet of computer paper would work better. I'd say try either construction paper or computer paper and just place a napkin/paper towel underneath and you should be fine!
DeleteWow we tried this today and the results were what you described! So fun! At first I was a little bit hesitant while waiting for the paint to dry and not really seeing anything spectacular - but it was worth the wait! However, the kind of watercolor paper we used (we live in Asia so probably different from what you have) had a smooth side and a more textured side - at first we used the textured side, and the crystalizing effect was not nearly as good as doing it on the smooth side. Also, after doing this I realized we could have used a darker shade for the colors, I was trying to conserve my food coloring so didn't use much, but later thought that the crystals would look even more stunning with a darker/brighter shade (like yours in the photos!) - ours turned out a bit too light. Next time!!
ReplyDeleteOh awesome!!! And that's really good to know about the texture on the paper making a difference - so interesting! I'm so glad you gave it a try and got to see how pretty it is in person! :) :) :)
DeleteI love this! Do you think you could make the paint the night before?
ReplyDeleteProbably! The worst I could envision happening is a film of crystals forming on the top, but you could always give it a brief stir to redistribute.
DeleteThis is lovely! Envisioning "Frozen"
ReplyDeleteTotally! :)
DeleteI did this with my first/second grade class this year and they LOVED it! Thank you!!!!!
ReplyDeleteYAYYYY!!! It makes me SO happy to hear that!!!
DeleteGreat idea. Has anyone tried with acrylic paints?
ReplyDeleteHow permanent it is once dried? Anyone tried showing with a sealant?
I like it
ReplyDeleteI like it. it is good
ReplyDeleteIt is cool and i like
ReplyDeletei rely like crestels i have never madeone
ReplyDeleteI'm not sure whether I love the idea of painting using salt and the beautiful pictures more or just the love that is in this website. How much fun your child must have with a Mom that loves to try new things and show how to do it. What a great Mom you are!!! keep on having fun!
ReplyDelete