
We love our Magic Foaming Stars so so much that we just had to put a Halloween spin on it! I love this activity so much because it's super easy and quick to set up and the results are crazy cool.
.jpg)
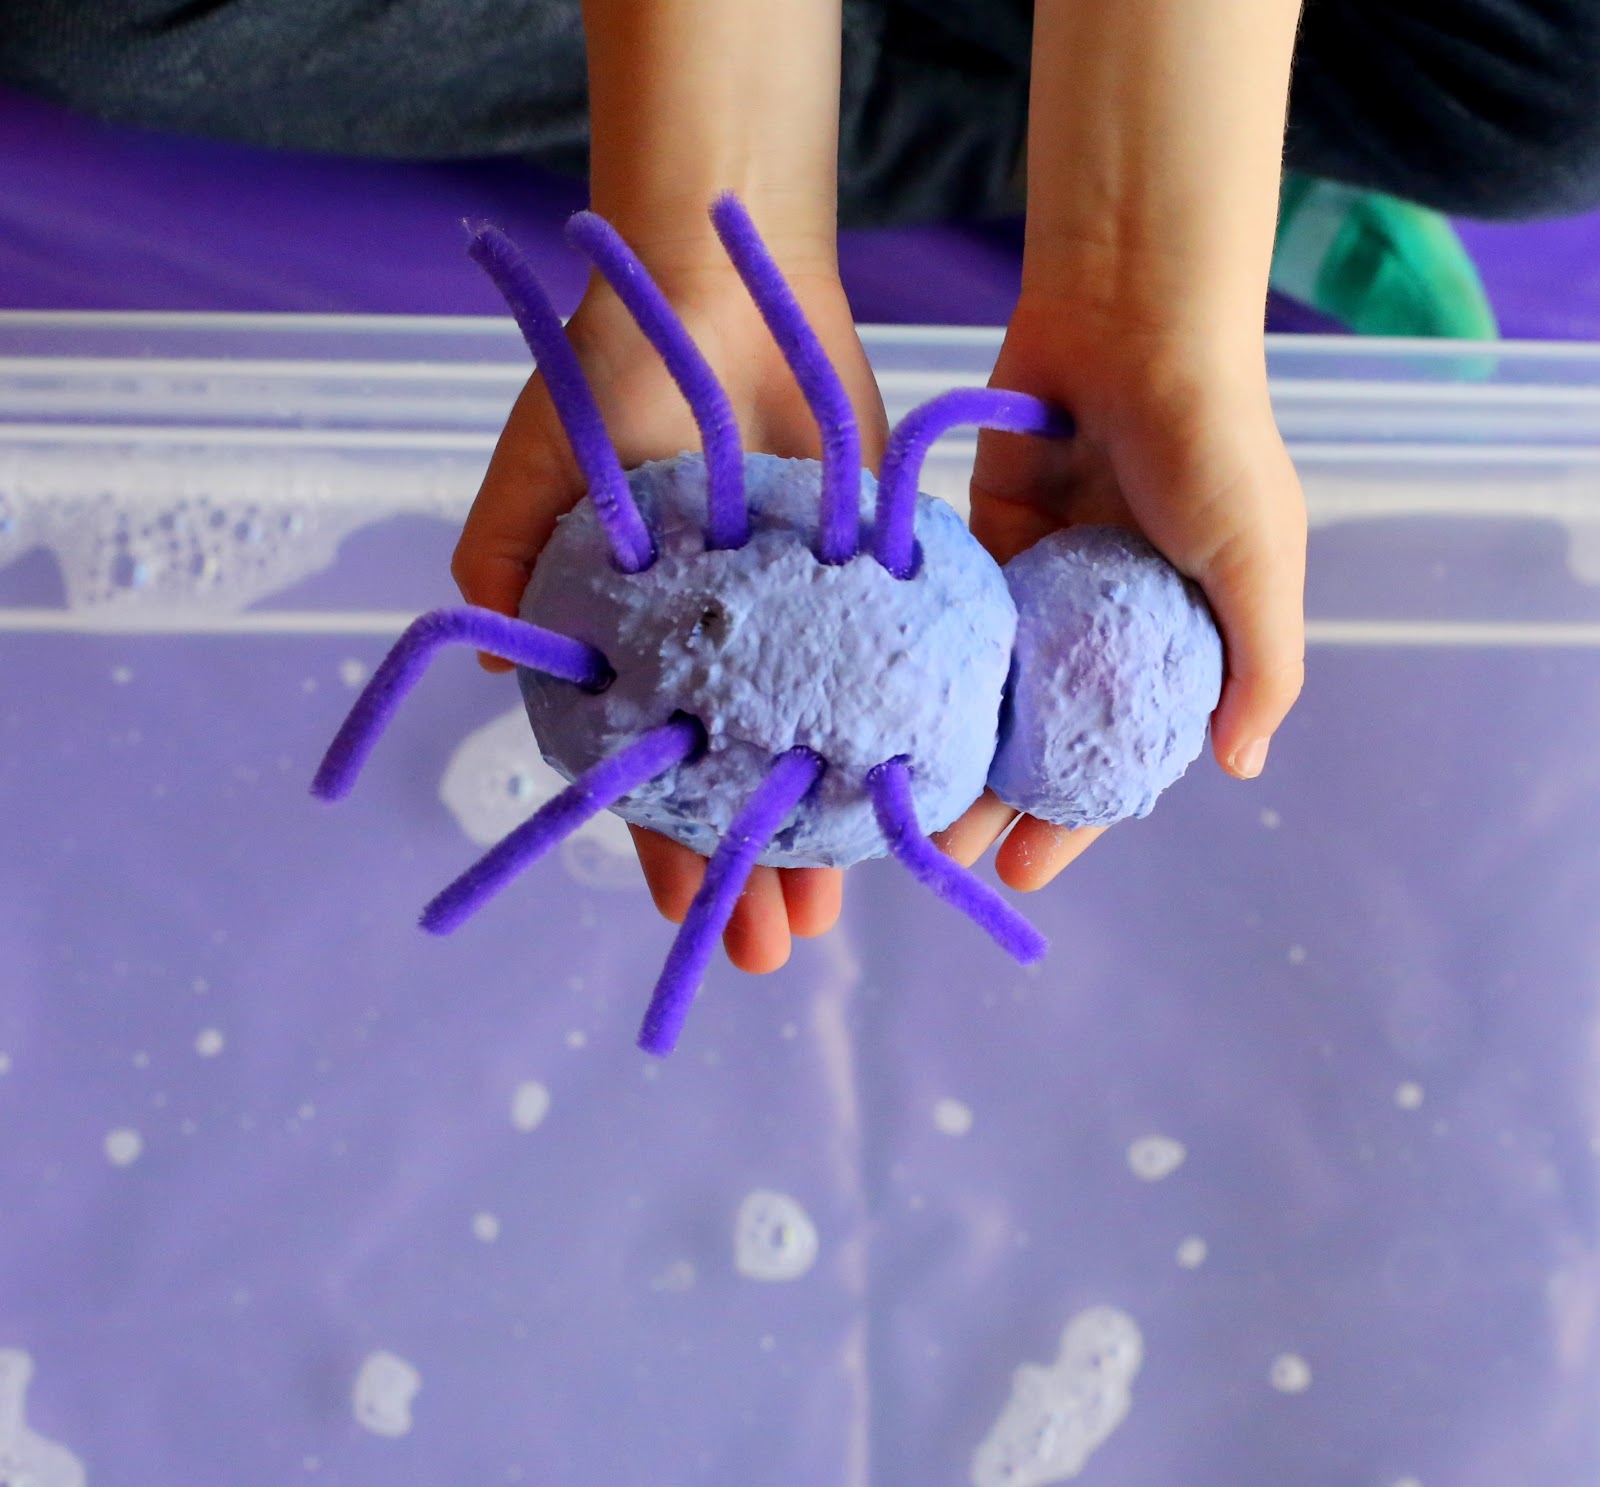
Start with a mama spider.
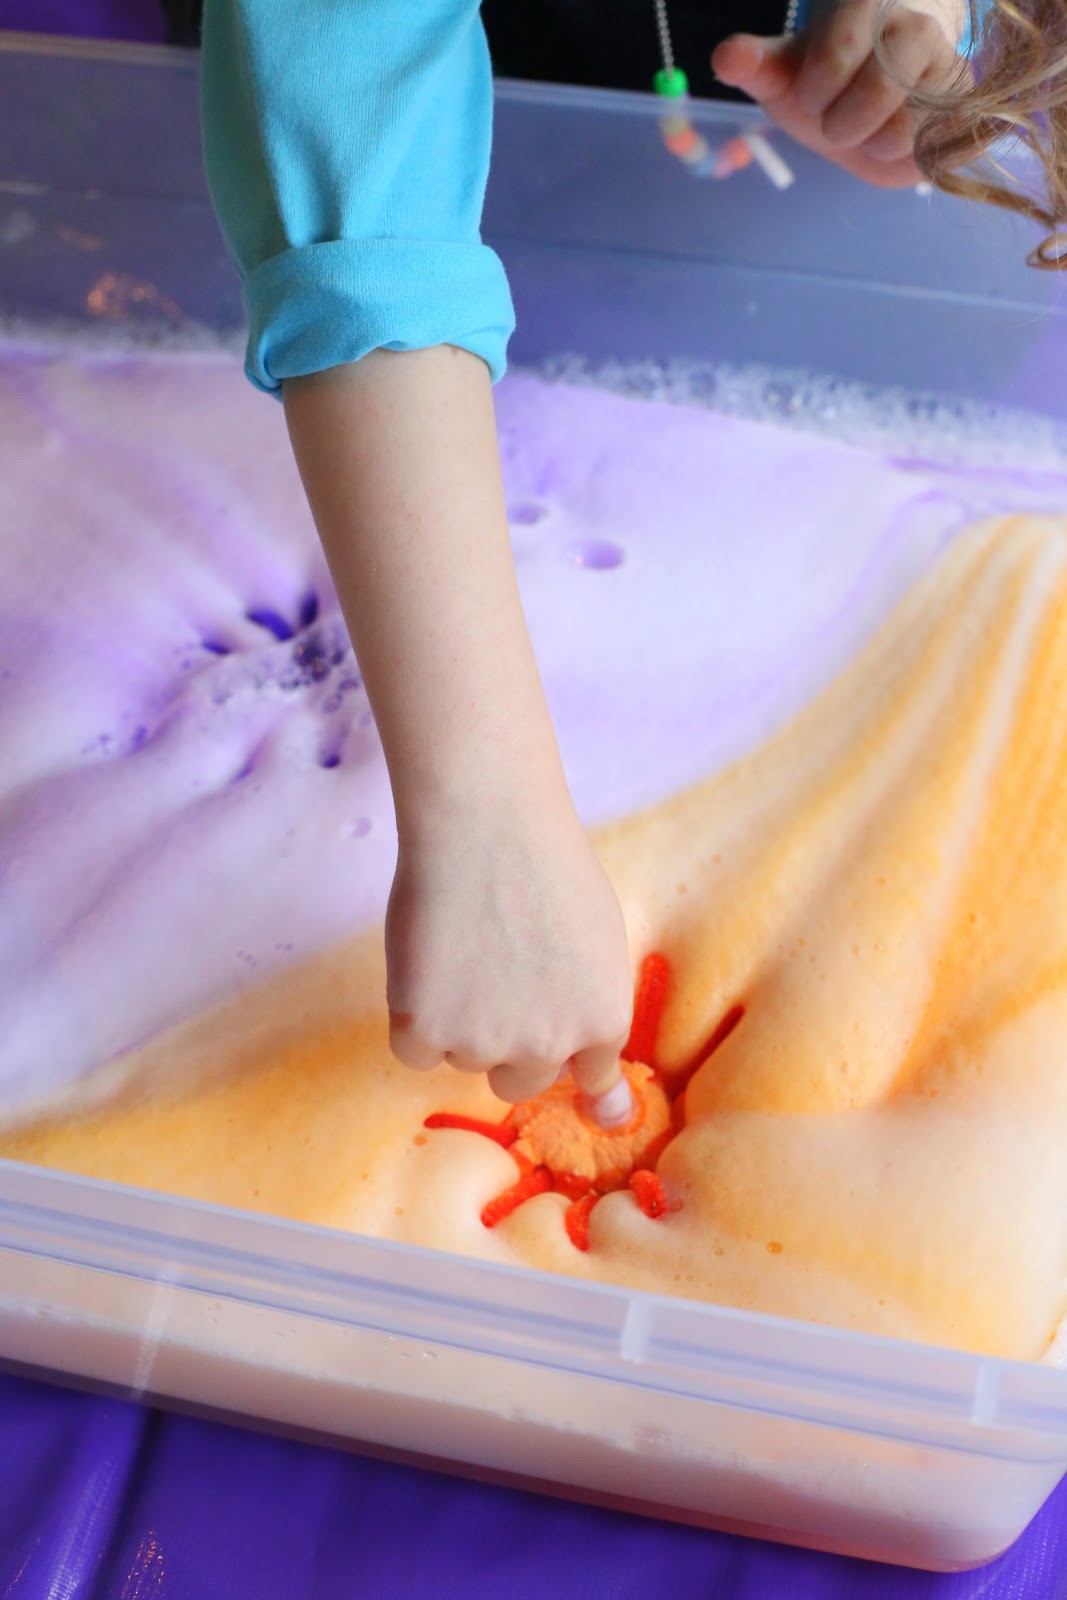
Add her to your vinegar and watch the colored rays of soap foam shoot out!
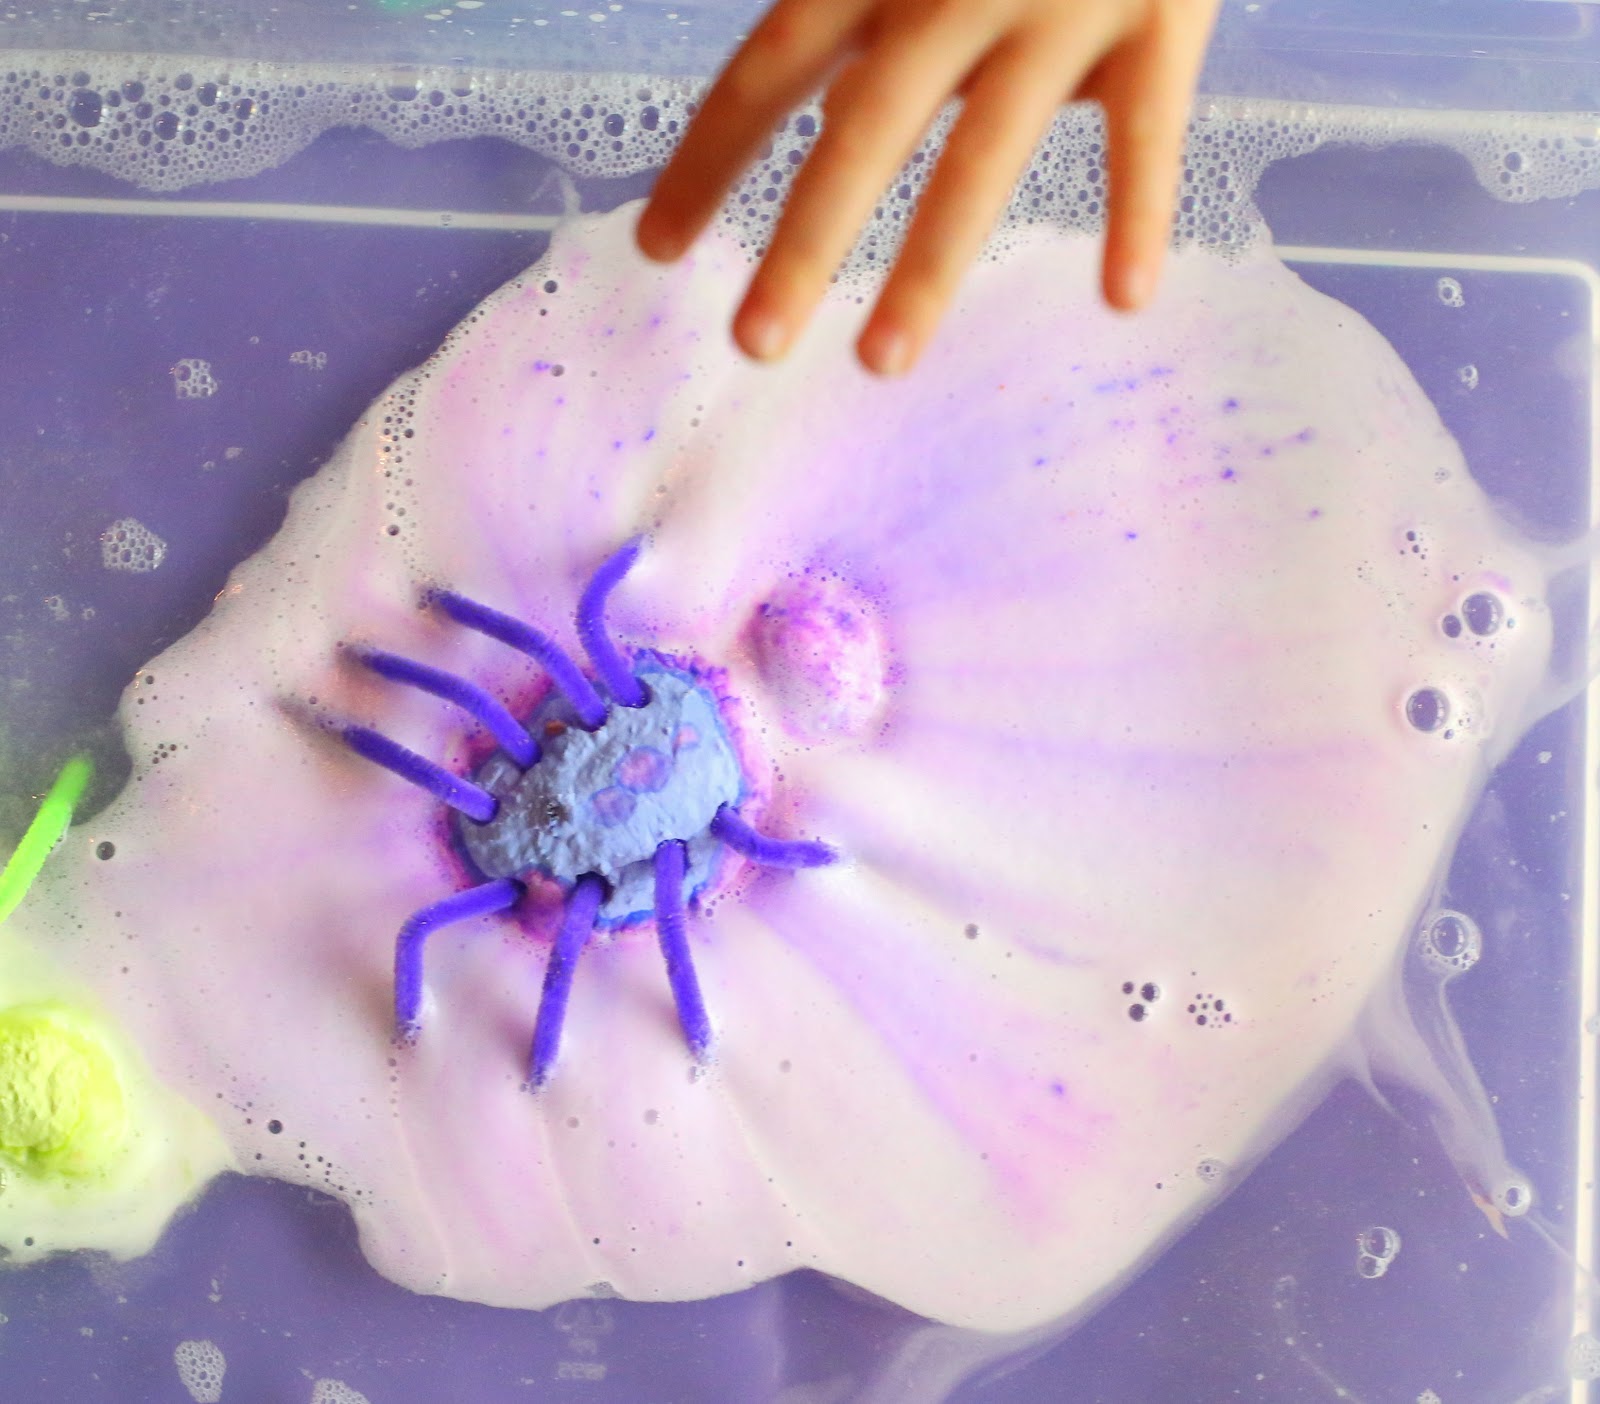
Add more spiders and watch the shooting foam rays grow into mounds of fluffy colored foam.
As the mama spider foams, her little baby spiders hatch! Rescue them!
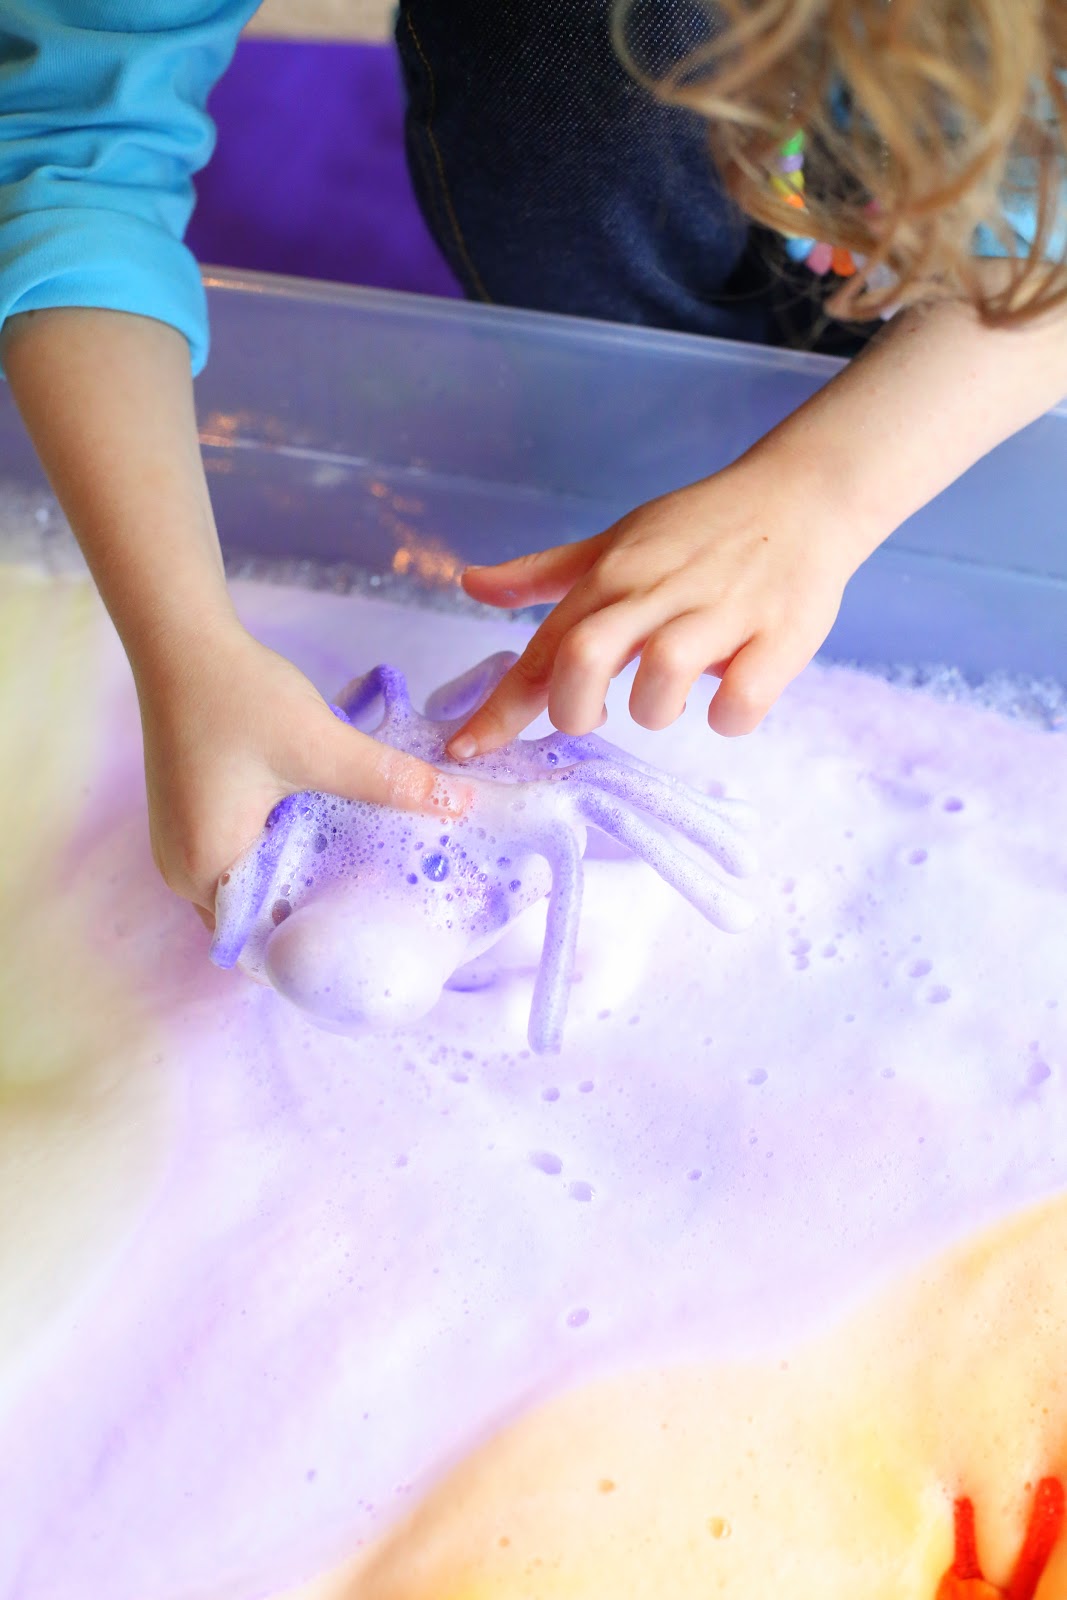
Got a baby!

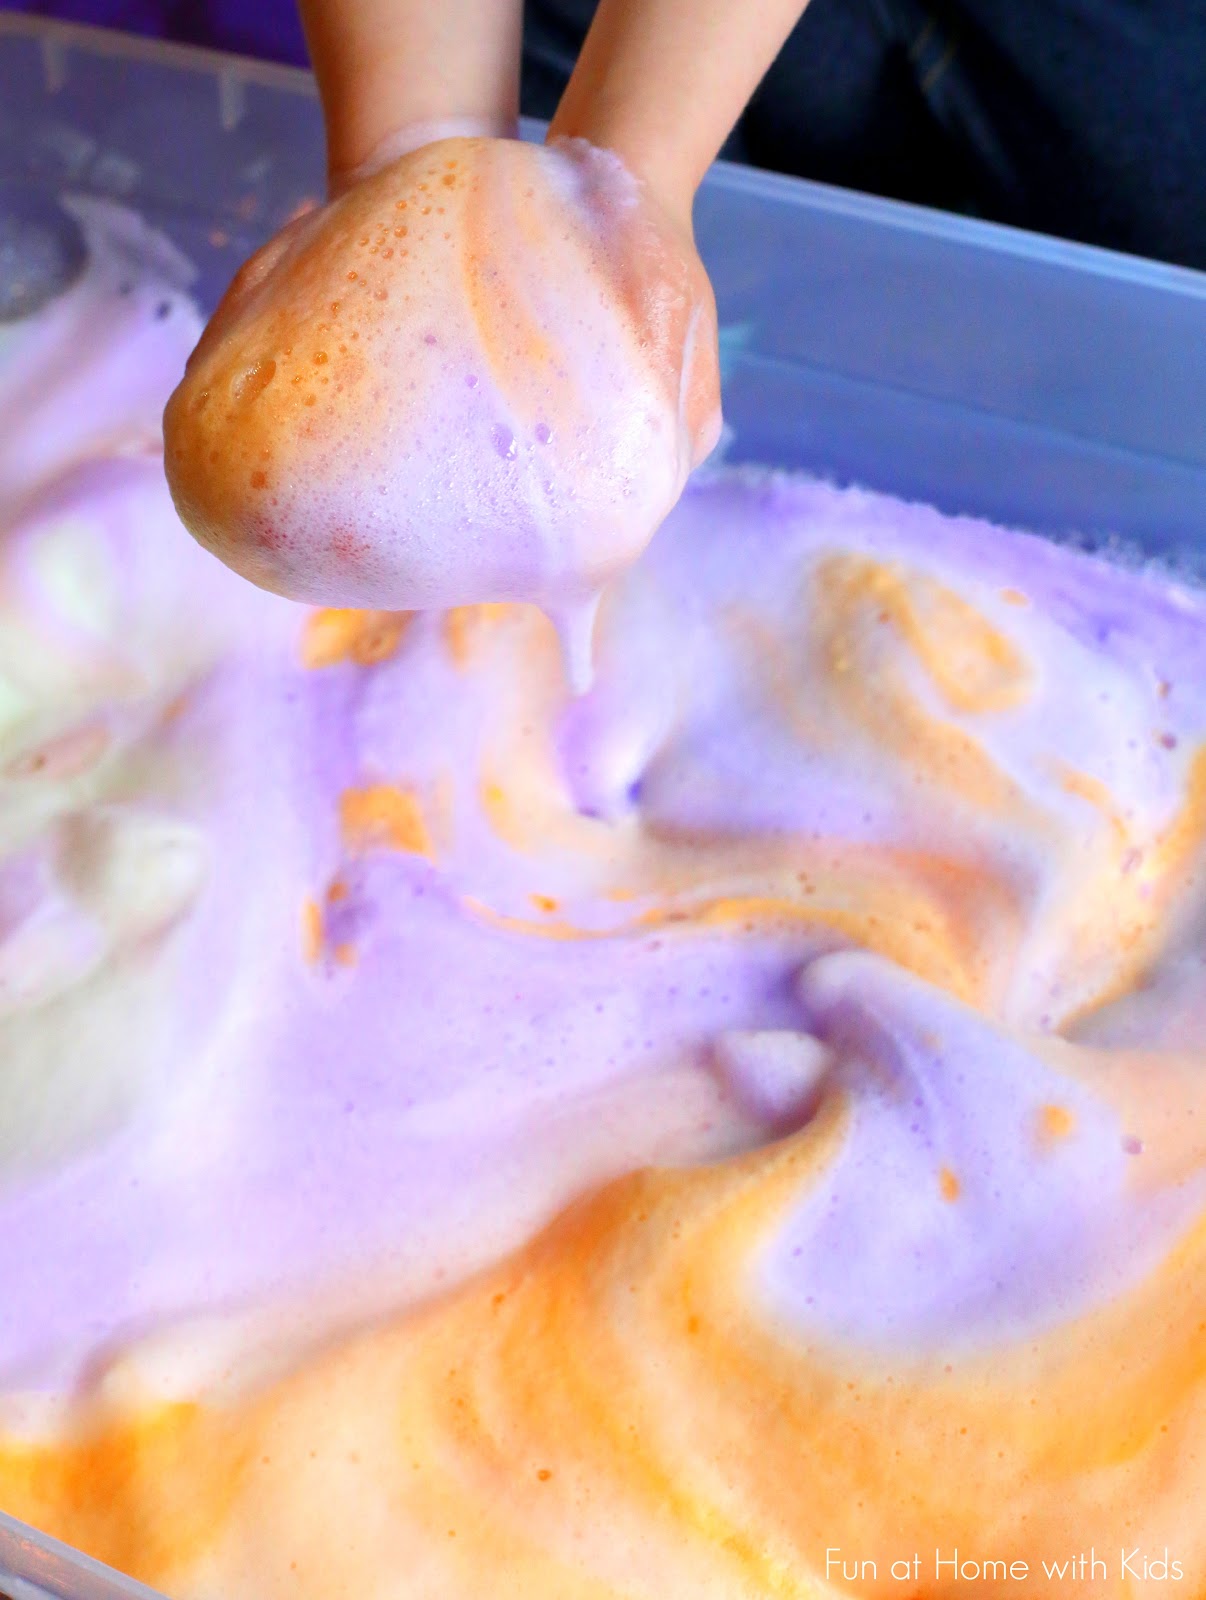
Eventually the spiders disappear, leaving behind mounds of fluffy colored (icy cold) soap foam!
Ready to make your own?
You'll need:
Baking Soda (aka Sodium Bicarb)
White vinegar
Dish soap (aka Washing up Liquid)
Water
Food Coloring or Liquid Watercolors
Pipe cleaners
Small Plastic Spiders
Wax Paper
Take two pipecleaners, fold them in half and cut them. Fold the cut-in-half-pipecleaners again and then cut one more time. Bend each of the eight pipecleaner legs slightly and set aside. In a bowl, measure out 1/2 cup of baking soda and add 1/4 cup of water (if you'd like to add liquid watercolors or food coloring, add them to the 1/4 cup of water). Mix well until all the baking soda is damp and all the color is well distributed. Grab a handful of the damp baking soda and add some small plastic spiders to the center. Add another handful of the baking soda on top and mold it into an oval (spider abdomen). Place the abdomen on a sheet of wax paper (using a tray underneath the wax paper will make it easier to move). Add four pipecleaner legs to each side of the oval spider abdomen. Next, take the remaining damp baking soda and form a head. Place the head such that it is pressed firmly against the body - this will ensure that the head and body freeze together (and you won't accidentally decapitate your spider). Repeat for as many spiders as you'd like to make. Move the finished spiders to a freezer for at least 6 hours or overnight.
Prepare a shallow bin or dish with vinegar and several squirts of dish soap (2-3 squirts per spider is a good rule of thumb). Swish gently - just enough to barely mix the soap and vinegar. Add your spiders and watch colored foam shoot out as they slowly dissolve. :)
Follow along with Fun at Home with Kids on Facebook, Google+, Pinterest or Subscribe by Email or Bloglovin'!
All activities here are activities I feel are safe for my own children. As your child's parents/guardians, you will need to decide what you feel is safe for your family. I always encourage contacting your child's pediatrician for guidance if you are not sure about the safety/age appropriateness of an activity. All activities on this blog are intended to be performed with adult supervision. Appropriate and reasonable caution should be used when activities call for the use of materials that could potentially be harmful, such as scissors, or items that could present a choking risk (small items), or a drowning risk (water activities), and with introducing a new food/ingredient to a child (allergies). Observe caution and safety at all times. The author and blog disclaim liability for any damage, mishap, or injury that may occur from engaging in any of these activities on this blog.


How long can you keep these and do they keep at room temperature or do they have to stay in the freezer? Thinking they'd make great Xmas presents for my nephews :O) Thank you for the great ideas!
ReplyDeleteThey would need to be used right out of the freezer. We do have Hatching Dinosaur Egg Bath Bombs on the site that can be kept at room temperature and would make a great present, though! :)
DeleteThis rocks! I wish I had seen it sooner. Totally putting this on the to-do list for next Halloween:)
ReplyDeleteThanks, Jen!!! :) :) :)
DeleteHow much straight vinegar do you put in your shallow pan? Is it mixed with water also? How deep should it be for the best effect once the spiders are added? Thanks!
ReplyDeleteWe did straight vinegar and just enough to cover the bottom of your pan will be enough to start the reaction. You can add more as time goes on if the bubbling slows and you want to speed it up. The only thing you'd want to avoid initially is making it so deep that your spiders actually end up completely under vinegar.
DeleteAck! Your instructions said 1/2 cup baking soda & 1/4 cup water. That was wildly out of ratio compared to your Stars recipe (which I just looked up now to see why my mixture is so liquid). I don't have enough baking soda on hand to thicken this up enough!!! I'm thinking it should have been 2 tsp of water, based on the ratio in your other recipe.
ReplyDeleteI just tried this again in my kitchen and 1/2 cup of baking soda and 1/4 cup of water is correct. I'm not sure why your mixture is liquid -- mine is a wet dough. It needs to be pretty wet for the spiders to be able to roll balls and add the pipecleaners without splitting the dough. The foaming stars is a drier mixture because you're able to pack it into a silicone mold. I hope that helps clear it up!
DeleteOh! Is there any chance you accidentally added 1/2 cup of water to 1/4 cup of baking soda rather than 1/4 cup of water to 1/2 cup of baking soda? That would make a very liquid mixture...
DeleteThank you for checking in so quickly, Asia! I'm trying to figure out what I did wrong too. I was able to drain off some of the excess water and add baking soda. For new spiders I started with the 1/2 cup baking soda and gradually added water to get a crumbly but mold-able consistency. I probably ended up with somewhere just over an 1/8 cup? That is puzzling because I'm sure I used the right cup measures for dry vs wet. But nothing is outside the realm of possibility with this mommy brain of mine... LOL At any rate, we ended up with 5 great looking mommy-spiders and my 6 yr old is DYING to know how the baby spiders are going to escape. Part 2 to come tomorrow. :) Wish I could attach a picture to show you our spiders - they turned out so cute!
DeleteSoooo weird! I am desperate to know why we're getting such different results! I'm so glad it ended up working out and I would LOOOVE to see a picture if you're still willing to send one -- I'm at funathomewithkids@gmail.com and pictures are like my favorite thing ever. Hope you guys have a blast with it tomorrow!!! <3
Delete